فلاشة Nokia 3 ta-1032 مع ملفات تخطي FRP

السلام عليكم ورحمة الله وبركاته
أرحب بك أخي زائر مدونة أحمد الحداد
واتمنى أن تكون في أتم الصحة والسلامة
وبعد موضوعنا في هذه التدوينة حول
فلاشة Nokia 3 ta-1032 مع ملفات تخطي FRP
مواصفات Nokia 3
- NETWORK Technology GSM / HSPA / LTE
- PLATFORM OS Android 7.0 (Nougat), upgradable to Android 9.0 (Pie)
- Chipset Mediatek MT6737 (28 nm)
- CPU Quad-core 1.4 GHz Cortex-A53
- GPU Mali-T720MP1
- MEMORY Card slot microSDXC (dedicated slot)
- Internal 16GB 2GB RAM eMMC 5.0
- Status Available. Released 2017, June 17
- BODY Dimensions 143.4 x 71.4 x 8.5 mm (5.65 x 2.81 x 0.33 in)
- Weight 140 g (4.94 oz)
- Build Glass front (Gorilla Glass 3), plastic back, aluminum frame
- SIM Single SIM (Nano-SIM) or Dual SIM (Nano-SIM, dual stand-by)
- DISPLAY Type IPS LCD
- Size 5.0 inches, 68.9 cm2 (~67.3% screen-to-body ratio)
- Resolution 720 x 1280 pixels, 16:9 ratio (~294 ppi density)
- Protection Corning Gorilla Glass 3
- MAIN CAMERA Single 8 MP, f/2.0, 1.12µm, AF
- Features LED flash
- Video 720p@30fps
- SELFIE CAMERA Single 8 MP, f/2.0, AF
- Video 720p
- SOUND Loudspeaker Yes
- 3.5mm jack Yes
- COMMS WLAN Wi-Fi 802.11 b/g/n, dual-band, Wi-Fi Direct, hotspot
- Bluetooth 4.0, A2DP, LE
- GPS Yes, with A-GPS
- NFC Yes
- Radio FM radio with RDS
- USB microUSB 2.0, USB On-The-Go
- FEATURES Sensors Accelerometer, gyro, proximity, compass
- BATTERY Type Li-Ion 2630 mAh, non-removable
- MISC Colors Silver White, Matte Black, Tempered Blue, Copper White
- Models TA-1032, TA-1020, TA-1028, TA-1038
تفاصيل روم رسمية نوكيا 3 TA-1032
الروم الأولى
- Model: Nokia 3
- Model Number: TA-1032
- File Size: 1.62GB
التحميل
الروم الثانية
فلاشة احياء nokia 3 ta-1032
مقطع شرح تفليش هذه الروم
https://youtu.be/J4bEr5KZ06Q
الفلاشة الثالثة
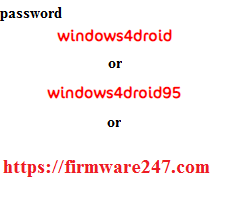
PASS=Halabtech
الفلاشة الرايعة
الفلاشة الخامسة
فلاشة احياء NOKIA TA-1032
اداة تفليش نوكيا 3
ملفات وشرح تخطي حساب جوجل ta-1032
TA-1032 FRP
عبارة عن ملف DA وادريسات الفورمات لقطاع FRP
FRP Address
Begin Address[HEX]: 0x9B20000
Format Length[HEX]: 0x100000

اقرا ايضا : فلاشة Nokia 3.1 ta-1070 مع ملف DA
محتوى ملفات تخطي حساب جوجل NOKIA TA-1032

PASS= AHMED_HADDAD