Halaman

    Social Items

اصلاح مشكلة الرقم التسلسلي لهاتف LG K51 K500

LG K51 K500 ملف التغطيه لاصلاح مشاكل الشبكة والرقم التسلسلي لهاتف


Stock NVRAM LG K51 Sprint
Fix IMEI LG K51 K500
Fix Baseband LG K51 K500

LG K51 Sprint ملف التغطية لهاتف
LG K51 K500 Sprint اصلاح مشكلة الرقم التسلسلي لهاتف
LG K51 K500 Sprint اصلاح البيس باند لهاتف


NVRAM تحميل ملف الشبكة

تحميل برنامج استعادة الملف الى الهاتف

ALABSI DEV كمايمكنك الاشتراك على قناتنا

LG K51 K500 Sprint كيفية استرجع ملف التغطية الى لهاتف

قم باطفي الهاتف ومن ثم تشغيل برنامج الاستعاده 
 وربط الهاتف بضغط على زر رفع الصوت وتوصيل الهاتف على الكمببوتر
التفاصيل اكثر يوجد اسفل فيديو كيفية عمل نسخة من ملف التغطي لاستايل 4 اسبرنت
الطريقة نفسها لاكن بدل ماتضغط على 
Backup
ستضغط على 
Restore
ومن ثم اختيار ملف التغطيه 
NVRAM_K500.NVRAM


الفيديو التوضيحي لاستعادة الملف

Stock Network File ( NVRAM ) LG K51 K500 Sprint

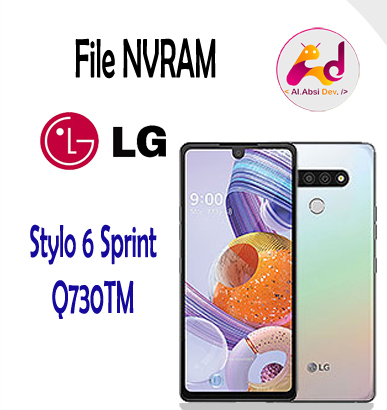
Fix Baseband LG Stylo 6 Sprint Q730TM


ملف التغطيه لاصلاح مشاكل الشبكة والرقم التسلسلي لهاتف استايل 6 اسبرنت


Stock NVRAM LG Stylo 6 Sprint
Fix IMEI LG Stylo 6 Q730TM
Fix Baseband LG Stylo 6 Q730TM

ملف التغطية لهاتف استايل 6 اسبرنت
اصلاح مشكلة الرقم التسلسلي لهاتف استايل 6 اسبرنت
اصلاح البيس باند لهاتف الجي استايل 6 اسبرنت


NVRAM تحميل ملف الشبكة

تحميل برنامج استعادة الملف الى الهاتف

ALABSI DEV كمايمكنك الاشتراك على قناتنا

LG Stylo 6 Sprint كيفية استرجع ملف التغطية الى لهاتف

قم باطفي الهاتف ومن ثم تشغيل برنامج الاستعاده 
 وربط الهاتف بضغط على زر رفع الصوت وتوصيل الهاتف على الكمببوتر
التفاصيل اكثر يوجد اسفل فيديو كيفية عمل نسخة من ملف التغطي لاستايل 4 اسبرنت
الطريقة نفسها لاكن بدل ماتضغط على 
Backup
ستضغط على 
Restore
ومن ثم اختيار ملف التغطيه استايل 6 اسبرنت


الفيديو التوضيحي لاستعادة الملف


Network File ( NVRAM ) LG Stylo 6 Q730TM Sprint

تحويل الكارير لهاتف جلاكسي A51 A515U جميع الحمايات


CSC and CP ( Modem ) Samsung Galaxy A51 A515 

CSC and CP ( Modem ) Galaxy A51 A515U
CSC and CP ( Modem ) Galaxy A51 A515U1
CSC and CP ( Modem ) Galaxy A51 A515W

A51 A515U ملف الكارير وملف المودم لـ جلاكسي
A51 A515U1 ملف الكارير وملف المودم لـ جلاكسي
A51 A515W ملف الكارير وملف المودم لـ جلاكسي

CSC and CP ( Modem ) Galaxy A51 A515U

Galaxy A51 A515U U1
CSC : Download
CP ( Modem ) : Download

Galaxy A51 A515U U3
CSC : Download
CP ( Modem ) : Download

Galaxy A51 A515U U4
CSC : Download
CP ( Modem ) : Download

CSC and CP ( Modem ) Galaxy A51 A515U1

Galaxy A51 A515U1 U1
CSC : Download
CP ( Modem ) : Download

Galaxy A51 A515U1 U2
CSC : Download
CP ( Modem ) : Download

Galaxy A51 A515U1 U3
CSC : Download
CP ( Modem ) : Download

Galaxy A51 A515U1 U4
CSC : Download
CP ( Modem ) : Download

CSC and CP ( Modem ) Galaxy A51 A515W

Galaxy A51 A515W U1
CSC : Download
CP ( Modem ) : Download

Galaxy A51 A515W U2
CSC : Download
CP ( Modem ) : Download

Galaxy A51 A515W U3
CSC : Download
CP ( Modem ) : Download

Galaxy A51 A515W U4
CSC : Download
CP ( Modem ) : Download

CSC and CP ( Modem ) Samsung Galaxy A51 A515 All Model All Bit

تحويل الكاريل لهاتف جلاكسي A21 جميع الحمايات

CSC and CP ( Modem ) Samsung Galaxy A21 A215 

CSC and CP ( Modem ) Galaxy A21 A215U
CSC and CP ( Modem ) Galaxy A21 A215U1
CSC and CP ( Modem ) Galaxy A21 A215W

A21 A215U ملف الكارير وملف المودم لـ جلاكسي
A21 A215U1 ملف الكارير وملف المودم لـ جلاكسي
A21 A215W ملف الكارير وملف المودم لـ جلاكسي

CSC and CP ( Modem ) Galaxy A21 A215U

Galaxy A21 A215U U1
CSC : Download
CP ( Modem ) : Download

Galaxy A21 A215U U2
CSC : Download
CP ( Modem ) : Download

CSC and CP ( Modem ) Galaxy A21 A215U1

Galaxy A21 A215U1 U1
CSC : Download
CP ( Modem ) : Download

Galaxy A21 A215U1 U2
CSC : Download
CP ( Modem ) : Download

CSC and CP ( Modem ) Galaxy A21 A215W

Galaxy A21 A215W U1
CSC : Download
CP ( Modem ) : Download

Galaxy A21 A215W U2

CP (Modem) : Download

CSC and CP ( Modem ) Samsung Galaxy A21 A215 All Model All Bit

النظام الوكالة لهاتف سامسونج جلاكسي A01


A01 A015 تحميل النظام الوكالة لهاتف سامسونج جلاكسي

Stock Frimware Galaxy A01 A015
Stock Rom Galaxy A01 A015
Stock Flash Galaxy A01 A015

A01 A015 النظام الوكالة لهاتف جلاكسي
A01 A015 الروم الوكالة لهاتف جلاكسي
A01 A015 الفلاشة الوكالة لهاتف جلاكسي

A01 A015T1 All Bit النظام الوكالة لـ جلاكسي

Galaxy A01 A015T1 U1 
Galaxy A01 A015T1 U2

A01 A015V All Bit النظام الوكالة لـ جلاكسي

Galaxy A01 A015V U1
Galaxy A01 A015V U2

A01 A015U1 All Bit النظام الوكالة لـ جلاكسي

Galaxy A01 A015U1 U1

A01 A015M All Bit النظام الوكالة لـ جلاكسي

Galaxy A01 A015M U1
Galaxy A01 A015M U2
Galaxy A01 A015M U3
Galaxy A01 A015M U4

A01 A015F All Bit النظام الوكالة لـ جلاكسي

Galaxy A01 A015F U1
Galaxy A01 A015F U2
Galaxy A01 A015F U3

Samaung Galaxy A01 A015 All Model All Bit

سنتحدث في هذا المقال عن الربح من الانترنت تحت مسمي العمل على الهاتف الذكي (الموبايل). ويجب عليك انت ك مبتدئ ان تعلم أن الربح من الانترنت عمل حقيقي وليس مجرد إضاعه للوقت او التسليه، وفي هذا الدرس سأشارك معكم أفضل طرق الربح بدون راس مال، وطريقة للربح من الانترنت ومضاعفة الرأس مال. فقط من خلال استغلال بعض الوقت أو وقت فراغك لربح بعض الدولارات والعملات الرقمية.

سنتعرف الان على أفضل تطبيقات الربح من الانترنت وهو تطبيق Free Bitcoin Cash لربح عملة البيتكوين كاش، ولكن ولكن دعونا في البداية نتعرف ما هي هي عملة البيتكوين كاش واهميتها ..

البيتكوين كاش Bitcoin Cash او BCH هي عملة رقمية مشفره تم إنشاؤها في سنة 2017 ظهرت نتيجة انقسامها عن عملة البتكوين الأساسي BTC .. وتعد عملة البيتكوين كاش Bitcoin Cash او BCH بسهولة المعاملات، هذا ما يسمح لها بمعالجة الكثير من المعاملات و معظم الصفقات و التحويلات في أقل وقت ممكن، و بحجم اكبر بخلاف عملة Bitcoin.

تحتل عملة البتكوين كاش bitcoin cach المركز السادس في سوق العملات الرقمية وما يؤكده المستسمرون ان هذه العملة لها مستقبل زاهر في سوق العملات حيث أن، سعرها في ارتفاع مستمر وهي تنافس دائما مع افضل العملات المشهورة.

فيما يلي سأشرح لك كيفية تحميل تطبيق Free Bitcoin Cash للاندرويد، واهم المميزات الخاصه به، ويمكنك تحميل تطبيق Free Bitcoin Cash اخر اصدار للاندرويد بصيغة apk رابط مباشر من لينك التحميل في اخر المقال.


مميزات تطبيق Free Bitcoin Cash لربح عملة البيتكوين كاش مجانا:


  • الربح من hourly claim available كل ساعة.
  • جمع الربح من bonus claim available العلاوه
  • الربح من adgem offerwall إتمام المهمات
  • الربح من الإحالات ودعوة الاصدقاء

طريقة السحب من تطبيق ربح عملة البيتكوين كاش مجانا:


  1. تقوم بالذهاب الي القائمة الرئيسية ثم اختيار الخانة الأخيرة control panel.
  2.  تذهب لمحفظتك الالكترونيه سواء كانت محفظة coinbase أو محفظة Payeer او اي محفظة الكترونيه تستخدمها.
  3. تقوم بنسخ عنوان محفظة البيتكوين كاش. 
  4. تضع عنوان المحفظة الخاص بك.
  5. اذا اردت تغير العنوان فيما بعد، تضغط على request account code
  6. سيصلك كود على البريد الالكتروني الذي سجلت به.
  7. تقوم بنسخه ثم تضغط enter account code بعدها تظهر لك نافذه.
  8. تقوم بوضع الكود فيها بعدها تظهر خانة جديدة تضع فيها عنوان محفظة عملة البيتكوين كاش BCH الجديد الخاصه بك.

السحب يكون كل يوم ثلاثاء ويكون السحب بشكل تلقائي.

الحد الادنى للسحب:


10000 الاف ساتوشي أو أكثر يتم الدفع كل ثلاثاء عند وصولك للحد الأدنى تسحب تلقائيا الى الى محفظتك.


تحميل تطبيق Free Bitcoin Cash ربح عملة البيتكوين كاش:


الان يمكنك تحميل تطبيق Free Bitcoin Cash للأندرويد من متجر جوجل بلاي، أو تحميله مباشرةً إلى هاتفك أو إلى جهاز الكمبيوتر بصيغة APK بدون الحاجة إلى متجر قوقل بلاي.

كل ما عليك فعله ان تقم بالذهاب الى متجر قوقل بلاى وفي خانة البحث؛ قم بكتابة اسم التطبيق “Free Bitcoin Cash“. بمجرد ظهور اسم التطبيق في نتائج البحث، اضغط على زر “تثبيت“. او يمكنك الذهاب مباشرةً إلى صفحة تحميل التطبيق من متجر قوقل بلاي من هنـا.
فى النهاية، أتمنى أن تكون وجدت في هذا الموضوع ما تبحث عنه، واكون قد ساعدك في شرح وتحميل تطبيق Free Bitcoin Cash للأندرويد، ومعرفة أهم المميزات الخاصه به.


Thanks for reading
-------------------------------------------

تطبيق Free Bitcoin Cash لربح عملة البيتكوين كاش مجانا

What is the root and what are the benefits and harms

Root is a program that gives the user full powers to control the operating system where it can modify the operating system files or delete in the sense of the most complete control of the phone.
How To Root Samsung Galaxy Note 4 SM-N910W8

Root features:
1-Modify or delete files or applications of the operating system.
2-Run programs that require root permissions.
3-Change the basic fonts within the Android system.
4-Move applications from device memory to external memory.
5-Installation of Custom rom.
6-Fix errors DRK and DM-Verity.

Cons of the root:
1-Loss of phone warranty.
2-Some applications do not work due to root (bluestacks root / dr fone root).
3-Stand on the company logo as a result of misuse.
4-The operating system crashed due to deletion or modification of important system files.


important warning:
  • Installation and use of the root android is entirely at your own risk and we do not take any responsibility for device failure.
  • In older versions of the Android system such as Jelly Bean and KitKat was using apps (kingroot / kingo root / framaroot / iroot root king / towelroot) To get root permissions either in new versions such as Lollipop, Marshmallow, Nougat, Pie and future versions of the Android system, these applications do not work.


What is the difference between SuperSU and Magisk

 VS 

The main difference between Magisk and SuperSU is how the root works on Android. Based on what the user wants to do.
We will first talk about supersu root how to get the root where it installs itself within the system files It changes the system files and adds new files to the system partition on the phone, but with the enhancement of Google to protect Android it has become difficult to do so that the amendment to the partition of the Android system to send an alert to applications that are trying to detect the presence of root.
Google SafetyNet monitors the operating system from any manipulation, and when it detects any manipulation in the Android operating system, most applications will not work and will not send you OTA updates.
What about Magisk is one of the most important features that does not touch system files, but modifies the boot partition instead so that it can trick safetyNet service and show that everything is normal and allows Magisk Manager to fully control the root settings.


Notes before root process

  • Charge the battery well before use.
  • Use the original USB cable that came with the device.
  • Use the laptop at work to avoid electricity problems.
  • You should focus well to protect the binary of your device.
  • The following protections must be disabled (FRP - OEM - RMM/KG) Follow the following article to learn How to Disbled FRP and OEM for device Samsung Galaxy.


Device information

-Brand Name: Samsung Galaxy
-Device Name: Galaxy Note 4
-Model: SM-N910W8 root
-Operating system: Android Kitkat 4.4.4, Lollipop 5.1.1 and Marshmallow 6.0.1


Files required for root work

How To Root Galaxy N910W8 android Kitkat 4.4.4, Lollipop 5.1.1 and  Marshmallow 6.0.1

1-Download Drivers and flash Tool.
2-Install the drivers on your device.
3-Download Root File, The baseband version must match the version of the root file.
4-Open the EFTSU Flash Tool.
5-From the top, click on Select File and then choose the root file.
6-Boot your device into download mode press and hold Home + Power + Volume Down buttons.
7-Press Flash to start.
8-After booting the device open EFTSU Manager app you need to reboot your device to get root permissions.
9-You can check for root access through the root checker app.
10-In case you encounter any problems please feel free to contact us
11-If you want to unroot or revert to the offical firmware, you can flash new firmware Full Firmware For Device Samsung Galaxy Note 4 SM-N910W8.

How To Root Samsung Galaxy Note 4 SM-N910W8

What is the root and what are the benefits and harms

Root is a program that gives the user full powers to control the operating system where it can modify the operating system files or delete in the sense of the most complete control of the phone.
How To Root Samsung Galaxy Note 4 SM-N910T3

Root features:
1-Modify or delete files or applications of the operating system.
2-Run programs that require root permissions.
3-Change the basic fonts within the Android system.
4-Move applications from device memory to external memory.
5-Installation of Custom rom.
6-Fix errors DRK and DM-Verity.

Cons of the root:
1-Loss of phone warranty.
2-Some applications do not work due to root (bluestacks root / dr fone root).
3-Stand on the company logo as a result of misuse.
4-The operating system crashed due to deletion or modification of important system files.


important warning:
  • Installation and use of the root android is entirely at your own risk and we do not take any responsibility for device failure.
  • In older versions of the Android system such as Jelly Bean and KitKat was using apps (kingroot / kingo root / framaroot / iroot root king / towelroot) To get root permissions either in new versions such as Lollipop, Marshmallow, Nougat, Pie and future versions of the Android system, these applications do not work.


What is the difference between SuperSU and Magisk

 VS 

The main difference between Magisk and SuperSU is how the root works on Android. Based on what the user wants to do.
We will first talk about supersu root how to get the root where it installs itself within the system files It changes the system files and adds new files to the system partition on the phone, but with the enhancement of Google to protect Android it has become difficult to do so that the amendment to the partition of the Android system to send an alert to applications that are trying to detect the presence of root.
Google SafetyNet monitors the operating system from any manipulation, and when it detects any manipulation in the Android operating system, most applications will not work and will not send you OTA updates.
What about Magisk is one of the most important features that does not touch system files, but modifies the boot partition instead so that it can trick safetyNet service and show that everything is normal and allows Magisk Manager to fully control the root settings.


Notes before root process

  • Charge the battery well before use.
  • Use the original USB cable that came with the device.
  • Use the laptop at work to avoid electricity problems.
  • You should focus well to protect the binary of your device.
  • The following protections must be disabled (FRP - OEM - RMM/KG) Follow the following article to learn How to Disbled FRP and OEM for device Samsung Galaxy.


Device information

-Brand Name: Samsung Galaxy
-Device Name: Galaxy Note 4
-Model: SM-N910T3 root
-Operating system: Android Lollipop 5.1.1 and Marshmallow 6.0.1


Files required for root work

How To Root Galaxy N910T3 android Lollipop 5.1.1 and  Marshmallow 6.0.1

1-Download Drivers and flash Tool.
2-Install the drivers on your device.
3-Download Root File, The baseband version must match the version of the root file.
4-Open the EFTSU Flash Tool.
5-From the top, click on Select File and then choose the root file.
6-Boot your device into download mode press and hold Home + Power + Volume Down buttons.
7-Press Flash to start.
8-After booting the device open EFTSU Manager app you need to reboot your device to get root permissions.
9-You can check for root access through the root checker app.
10-In case you encounter any problems please feel free to contact us
11-If you want to unroot or revert to the offical firmware, you can flash new firmware Full Firmware For Device Samsung Galaxy Note 4 SM-N910T3.

How To Root Samsung Galaxy Note 4 SM-N910T3

What is the root and what are the benefits and harms

Root is a program that gives the user full powers to control the operating system where it can modify the operating system files or delete in the sense of the most complete control of the phone.
How To Root Samsung Galaxy Note 4 SM-N910T2

Root features:
1-Modify or delete files or applications of the operating system.
2-Run programs that require root permissions.
3-Change the basic fonts within the Android system.
4-Move applications from device memory to external memory.
5-Installation of Custom rom.
6-Fix errors DRK and DM-Verity.

Cons of the root:
1-Loss of phone warranty.
2-Some applications do not work due to root (bluestacks root / dr fone root).
3-Stand on the company logo as a result of misuse.
4-The operating system crashed due to deletion or modification of important system files.


important warning:
  • Installation and use of the root android is entirely at your own risk and we do not take any responsibility for device failure.
  • In older versions of the Android system such as Jelly Bean and KitKat was using apps (kingroot / kingo root / framaroot / iroot root king / towelroot) To get root permissions either in new versions such as Lollipop, Marshmallow, Nougat, Pie and future versions of the Android system, these applications do not work.


What is the difference between SuperSU and Magisk

 VS 

The main difference between Magisk and SuperSU is how the root works on Android. Based on what the user wants to do.
We will first talk about supersu root how to get the root where it installs itself within the system files It changes the system files and adds new files to the system partition on the phone, but with the enhancement of Google to protect Android it has become difficult to do so that the amendment to the partition of the Android system to send an alert to applications that are trying to detect the presence of root.
Google SafetyNet monitors the operating system from any manipulation, and when it detects any manipulation in the Android operating system, most applications will not work and will not send you OTA updates.
What about Magisk is one of the most important features that does not touch system files, but modifies the boot partition instead so that it can trick safetyNet service and show that everything is normal and allows Magisk Manager to fully control the root settings.


Notes before root process

  • Charge the battery well before use.
  • Use the original USB cable that came with the device.
  • Use the laptop at work to avoid electricity problems.
  • You should focus well to protect the binary of your device.
  • The following protections must be disabled (FRP - OEM - RMM/KG) Follow the following article to learn How to Disbled FRP and OEM for device Samsung Galaxy.


Device information

-Brand Name: Samsung Galaxy
-Device Name: Galaxy Note 4
-Model: SM-N910T2 root
-Operating system: Android Kitkat 4.4.4


Files required for root work

How To Root Galaxy N910T2 android Kitkat 4.4.4

1-Download Drivers and flash Tool.
2-Install the drivers on your device.
3-Download Root File, The baseband version must match the version of the root file.
4-Open the EFTSU Flash Tool.
5-From the top, click on Select File and then choose the root file.
6-Boot your device into download mode press and hold Home + Power + Volume Down buttons.
7-Press Flash to start.
8-After booting the device open EFTSU Manager app you need to reboot your device to get root permissions.
9-You can check for root access through the root checker app.
10-In case you encounter any problems please feel free to contact us
11-If you want to unroot or revert to the offical firmware, you can flash new firmware Full Firmware For Device Samsung Galaxy Note 4 SM-N910T2.

How To Root Samsung Galaxy Note 4 SM-N910T2

فلاشة Lenovo K5 Play L38011  مع تخطي حساب FRP


Lenovo K5 Play L38011 FIRMWARE


مواصفات LENOVO K5PLAY

  1. NETWORK Technology GSM / CDMA / HSPA / LTE
  2. PLATFORM OS Android 8.0 (Oreo), ZUI 3.7
  3. Chipset Qualcomm MSM8937 Snapdragon 430 (28 nm)
  4. CPU Octa-core 1.4 GHz Cortex-A53
  5. GPU Adreno 505
  6. MEMORY Card slot microSDXC (uses shared SIM slot)
  7. Internal 16GB 2GB RAM, 32GB 3GB RAM eMMC 5.1
  8. BODY Dimensions 153.8 x 72.6 x 7.9 mm (6.06 x 2.86 x 0.31 in)
  9. Weight 155 g (5.47 oz)
  10. SIM Hybrid Dual SIM (Nano-SIM, dual stand-by)
  11. DISPLAY Type IPS LCD
  12. Size 5.7 inches, 83.8 cm2 (~75.1% screen-to-body ratio)
  13. Resolution 720 x 1440 pixels, 18:9 ratio (~282 ppi density)
  14. MAIN CAMERA Dual 13 MP, f/2.2, AF 2 MP, f/2.4, (depth)
  15. Features LED flash, HDR, panorama
  16. Video 1080p@30fps
  17. SELFIE CAMERA Single 8 MP, f/2.0
  18. SOUND Loudspeaker Yes
  19. 3.5mm jack Yes
  20. COMMS WLAN Wi-Fi 802.11 a/b/g/n, Wi-Fi Direct, hotspot
  21. Bluetooth 4.2, A2DP, LE
  22. GPS Yes, with A-GPS
  23. NFC No
  24. Radio FM radio
  25. USB microUSB 2.0
  26. FEATURES Sensors Fingerprint (rear-mounted), accelerometer, proximity, compass
  27. BATTERY Type Li-Ion 3000 mAh, non-removable
  28. MISC Colors Black, Gray, Blue

  • فلاشة رسمية Lenovo K5 Play


تفاصيلها


  • official Lenovo K5 Play L38011 Stock Firmware (Flash File) 


NO GOOGLE PLAY NO ARABIC


  • LENOVO L38011 OTA ROM


LENOVO K5 PLAY FLASH TOOL


فلاشة عربية LENOVO K55 PLAY L38011

تفاصيلها


https://youtu.be/II1YxkUqZFg


روم عربي LENOVO K5 PLAY


للحصول على الباسوورد ادخل للمصدر وسيتم ارسالها لك


LENOVO K5 L38011  FRP BYPASS GOOGLE 

https://youtu.be/Hye6Klgf0RQ


فلاشة Lenovo K5 Play L38011 مع تخطي حساب FRP

What is the root and what are the benefits and harms

Root is a program that gives the user full powers to control the operating system where it can modify the operating system files or delete in the sense of the most complete control of the phone.
How To Root Samsung Galaxy Note 4 SM-N910T

Root features:
1-Modify or delete files or applications of the operating system.
2-Run programs that require root permissions.
3-Change the basic fonts within the Android system.
4-Move applications from device memory to external memory.
5-Installation of Custom rom.
6-Fix errors DRK and DM-Verity.

Cons of the root:
1-Loss of phone warranty.
2-Some applications do not work due to root (bluestacks root / dr fone root).
3-Stand on the company logo as a result of misuse.
4-The operating system crashed due to deletion or modification of important system files.


important warning:
  • Installation and use of the root android is entirely at your own risk and we do not take any responsibility for device failure.
  • In older versions of the Android system such as Jelly Bean and KitKat was using apps (kingroot / kingo root / framaroot / iroot root king / towelroot) To get root permissions either in new versions such as Lollipop, Marshmallow, Nougat, Pie and future versions of the Android system, these applications do not work.


What is the difference between SuperSU and Magisk

 VS 

The main difference between Magisk and SuperSU is how the root works on Android. Based on what the user wants to do.
We will first talk about supersu root how to get the root where it installs itself within the system files It changes the system files and adds new files to the system partition on the phone, but with the enhancement of Google to protect Android it has become difficult to do so that the amendment to the partition of the Android system to send an alert to applications that are trying to detect the presence of root.
Google SafetyNet monitors the operating system from any manipulation, and when it detects any manipulation in the Android operating system, most applications will not work and will not send you OTA updates.
What about Magisk is one of the most important features that does not touch system files, but modifies the boot partition instead so that it can trick safetyNet service and show that everything is normal and allows Magisk Manager to fully control the root settings.


Notes before root process

  • Charge the battery well before use.
  • Use the original USB cable that came with the device.
  • Use the laptop at work to avoid electricity problems.
  • You should focus well to protect the binary of your device.
  • The following protections must be disabled (FRP - OEM - RMM/KG) Follow the following article to learn How to Disbled FRP and OEM for device Samsung Galaxy.


Device information

-Brand Name: Samsung Galaxy
-Device Name: Galaxy Note 4
-Model: SM-N910T root
-Operating system: Android Kitkat 4.4.4, Lollipop 5.0.1/5.1.1 and Marshmallow 6.0.1


Files required for root work

How To Root Galaxy N910T android Kitkat 4.4.4, Lollipop 5.1.1 and  Marshmallow 6.0.1

1-Download Drivers and flash Tool.
2-Install the drivers on your device.
3-Download Root File, The baseband version must match the version of the root file.
4-Open the EFTSU Flash Tool.
5-From the top, click on Select File and then choose the root file.
6-Boot your device into download mode press and hold Home + Power + Volume Down buttons.
7-Press Flash to start.
8-After booting the device open EFTSU Manager app you need to reboot your device to get root permissions.
9-You can check for root access through the root checker app.
10-In case you encounter any problems please feel free to contact us
11-If you want to unroot or revert to the offical firmware, you can flash new firmware Full Firmware For Device Samsung Galaxy Note 4 SM-N910T.

How To Root Samsung Galaxy Note 4 SM-N910T