Halaman

    Social Items

What is the root and what are the benefits and harms

Root is a program that gives the user full powers to control the operating system where it can modify the operating system files or delete in the sense of the most complete control of the phone.
root j700k,how to root j700k,root j700k 5.1.1

Root features:
1-Modify or delete files or applications of the operating system.
2-Run programs that require root permissions.
3-Change the basic fonts within the Android system.
4-Move applications from device memory to external memory.
5-Installation of Custom rom.


Cons of the root:
1-Loss of phone warranty.
2-Some applications do not work due to root (bluestacks root / dr fone root).
3-Stand on the company logo as a result of misuse.
4-The operating system crashed due to deletion or modification of important system files.


important warning:
  • Installation and use of the root android is entirely at your own risk and we do not take any responsibility for device failure.
  • In older versions of the Android system such as Jelly Bean and KitKat was using apps (kingroot / kingo root / framaroot / iroot root king / towelroot) To get root permissions either in new versions such as Lollipop, Marshmallow, Nougat, Pie and future versions of the Android system, these applications do not work.


What is the difference between SuperSU and Magisk

 VS 

The main difference between Magisk and SuperSU is how the root works on Android. Based on what the user wants to do.
We will first talk about supersu root how to get the root where it installs itself within the system files It changes the system files and adds new files to the system partition on the phone, but with the enhancement of Google to protect Android it has become difficult to do so that the amendment to the partition of the Android system to send an alert to applications that are trying to detect the presence of root.
Google SafetyNet monitors the operating system from any manipulation, and when it detects any manipulation in the Android operating system, most applications will not work and will not send you OTA updates.
What about Magisk is one of the most important features that does not touch system files, but modifies the boot partition instead so that it can trick safetyNet service and show that everything is normal and allows Magisk Manager to fully control the root settings.


Notes before root process

  • Charge the battery well before use.
  • Use the original USB cable that came with the device.
  • Use the laptop at work to avoid electricity problems.
  • You should focus well to protect the binary of your device.
  • The following protections must be disabled (FRP - OEM - RMM/KG) Follow the following article to learn How to Disbled FRP and OEM for device Samsung Galaxy.


Device information

-Brand Name: Samsung Galaxy
-Device Name: Galaxy J7
-Model: SM-J700K root
-Operating system: Android Lollipop 5.1.1


Files required for root work


How To Root Galaxy J700K android Lollipop 5.1.1

1-Download Drivers, Odin and J700K Root files for Lollipop 5.1.1.
2-Install the drivers on your device.
3-Install the Magisk Manager app on your Phone.
4-Download Full firmware,Then extract the files you will see 4 files (BL-AP-CP-CSC), Rename a file AP and delete .md5 It becomes the end of the file name .tar, Open the file in a program winrar or 7z, You will find a file boot.img.
5-Copy boot file to Device memory.
6-Open the Magisk Manager app.
7-Open the application settings and from the option Patched Boot Output Formate We choose .img.tar.
8-We return to the main interface of the application And we click on install a new window will appear we choose install too.
9-A new window will appear titled Select Patched We choose the second option Patch Boot Image File.


10-Locate the boot file and give the application access rights.

11-Patch Boot will take some time about 5 minutes.
12-After the process is finished navigate to the MagiskManager folder or Download folder you will see the file named patched_boot.img.tar (mroot j700k).
13-Copy the file to your computer and open the Odin tool.
14-Of the box AP We choose the file (patched_boot.img.tar).
15-Boot your device into download mode prees Volume Down + Home + Power key together for a few moments.
16-Press Start to flash the boot file.
17-After the boot is complete we install the Magisk Manager application.
18-After installing the app you need to reboot your device to get root permissions.
19-You can check for root access through the root checker app.
20-In case you encounter any problems please feel free to contact us
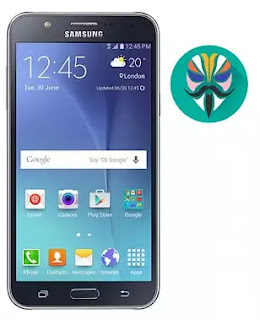
How To Root Samsung Galaxy J7 SM-J700K

تنزيل واتس اب آدم النسخة السوداء والبنيه v16

تنزيل واتس اب آدم النسخة السوداء والبنيه v16

واتساب آدم النسخة السوداء AdamWhatsApp black version
واتساب آدم النسخة البنية Adam2WhatsApp brown version
الاصدار v16
تم تحديث الروابط
تاريخ التحديث 9/12/2019


لتسريع عملية التنزيل الواتساب اليكم افضل تطبيقات
التحميل للاندرويد من هنااااا
ما الجديد في اصدار ادم v16
1/ إعادة تفعيل وضع الطيران للواتساب (إيقاف الأنترنت عن الواتساب فقط)
2/ إعادة وتطوير واجهت الخصوصية للواتساب
3/ إعادة إضافة خيار حذف الرسائل من عند الطرفين
4/ اضافة مراسلة لرقم غير مسجل
5/ اضافة خيار مصادقة البصمه(الخصوصية)
6/ اضافة خطوط داخل التطبيق نفسة دون الحاجة لتحميلهن
7/ اضافة خيار منع حذف الحالات من عندك(لايمكن لشخص حذف حالتة من عندك)
8/ امكانية زيادة عدد اعضاء الرسائل الجماعية الى اكثر من 1024
9/ زيادة حجم الحاله الى اكثر من 10 دقائق بدلا من 30 ثانيه
10/ اضافة تعديلات على الزر العائم
11/ إضافة خيار لإخفاء ايقونة قطع الإنترنت عن الواتساب
12/ اضافات الأسطورة-شاشة المحادثات-خيار رقم 3.4.9
13/ اصلاح تام للترجمة حين التغيير من اللغة الأنجليزية الى اللغة العربية في الواتساب

14/ اصلاح وتحسين خيار تقسيم فيديو الحالة
15/ اضافات الأسطورة - مشاركة الوسائط - خيار رقم 4.7
16/ اصلاح عدم ظهور ايقونة معلومات الرسالة في الشريط العلوي داخل المحادثات
17/ اصلاح عدم ظهور ايقونة الرد في الشريط العلوي داخل المحادثات
18/ اصلاح عدم ظهور ايقونة الارفاق في الشريط العلوي داخل المحادثات
19/ اصلاح انهيار التطبيق في بعض الاجهزة
20/ اصلاحات اخرى
قد يهمك ايضا OBWhatsApp v24 اخر اصدار
واتساب ادم العنابي
للتحميل
تحميل اضغط هنا
تحميل واتساب آدم الاسود

للتحميل
تحميل اضغط هنا


تنزيل واتس اب آدم النسخة السوداء والبنيه v16

فك شفرة هاتف سامسنج جي ثري J3-SM-J327VPP

Unlock SIM J327VPP 7.0
Unlock SIM J327VPP U1
Unlock SIM J327VPP U2

فك شفرة عبارة عن اسكربت بسيط وسريع تلبي طلب 
المبرمجين المبتدئين عن كيفبة فك شفرة بدون ادوات 
وبدون بكس  تم انشاء شرح فيديو لتضمين العمل 
وايصال المعلومة بشكل جيد للمبرمجين المبتدئين 
هاذا الاسكربت نستخدمة فقط في اصدار 7.0
حماية U1 , U2  اذا كان الهاتف يحمل اصدار 8.0
قم بتنزل الفلاشة ذو اصدار 7.0 ومن ثم تفليش الهاتف
واتباع الخطوات لفك الشفرة 

يمكنك متابعة شرح فك الشفرة  من هناء
او من خلال الفيديو المرفق اسفل الموضوع 


لتحميل اسكربت فك الشفرة  من هناء


شرح الفيدو كيف فك الشفرة 


تنوية هام
ممنوع النسخ وممنوع المشاركة على المدونات الاخرى 
جميع الحقوق محفوظة لدى AlseerY-SofT


UnLock SIM Card SAMSUNG GALAXY J3 Mission Verizon SM-J327VPP

فك شفرة هاتف سامسنج جي ثري J3-SM-J327VPP

Unlock SIM J327VPP 7.0
Unlock SIM J327VPP U1
Unlock SIM J327VPP U2

فك شفرة عبارة عن اسكربت بسيط وسريع تلبي طلب 
المبرمجين المبتدئين عن كيفبة فك شفرة بدون ادوات 
وبدون بكس  تم انشاء شرح فيديو لتضمين العمل 
وايصال المعلومة بشكل جيد للمبرمجين المبتدئين 
هاذا الاسكربت نستخدمة فقط في اصدار 7.0
حماية U1 , U2  اذا كان الهاتف يحمل اصدار 8.0
قم بتنزل الفلاشة ذو اصدار 7.0 ومن ثم تفليش الهاتف
واتباع الخطوات لفك الشفرة 

يمكنك متابعة شرح فك الشفرة  من هناء
او من خلال الفيديو المرفق اسفل الموضوع 


لتحميل اسكربت فك الشفرة  من هناء


شرح الفيدو كيف فك الشفرة 


تنوية هام
ممنوع النسخ وممنوع المشاركة على المدونات الاخرى 
جميع الحقوق محفوظة لدى AlseerY-SofT


UnLock SIM Card SAMSUNG GALAXY J3 Mission Verizon SM-J327VPP

What is the root and what are the benefits and harms

Root is a program that gives the user full powers to control the operating system where it can modify the operating system files or delete in the sense of the most complete control of the phone.
root j700h,how to root j700h,root j700h 5.1.1,root j700h 6.0.1

Root features:
1-Modify or delete files or applications of the operating system.
2-Run programs that require root permissions.
3-Change the basic fonts within the Android system.
4-Move applications from device memory to external memory.
5-Installation of Custom rom.


Cons of the root:
1-Loss of phone warranty.
2-Some applications do not work due to root (bluestacks root / dr fone root).
3-Stand on the company logo as a result of misuse.
4-The operating system crashed due to deletion or modification of important system files.


important warning:
  • Installation and use of the root android is entirely at your own risk and we do not take any responsibility for device failure.
  • In older versions of the Android system such as Jelly Bean and KitKat was using apps (kingroot / kingo root / framaroot / iroot root king / towelroot) To get root permissions either in new versions such as Lollipop, Marshmallow, Nougat, Pie and future versions of the Android system, these applications do not work.


What is the difference between SuperSU and Magisk

 VS 

The main difference between Magisk and SuperSU is how the root works on Android. Based on what the user wants to do.
We will first talk about supersu root how to get the root where it installs itself within the system files It changes the system files and adds new files to the system partition on the phone, but with the enhancement of Google to protect Android it has become difficult to do so that the amendment to the partition of the Android system to send an alert to applications that are trying to detect the presence of root.
Google SafetyNet monitors the operating system from any manipulation, and when it detects any manipulation in the Android operating system, most applications will not work and will not send you OTA updates.
What about Magisk is one of the most important features that does not touch system files, but modifies the boot partition instead so that it can trick safetyNet service and show that everything is normal and allows Magisk Manager to fully control the root settings.


Notes before root process

  • Charge the battery well before use.
  • Use the original USB cable that came with the device.
  • Use the laptop at work to avoid electricity problems.
  • You should focus well to protect the binary of your device.
  • The following protections must be disabled (FRP - OEM - RMM/KG) Follow the following article to learn How to Disbled FRP and OEM for device Samsung Galaxy.


Device information

-Brand Name: Samsung Galaxy
-Device Name: Galaxy J7
-Model: SM-J700H/DS root
-Operating system: Android Lollipop 5.1.1 or Marshmallow 6.0.1


Files required for root work


How To Root Galaxy J700H android Lollipop 5.1.1 / How To Root Galaxy J700H android Marshmallow 6.0.1

1-Download Drivers, Odin and J700H Root files for Lollipop 5.1.1 or Marshmallow 6.0.1 Depending on your device version.
2-Install the drivers on your device.
3-Install the Magisk Manager app on your Phone.
4-Download Full firmware,Then extract the files you will see 4 files (BL-AP-CP-CSC), Rename a file AP and delete .md5 It becomes the end of the file name .tar, Open the file in a program winrar or 7z, You will find a file boot.img.
5-Copy boot file to Device memory.
6-Open the Magisk Manager app.
7-Open the application settings and from the option Patched Boot Output Formate We choose .img.tar.
8-We return to the main interface of the application And we click on install a new window will appear we choose install too.
9-A new window will appear titled Select Patched We choose the second option Patch Boot Image File.


10-Locate the boot file and give the application access rights.

11-Patch Boot will take some time about 5 minutes.
12-After the process is finished navigate to the MagiskManager folder or Download folder you will see the file named patched_boot.img.tar (mroot j700h).
13-Copy the file to your computer and open the Odin tool.
14-Of the box AP We choose the file (patched_boot.img.tar).
15-Boot your device into download mode prees Volume Down + Home + Power key together for a few moments.
16-Press Start to flash the boot file.
17-After the boot is complete we install the Magisk Manager application.
18-After installing the app you need to reboot your device to get root permissions.
19-You can check for root access through the root checker app.
20-In case you encounter any problems please feel free to contact us

How To Root Samsung Galaxy J7 SM-J700H

What is the root and what are the benefits and harms

Root is a program that gives the user full powers to control the operating system where it can modify the operating system files or delete in the sense of the most complete control of the phone.
root j700f,how to root j700f,root j700f 5.1.1,root j700f 6.0.1

Root features:
1-Modify or delete files or applications of the operating system.
2-Run programs that require root permissions.
3-Change the basic fonts within the Android system.
4-Move applications from device memory to external memory.
5-Installation of Custom rom.


Cons of the root:
1-Loss of phone warranty.
2-Some applications do not work due to root (bluestacks root / dr fone root).
3-Stand on the company logo as a result of misuse.
4-The operating system crashed due to deletion or modification of important system files.


important warning:
  • Installation and use of the root android is entirely at your own risk and we do not take any responsibility for device failure.
  • In older versions of the Android system such as Jelly Bean and KitKat was using apps (kingroot / kingo root / framaroot / iroot root king / towelroot) To get root permissions either in new versions such as Lollipop, Marshmallow, Nougat, Pie and future versions of the Android system, these applications do not work.


What is the difference between SuperSU and Magisk

 VS 

The main difference between Magisk and SuperSU is how the root works on Android. Based on what the user wants to do.
We will first talk about supersu root how to get the root where it installs itself within the system files It changes the system files and adds new files to the system partition on the phone, but with the enhancement of Google to protect Android it has become difficult to do so that the amendment to the partition of the Android system to send an alert to applications that are trying to detect the presence of root.
Google SafetyNet monitors the operating system from any manipulation, and when it detects any manipulation in the Android operating system, most applications will not work and will not send you OTA updates.
What about Magisk is one of the most important features that does not touch system files, but modifies the boot partition instead so that it can trick safetyNet service and show that everything is normal and allows Magisk Manager to fully control the root settings.


Notes before root process

  • Charge the battery well before use.
  • Use the original USB cable that came with the device.
  • Use the laptop at work to avoid electricity problems.
  • You should focus well to protect the binary of your device.
  • The following protections must be disabled (FRP - OEM - RMM/KG) Follow the following article to learn How to Disbled FRP and OEM for device Samsung Galaxy.


Device information

-Brand Name: Samsung Galaxy
-Device Name: Galaxy J7
-Model: SM-J700F/DS root
-Operating system: Android Lollipop 5.1.1 or Marshmallow 6.0.1


Files required for root work


How To Root Galaxy J700F android Lollipop 5.1.1 / How To Root Galaxy J700F android Marshmallow 6.0.1

1-Download Drivers, Odin and J700F Root files for Lollipop 5.1.1 or Marshmallow 6.0.1 Depending on your device version.
2-Install the drivers on your device.
3-Install the Magisk Manager app on your Phone.
4-Download Full firmware,Then extract the files you will see 4 files (BL-AP-CP-CSC), Rename a file AP and delete .md5 It becomes the end of the file name .tar, Open the file in a program winrar or 7z, You will find a file boot.img.
5-Copy boot file to Device memory.
6-Open the Magisk Manager app.
7-Open the application settings and from the option Patched Boot Output Formate We choose .img.tar.
8-We return to the main interface of the application And we click on install a new window will appear we choose install too.
9-A new window will appear titled Select Patched We choose the second option Patch Boot Image File.


10-Locate the boot file and give the application access rights.

11-Patch Boot will take some time about 5 minutes.
12-After the process is finished navigate to the MagiskManager folder or Download folder you will see the file named patched_boot.img.tar (mroot j700f).
13-Copy the file to your computer and open the Odin tool.
14-Of the box AP We choose the file (patched_boot.img.tar).
15-Boot your device into download mode prees Volume Down + Home + Power key together for a few moments.
16-Press Start to flash the boot file.
17-After the boot is complete we install the Magisk Manager application.
18-After installing the app you need to reboot your device to get root permissions.
19-You can check for root access through the root checker app.
20-In case you encounter any problems please feel free to contact us

How To Root Samsung Galaxy J7 SM-J700F

أداة سحب وتفليش ANS L50 منقول


سحب قطاعات ANS L50 BOOT- SYSTEM- USERDATA تفليش قطاعات ANS L50 BOOT- SYSTEM- USERDATA تجاوز حساب FRP ANS L50 فورمات FORMAT ANS L50


  • سحب قطاعات ANS L50 BOOT- SYSTEM- USERDATA
  • تفليش قطاعات ANS L50 BOOT- SYSTEM- USERDATA
  • تجاوز حساب FRP ANS L50
  • فورمات FORMAT ANS L50


أداة سحب وتفليش ANS L50 منقول

الأداة للاخ نادر السماوي


شرح الاداة


  • سحب قطاعات ANS L50 BOOT- SYSTEM- USERDATA
  • تفليش قطاعات ANS L50 BOOT- SYSTEM- USERDATA
  • تجاوز حساب FRP ANS L50
  • فورمات FORMAT ANS L50

      كله في وضع EDL


      سحب قطاعات ANS L50 BOOT- SYSTEM- USERDATA تفليش قطاعات ANS L50 BOOT- SYSTEM- USERDATA تجاوز حساب FRP ANS L50 فورمات FORMAT ANS L50

      تحميل أداة سحب وتفليش ANS L50


      download


      رابط صفحة الفيس بوك
      رابط الصفحة على تويتر
      انضم لقناتنا على تيليجرام
      رابط قناتنا على يوتيوب

      أداة سحب وتفليش ANS L50 منقول

      ROOT G935V G935p G935t U10 UA  

      ROOT G935 U10 UA 

      روت S7 Edge+ G935 U10 UA  جميع الموديلات G935V G935p G935t
      روت g965f حماية U7 اصدار
      g965f ROOT U7
      روت لا يحتوي على اي مشاكل
      روت يحذف البيانات و يحريك عداد النوكس ويفقد ضمان الهاتف
      يجب ان يكون FRP:OFF OEM:OFF RMM:OFF

      ROOT G935V U10 UA
      ENG-ROOT SM-G935 U10 UA
      Adb Enable SM-G935 U10 UA
      KERNEL SM-G935 U10 UA
      Bypass FRP G935 U10 UA
      كلمه المرور 
       
      للتحميل
      تحميل اضغط هنا
      قد يهمك ايضا 
      Root G930p G930V G930A G930T U10
      قناتنا على تلجرام
      شعارنا تقديم المعلومات دون احتكار

      ROOT G935V G935p G935t U10 UA

      أداة سحب وتفليش ANS L50 منقول


      سحب قطاعات ANS L50 BOOT- SYSTEM- USERDATA تفليش قطاعات ANS L50 BOOT- SYSTEM- USERDATA تجاوز حساب FRP ANS L50 فورمات FORMAT ANS L50


      • سحب قطاعات ANS L50 BOOT- SYSTEM- USERDATA
      • تفليش قطاعات ANS L50 BOOT- SYSTEM- USERDATA
      • تجاوز حساب FRP ANS L50
      • فورمات FORMAT ANS L50


      أداة سحب وتفليش ANS L50 منقول

      الأداة للاخ نادر السماوي


      شرح الاداة


      • سحب قطاعات ANS L50 BOOT- SYSTEM- USERDATA
      • تفليش قطاعات ANS L50 BOOT- SYSTEM- USERDATA
      • تجاوز حساب FRP ANS L50
      • فورمات FORMAT ANS L50

          كله في وضع EDL


          سحب قطاعات ANS L50 BOOT- SYSTEM- USERDATA تفليش قطاعات ANS L50 BOOT- SYSTEM- USERDATA تجاوز حساب FRP ANS L50 فورمات FORMAT ANS L50

          تحميل أداة سحب وتفليش ANS L50


          download


          أداة سحب وتفليش ANS L50 منقول

          ملف NV اصلاح الشبكة لجهاز ANS L50 


           NV ANS L50 Repair Network

           QCN ANS L50 Repair Network


          اصلاح الشبكة لجهاز انس L50


          ملف شغال % ومسحوب من جهاز شغال 

          دور الملف يعمل على اصلاح الشبكة وارجاع اعدادات 3G  الوكاله 


          رابط التحميل مباشر


          هنا

           باسورد فك الظغط          
          cdmadev1


          NV ANS L50 Repair Network

          ملف NV اصلاح الشبكة لجهاز ANS L50 


           NV ANS L50 Repair Network

           QCN ANS L50 Repair Network


          اصلاح الشبكة لجهاز انس L50


          ملف شغال % ومسحوب من جهاز شغال 

          دور الملف يعمل على اصلاح الشبكة وارجاع اعدادات 3G  الوكاله 


          رابط التحميل مباشر


          هنا

           باسورد فك الظغط          
          cdmadev1


          ANS L50 Repair Network NV