Halaman

    Social Items

فك شفرة هاتف جلاكسي A21 اسبرنت

Free Unlocked Samsung Galaxy A21 A215U Bit1 Sprint Boost Virgin

Free unlocked Galaxy A21 Sprint
Free unlocked Galaxy A21 Boost
Free unlocked Galaxy A21 Virgin

How to unlock Sim Card Galaxy A21 A215U Sprint

Download Frimware Galaxy A21 BST Download
Download File Unlock A21 Sprint U1 Bit1 Download

Step 1 :
Unzip Frimware A21 
and Flashing Frimware A21 Using Odin

Step 2 :
Unzip File unlock A21
and Falshing File unlock A21 Using Odin


Free Unlock Samsung Galaxy A21 Metropcs T-Mobile Bit1 ( CDMA + GSM )
Free Unlock  Samsung Galaxy A21 Metropcs T-Mobile Bit2 ( CDMA Only )


Watch the video for details


Samsung Galaxy A21 unlocked

What is the root and what are the benefits and harms

Root is a program that gives the user full powers to control the operating system where it can modify the operating system files or delete in the sense of the most complete control of the phone.
How To Root Samsung Galaxy Note 4 SM-N9109W

Root features:
1-Modify or delete files or applications of the operating system.
2-Run programs that require root permissions.
3-Change the basic fonts within the Android system.
4-Move applications from device memory to external memory.
5-Installation of Custom rom.
6-Fix errors DRK and DM-Verity.

Cons of the root:
1-Loss of phone warranty.
2-Some applications do not work due to root (bluestacks root / dr fone root).
3-Stand on the company logo as a result of misuse.
4-The operating system crashed due to deletion or modification of important system files.


important warning:
  • Installation and use of the root android is entirely at your own risk and we do not take any responsibility for device failure.
  • In older versions of the Android system such as Jelly Bean and KitKat was using apps (kingroot / kingo root / framaroot / iroot root king / towelroot) To get root permissions either in new versions such as Lollipop, Marshmallow, Nougat, Pie and future versions of the Android system, these applications do not work.


What is the difference between SuperSU and Magisk

 VS 

The main difference between Magisk and SuperSU is how the root works on Android. Based on what the user wants to do.
We will first talk about supersu root how to get the root where it installs itself within the system files It changes the system files and adds new files to the system partition on the phone, but with the enhancement of Google to protect Android it has become difficult to do so that the amendment to the partition of the Android system to send an alert to applications that are trying to detect the presence of root.
Google SafetyNet monitors the operating system from any manipulation, and when it detects any manipulation in the Android operating system, most applications will not work and will not send you OTA updates.
What about Magisk is one of the most important features that does not touch system files, but modifies the boot partition instead so that it can trick safetyNet service and show that everything is normal and allows Magisk Manager to fully control the root settings.


Notes before root process

  • Charge the battery well before use.
  • Use the original USB cable that came with the device.
  • Use the laptop at work to avoid electricity problems.
  • You should focus well to protect the binary of your device.
  • The following protections must be disabled (FRP - OEM - RMM/KG) Follow the following article to learn How to Disbled FRP and OEM for device Samsung Galaxy.


Device information

-Brand Name: Samsung Galaxy
-Device Name: Galaxy Note 4
-Model: SM-N9109W root
-Operating system: Android Kitkat 4.4.4, Lollipop 5.0.1/5.1.1 and Marshmallow 6.0.1


Files required for root work

How To Root Galaxy N9109W android Kitkat 4.4.4, Lollipop 5.1.1 and  Marshmallow 6.0.1

1-Download Drivers and flash Tool.
2-Install the drivers on your device.
3-Download Root File, The baseband version must match the version of the root file.
4-Open the EFTSU Flash Tool.
5-From the top, click on Select File and then choose the root file.
6-Boot your device into download mode press and hold Home + Power + Volume Down buttons.
7-Press Flash to start.
8-After booting the device open EFTSU Manager app you need to reboot your device to get root permissions.
9-You can check for root access through the root checker app.
10-In case you encounter any problems please feel free to contact us
11-If you want to unroot or revert to the offical firmware, you can flash new firmware Full Firmware For Device Samsung Galaxy Note 4 SM-N9109W.

How To Root Samsung Galaxy Note 4 SM-N9109W

What is the root and what are the benefits and harms

Root is a program that gives the user full powers to control the operating system where it can modify the operating system files or delete in the sense of the most complete control of the phone.
How To Root Samsung Galaxy Note 4 SM-N9106W

Root features:
1-Modify or delete files or applications of the operating system.
2-Run programs that require root permissions.
3-Change the basic fonts within the Android system.
4-Move applications from device memory to external memory.
5-Installation of Custom rom.
6-Fix errors DRK and DM-Verity.

Cons of the root:
1-Loss of phone warranty.
2-Some applications do not work due to root (bluestacks root / dr fone root).
3-Stand on the company logo as a result of misuse.
4-The operating system crashed due to deletion or modification of important system files.


important warning:
  • Installation and use of the root android is entirely at your own risk and we do not take any responsibility for device failure.
  • In older versions of the Android system such as Jelly Bean and KitKat was using apps (kingroot / kingo root / framaroot / iroot root king / towelroot) To get root permissions either in new versions such as Lollipop, Marshmallow, Nougat, Pie and future versions of the Android system, these applications do not work.


What is the difference between SuperSU and Magisk

 VS 

The main difference between Magisk and SuperSU is how the root works on Android. Based on what the user wants to do.
We will first talk about supersu root how to get the root where it installs itself within the system files It changes the system files and adds new files to the system partition on the phone, but with the enhancement of Google to protect Android it has become difficult to do so that the amendment to the partition of the Android system to send an alert to applications that are trying to detect the presence of root.
Google SafetyNet monitors the operating system from any manipulation, and when it detects any manipulation in the Android operating system, most applications will not work and will not send you OTA updates.
What about Magisk is one of the most important features that does not touch system files, but modifies the boot partition instead so that it can trick safetyNet service and show that everything is normal and allows Magisk Manager to fully control the root settings.


Notes before root process

  • Charge the battery well before use.
  • Use the original USB cable that came with the device.
  • Use the laptop at work to avoid electricity problems.
  • You should focus well to protect the binary of your device.
  • The following protections must be disabled (FRP - OEM - RMM/KG) Follow the following article to learn How to Disbled FRP and OEM for device Samsung Galaxy.


Device information

-Brand Name: Samsung Galaxy
-Device Name: Galaxy Note 4
-Model: SM-N9106W root
-Operating system: Android Kitkat 4.4.4 and Lollipop 5.0.1


Files required for root work

How To Root Galaxy N9106W android Kitkat 4.4.4 and Lollipop 5.0.1

1-Download Drivers and flash Tool.
2-Install the drivers on your device.
3-Download Root File, The baseband version must match the version of the root file.
4-Open the EFTSU Flash Tool.
5-From the top, click on Select File and then choose the root file.
6-Boot your device into download mode press and hold Home + Power + Volume Down buttons.
7-Press Flash to start.
8-After booting the device open EFTSU Manager app you need to reboot your device to get root permissions.
9-You can check for root access through the root checker app.
10-In case you encounter any problems please feel free to contact us
11-If you want to unroot or revert to the offical firmware, you can flash new firmware Full Firmware For Device Samsung Galaxy Note 4 SM-N9106W.

How To Root Samsung Galaxy Note 4 SM-N9106W

What is the root and what are the benefits and harms

Root is a program that gives the user full powers to control the operating system where it can modify the operating system files or delete in the sense of the most complete control of the phone.
How To Root Samsung Galaxy Note 4 SM-N9100

Root features:
1-Modify or delete files or applications of the operating system.
2-Run programs that require root permissions.
3-Change the basic fonts within the Android system.
4-Move applications from device memory to external memory.
5-Installation of Custom rom.
6-Fix errors DRK and DM-Verity.

Cons of the root:
1-Loss of phone warranty.
2-Some applications do not work due to root (bluestacks root / dr fone root).
3-Stand on the company logo as a result of misuse.
4-The operating system crashed due to deletion or modification of important system files.


important warning:
  • Installation and use of the root android is entirely at your own risk and we do not take any responsibility for device failure.
  • In older versions of the Android system such as Jelly Bean and KitKat was using apps (kingroot / kingo root / framaroot / iroot root king / towelroot) To get root permissions either in new versions such as Lollipop, Marshmallow, Nougat, Pie and future versions of the Android system, these applications do not work.


What is the difference between SuperSU and Magisk

 VS 

The main difference between Magisk and SuperSU is how the root works on Android. Based on what the user wants to do.
We will first talk about supersu root how to get the root where it installs itself within the system files It changes the system files and adds new files to the system partition on the phone, but with the enhancement of Google to protect Android it has become difficult to do so that the amendment to the partition of the Android system to send an alert to applications that are trying to detect the presence of root.
Google SafetyNet monitors the operating system from any manipulation, and when it detects any manipulation in the Android operating system, most applications will not work and will not send you OTA updates.
What about Magisk is one of the most important features that does not touch system files, but modifies the boot partition instead so that it can trick safetyNet service and show that everything is normal and allows Magisk Manager to fully control the root settings.


Notes before root process

  • Charge the battery well before use.
  • Use the original USB cable that came with the device.
  • Use the laptop at work to avoid electricity problems.
  • You should focus well to protect the binary of your device.
  • The following protections must be disabled (FRP - OEM - RMM/KG) Follow the following article to learn How to Disbled FRP and OEM for device Samsung Galaxy.


Device information

-Brand Name: Samsung Galaxy
-Device Name: Galaxy Note 4
-Model: SM-N9100 root
-Operating system: Android Lollipop 5.1.1 and Marshmallow 6.0.1


Files required for root work

How To Root Galaxy N9100 android Lollipop 5.1.1 and  Marshmallow 6.0.1

1-Download Drivers and flash Tool.
2-Install the drivers on your device.
3-Download Root File, The baseband version must match the version of the root file.
4-Open the EFTSU Flash Tool.
5-From the top, click on Select File and then choose the root file.
6-Boot your device into download mode press and hold Home + Power + Volume Down buttons.
7-Press Flash to start.
8-After booting the device open EFTSU Manager app you need to reboot your device to get root permissions.
9-You can check for root access through the root checker app.
10-In case you encounter any problems please feel free to contact us
11-If you want to unroot or revert to the offical firmware, you can flash new firmware Full Firmware For Device Samsung Galaxy Note 4 SM-N9100.

How To Root Samsung Galaxy Note 4 SM-N9100

                                              NEW ICCID 3-2-2021


Iphone unlock sims back to work All carrier
ICCID :


R-SIM Perfect ICCID unlock come back at 2021/2/3

All the r-sim chips support the perfect unlock mode:
Steps:
6.Upgrade to the latest IOS13.
2. plug R-SIM unlcok chips, pop-up windows
3. Select [Iccid Activation] select the [ICCID UNLOCK] [Edit ICCID code] and enter 89014104279605344027send, and then click Accept.
4. Turn off the phone and connect to WiFi to activate the phone perfectly.
(It has been over 10 months since the last perfect iccid block. Let's celebrate it.)


كل يوم كود جديد


👇

88#*7672*5005*


89014104279605344027


Step 1:Enter settings, then the iphone enters the activation mode. 


Step 2:Emergency call input * 5005 * 7672 * 88 # and iccid input box will pop up, if there is no pop-up plug on the card and then enter. 


done


Rsim 12
Rsim13
Rsim14
Rsim17
Rsim15


GSM-CDMA

Gpp_sim

NEW ICCID 3-2-2021

Format Oppo - Realme | Free Tool | Mysterious-Box V3.0

Format Oppo - Realme  Free Tool  Mysterious-Box V3.0


 Mysterious-Box V3.0

 Oppo - Realme  Format Free Tool

Supported Models
  • A1K CPH1923
  • A83 CPH1827
  • F15 CPH2001
  • F11 Pro CPH1969
  • F11 Pro CPH1987
  • F9 Pro CPH1823
  • F9 Pro CPH1825
  • F9 CPH1881
  • F9 CPH1825
  • F7 CPH1819
  • F7 Youth CPH1859
  • F5 CPH1723
  • R15 CPH1835
  • R15 CPH1835
  • A5S CPH1909
  • A5S CPH1912
  • A83 CPH1729
  • A9 CPH1837
  • A9 CPH1938
  • Realme 1 CPH1861
  • Realme C2 RMX1941
  • Realme 3 RMX1821
  • Realme C11 RMX2185
  • RENO 2F CPH1989


 Support Translation Device For Version 

localization to arabic supported android versions

  1.  Android 5.x.x
  2.  Android 6.x.x
  3.  Android 7.x.x
  4. Android 8.x.x
  5.  Android 9.x.x
  6.  Android 10.x.x
  7.  Android 11.x.x

 Support Translation Device For languages 

Amharic - Arabic - Azeri - Bulgarian - Bengali - Bosnian - atalan - Czech - Danish - German - Greek - English - Spanish - Estonian - Basque - Farsi - Persian - Finnish -Filipino - French - Galician - Gujarati - Hindi - Croatian - Hungarian - Armenian - Indonesian - Icelandic - Italiano - Japanese - Georgian - Kazakh - Khmer -Kannada-Korean - Kurdish - Lithuanian - Latvian - FYRO Macedonia - Malayalam - Marathi - Malay - Burmese - Norwegian - Nepali - Dutch - Punjabi - Polish - Portuguese - Romanian - Russian - Sinhala - Slovak - Slovenian - Sanskrit - Swedish - Swahili - Tamil - Telugu - Thai - Turkish - Ukrainian - Uzbek - Vietnamese - Chinese


How To install Tool  Plz Follow step for install fix file oppo 


Format Oppo - Realme | Free Tool | Mysterious-Box V3.0

اصلاح مشكلة الرقم التسلسلي لهاتف LG K51 K500

LG K51 K500 ملف التغطيه لاصلاح مشاكل الشبكة والرقم التسلسلي لهاتف


Stock NVRAM LG K51 Sprint
Fix IMEI LG K51 K500
Fix Baseband LG K51 K500

LG K51 Sprint ملف التغطية لهاتف
LG K51 K500 Sprint اصلاح مشكلة الرقم التسلسلي لهاتف
LG K51 K500 Sprint اصلاح البيس باند لهاتف


NVRAM تحميل ملف الشبكة

تحميل برنامج استعادة الملف الى الهاتف

ALABSI DEV كمايمكنك الاشتراك على قناتنا

LG K51 K500 Sprint كيفية استرجع ملف التغطية الى لهاتف

قم باطفي الهاتف ومن ثم تشغيل برنامج الاستعاده 
 وربط الهاتف بضغط على زر رفع الصوت وتوصيل الهاتف على الكمببوتر
التفاصيل اكثر يوجد اسفل فيديو كيفية عمل نسخة من ملف التغطي لاستايل 4 اسبرنت
الطريقة نفسها لاكن بدل ماتضغط على 
Backup
ستضغط على 
Restore
ومن ثم اختيار ملف التغطيه 
NVRAM_K500.NVRAM


الفيديو التوضيحي لاستعادة الملف

Stock Network File ( NVRAM ) LG K51 K500 Sprint

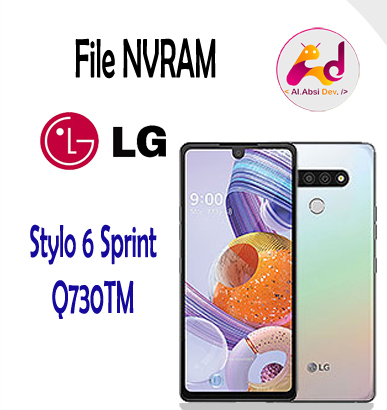
Fix Baseband LG Stylo 6 Sprint Q730TM


ملف التغطيه لاصلاح مشاكل الشبكة والرقم التسلسلي لهاتف استايل 6 اسبرنت


Stock NVRAM LG Stylo 6 Sprint
Fix IMEI LG Stylo 6 Q730TM
Fix Baseband LG Stylo 6 Q730TM

ملف التغطية لهاتف استايل 6 اسبرنت
اصلاح مشكلة الرقم التسلسلي لهاتف استايل 6 اسبرنت
اصلاح البيس باند لهاتف الجي استايل 6 اسبرنت


NVRAM تحميل ملف الشبكة

تحميل برنامج استعادة الملف الى الهاتف

ALABSI DEV كمايمكنك الاشتراك على قناتنا

LG Stylo 6 Sprint كيفية استرجع ملف التغطية الى لهاتف

قم باطفي الهاتف ومن ثم تشغيل برنامج الاستعاده 
 وربط الهاتف بضغط على زر رفع الصوت وتوصيل الهاتف على الكمببوتر
التفاصيل اكثر يوجد اسفل فيديو كيفية عمل نسخة من ملف التغطي لاستايل 4 اسبرنت
الطريقة نفسها لاكن بدل ماتضغط على 
Backup
ستضغط على 
Restore
ومن ثم اختيار ملف التغطيه استايل 6 اسبرنت


الفيديو التوضيحي لاستعادة الملف


Network File ( NVRAM ) LG Stylo 6 Q730TM Sprint