Halaman

    Social Items

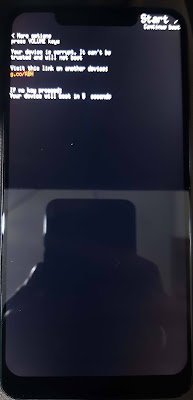
فلاشة احياء Y9 PRIME 2019 البرتقالي


Y9 PRIME 2019 fix dead boot rom


مواصفات Y9 PRIME 2019 STK-L21

  • Versions: STK-L21; STK-L22; STK-LX3
  • PLATFORM OS Android: 9.0 (Pie), upgradable to Android 10, Magic UI 2.1
  • Chipset Kirin 710F (12 nm)
  • CPU Octa-core (4x2.2 GHz Cortex-A73 & 4x1.7 GHz Cortex-A53)
  • GPU Mali-G51 MP4
  • NETWORK Technology GSM / HSPA / LTE
  • BODY Dimensions 163.5 x 77.3 x 8.9 mm (6.44 x 3.04 x 0.35 in)
  • Weight 196.8 g (6.95 oz)
  • Build Glass front, plastic back
  • SIM Single SIM (Nano-SIM) or Dual SIM (Nano-SIM, dual stand-by)
  • DISPLAY Type LTPS IPS LCD
  • Size :6.59 inches, 106.6 cm2 (~84.3% screen-to-body ratio)
  • Resolution 1080 x 2340 pixels, 19.5:9 ratio (~391 ppi density)
  • MEMORY Card slot microSDXC (dedicated slot)
  • Internal 64GB 4GB RAM, 128GB 4GB RAM  eMMC
  • MAIN CAMERA Triple 16 MP, f/1.8, (wide), PDAF
  • 8 MP, f/2.4, 13mm (ultrawide)
  • 2 MP, f/2.4, (depth)
  • Features LED flash, HDR, panorama
  • Video 1080p@30fps
  • SELFIE CAMERA Single Motorized pop-up 16 MP, f/2.0
  • Video 1080p@30fps
  • SOUND Loudspeaker Yes
  • 3.5mm jack Yes
  • COMMS WLAN Wi-Fi 802.11 a/b/g/n/ac, dual-band, Wi-Fi Direct, hotspot
  • Bluetooth 5.0, A2DP, LE
  • GPS Yes, with A-GPS, GLONASS, GALILEO, BDS, QZSS
  • NFC No
  • Radio FM radio
  • USB USB Type-C 2.0, USB On-The-Go
  • FEATURES :Sensors Fingerprint (rear-mounted), accelerometer, gyro, proximity, compass
  • BATTERY Type :Li-Po 4000 mAh, non-removable
  • MISC Colors Emerald Green, Midnight Black, Sapphire Blue

فلاشة احياء STK-L21 البرتقالي


يتم التفليش على إحدى البوكسات الداعمة ل Load Factory Fastboot fastboot erase frp 

ثم يتم تفليش هذه الفلاشة من وضع fastboot

تفاصيل الفلاشة


منقول من جروب التيماوية


سيتم نشر الروابط الصحيحة بعد خمسة ايام باذن الله لضمان عدم سرقة الموضوع

فلاشة عمل داونجريد STK-L21  STK-L22 STARK-L21A


فلاشة احياء Y9 PRIME 2019 البرتقالي

روم Infinix Note 7 X690 مع ملف DA


Infinix Note 7 X690 FLASH FILE WITH DA


مواصفات Infinix Note 7 

  • PLATFORM OS Android 10, XOS 6.0
  • Chipset Mediatek Helio G70 (12 nm)
  • CPU Octa-core (2x2.0 GHz Cortex-A75 & 6x1.7 GHz Cortex-A55)
  • GPU Mali-G52 2EEMC2
  • NETWORK Technology GSM / HSPA / LTE
  • BODY Dimensions 173.4 x 79 x 8.8 mm (6.83 x 3.11 x 0.35 in)
  • Weight 206 g (7.27 oz)
  • SIM Dual SIM (Nano-SIM, dual stand-by)
  • DISPLAY Type IPS LCD
  • Size 6.95 inches, 114.7 cm2 (~83.7% screen-to-body ratio)
  • Resolution 720 x 1640 pixels (~258 ppi density)
  • Protection Corning Gorilla Glass
  • MEMORY Card slot microSDXC (dedicated slot)
  • Internal 64GB 4GB RAM, 128GB 4GB RAM, 128GB 6GB RAM eMMC 5.1
  • MAIN CAMERA Quad 48 MP, f/1.8, (wide), 1/2.0", 0.8µm, PDAF
  • 2 MP, f/2.4, (macro)
  • 2 MP, f/2.4, (depth)
  • 2 MP, f/1.8, (dedicated video camera) - 128/6 model only
  • Features Quad-LED flash, panorama, HDR
  • Video 1080p@30fps
  • SELFIE CAMERA Single 16 MP, f/2.0, 26mm (wide), 1/3.06", 1.0µm
  • Video 1080p@30fps
  • SOUND Loudspeaker Yes, with dual speakers
  • 3.5mm jack Yes
  • COMMS WLAN Wi-Fi 802.11 a/b/g/n/ac, dual-band, hotspot
  • Bluetooth 5.0, A2DP, LE
  • GPS Yes, with A-GPS
  • NFC No
  • Radio FM radio
  • USB microUSB 2.0, USB On-The-Go
  • FEATURES Sensors Fingerprint (side-mounted), accelerometer, proximity, compass
  • BATTERY Type Li-Po 5000 mAh, non-removable
  • Charging Fast charging 18W


فلاشة infinix x690


تفاصيلها


Infinix Note 7 FLASH FILE


روم انفنكس x690


تفاصيلها 


INFINIX X690 FILE FLASH


للتحميل يجب التسجيل بالموقع والرابط مجاني


DA FILE FOR INFINIX X690-X690C-X690B


Infinix_Note_7_X690B_x690_x690c_DA_File


CLICK HERE


روم Infinix Note 7 X690 مع ملف DA

What is the root and what are the benefits and harms

Root is a program that gives the user full powers to control the operating system where it can modify the operating system files or delete in the sense of the most complete control of the phone.
How To Root Samsung Galaxy A8 2018 SM-A530N

Root features:
1-Modify or delete files or applications of the operating system.
2-Run programs that require root permissions.
3-Change the basic fonts within the Android system.
4-Move applications from device memory to external memory.
5-Installation of Custom rom.
6-Fix errors DRK and DM-Verity.

Cons of the root:
1-Loss of phone warranty.
2-Some applications do not work due to root (bluestacks root / dr fone root).
3-Stand on the company logo as a result of misuse.
4-The operating system crashed due to deletion or modification of important system files.


important warning:
  • Installation and use of the root android is entirely at your own risk and we do not take any responsibility for device failure.
  • In older versions of the Android system such as Jelly Bean and KitKat was using apps (kingroot / kingo root / framaroot / iroot root king / towelroot) To get root permissions either in new versions such as Lollipop, Marshmallow, Nougat, Pie and future versions of the Android system, these applications do not work.


What is the difference between SuperSU and Magisk

 VS 

The main difference between Magisk and SuperSU is how the root works on Android. Based on what the user wants to do.
We will first talk about supersu root how to get the root where it installs itself within the system files It changes the system files and adds new files to the system partition on the phone, but with the enhancement of Google to protect Android it has become difficult to do so that the amendment to the partition of the Android system to send an alert to applications that are trying to detect the presence of root.
Google SafetyNet monitors the operating system from any manipulation, and when it detects any manipulation in the Android operating system, most applications will not work and will not send you OTA updates.
What about Magisk is one of the most important features that does not touch system files, but modifies the boot partition instead so that it can trick safetyNet service and show that everything is normal and allows Magisk Manager to fully control the root settings.


Notes before root process

  • Charge the battery well before use.
  • Use the original USB cable that came with the device.
  • Use the laptop at work to avoid electricity problems.
  • You should focus well to protect the binary of your device.
  • The following protections must be disabled (FRP - OEM - RMM/KG) Follow the following article to learn How to Disbled FRP and OEM for device Samsung Galaxy.


Device information

-Brand Name: Samsung Galaxy
-Device Name: Galaxy A8 2018
-Model: SM-A530N root
-Operating system: Android Nougat 7.1.1 or Oreo 8.0 or Pie 9.0


Files required for root work

How To Root Galaxy A530N android Nougat 7.1.1 / How To Root Galaxy A530N android Oreo 8.0 / How To Root Galaxy A530N android Pie 9.0

1-Download Drivers and flash Tool.
2-Install the drivers on your device.
3-Download Root File, The baseband version must match the version of the root file.
4-Open the EFTSU Flash Tool.
5-From the top, click on Select File and then choose the root file.
6-Boot your device into download mode prees Volume Down + Volume Up and connect the USB cable.
7-Press Flash to start.
8-After booting the device install EFTSU Manager app.
9-Then, from the EFTSU Flash tool, we click on Reboot ADB Device to Root Mode (Recovery mode).
10-When the boot is complete, Open the EFTSU Manager app to get the root.
11-You can check for root access through the root checker app.
12-In case you encounter any problems please feel free to contact us
13-If you want to unroot or revert to the offical firmware, you can flash new firmware.

How To Root Samsung Galaxy A8 2018 SM-A530N

What is the root and what are the benefits and harms

Root is a program that gives the user full powers to control the operating system where it can modify the operating system files or delete in the sense of the most complete control of the phone.
How To Root Samsung Galaxy A8 2018 SM-A530F

Root features:
1-Modify or delete files or applications of the operating system.
2-Run programs that require root permissions.
3-Change the basic fonts within the Android system.
4-Move applications from device memory to external memory.
5-Installation of Custom rom.
6-Fix errors DRK and DM-Verity.

Cons of the root:
1-Loss of phone warranty.
2-Some applications do not work due to root (bluestacks root / dr fone root).
3-Stand on the company logo as a result of misuse.
4-The operating system crashed due to deletion or modification of important system files.


important warning:
  • Installation and use of the root android is entirely at your own risk and we do not take any responsibility for device failure.
  • In older versions of the Android system such as Jelly Bean and KitKat was using apps (kingroot / kingo root / framaroot / iroot root king / towelroot) To get root permissions either in new versions such as Lollipop, Marshmallow, Nougat, Pie and future versions of the Android system, these applications do not work.


What is the difference between SuperSU and Magisk

 VS 

The main difference between Magisk and SuperSU is how the root works on Android. Based on what the user wants to do.
We will first talk about supersu root how to get the root where it installs itself within the system files It changes the system files and adds new files to the system partition on the phone, but with the enhancement of Google to protect Android it has become difficult to do so that the amendment to the partition of the Android system to send an alert to applications that are trying to detect the presence of root.
Google SafetyNet monitors the operating system from any manipulation, and when it detects any manipulation in the Android operating system, most applications will not work and will not send you OTA updates.
What about Magisk is one of the most important features that does not touch system files, but modifies the boot partition instead so that it can trick safetyNet service and show that everything is normal and allows Magisk Manager to fully control the root settings.


Notes before root process

  • Charge the battery well before use.
  • Use the original USB cable that came with the device.
  • Use the laptop at work to avoid electricity problems.
  • You should focus well to protect the binary of your device.
  • The following protections must be disabled (FRP - OEM - RMM/KG) Follow the following article to learn How to Disbled FRP and OEM for device Samsung Galaxy.


Device information

-Brand Name: Samsung Galaxy
-Device Name: Galaxy A8 2018
-Model: SM-A530F/DS root
-Operating system: Android Nougat 7.1.1 or Oreo 8.0 or Pie 9.0


Files required for root work

How To Root Galaxy A530F android Nougat 7.1.1 / How To Root Galaxy A530F android Oreo 8.0 / How To Root Galaxy A530F android Pie 9.0

1-Download Drivers and flash Tool.
2-Install the drivers on your device.
3-Download Root File, The baseband version must match the version of the root file.
4-Open the EFTSU Flash Tool.
5-From the top, click on Select File and then choose the root file.
6-Boot your device into download mode prees Volume Down + Volume Up and connect the USB cable.
7-Press Flash to start.
8-After booting the device install EFTSU Manager app.
9-Then, from the EFTSU Flash tool, we click on Reboot ADB Device to Root Mode (Recovery mode).
10-When the boot is complete, Open the EFTSU Manager app to get the root.
11-You can check for root access through the root checker app.
12-In case you encounter any problems please feel free to contact us
13-If you want to unroot or revert to the offical firmware, you can flash new firmware.

How To Root Samsung Galaxy A8 2018 SM-A530F

فلاشة Infinix Note 7 X690 مع ملف DA


Infinix Note 7 X690 FLASH FILE WITH DA


مواصفات Infinix Note 7 

  • PLATFORM OS Android 10, XOS 6.0
  • Chipset Mediatek Helio G70 (12 nm)
  • CPU Octa-core (2x2.0 GHz Cortex-A75 & 6x1.7 GHz Cortex-A55)
  • GPU Mali-G52 2EEMC2
  • NETWORK Technology GSM / HSPA / LTE
  • BODY Dimensions 173.4 x 79 x 8.8 mm (6.83 x 3.11 x 0.35 in)
  • Weight 206 g (7.27 oz)
  • SIM Dual SIM (Nano-SIM, dual stand-by)
  • DISPLAY Type IPS LCD
  • Size 6.95 inches, 114.7 cm2 (~83.7% screen-to-body ratio)
  • Resolution 720 x 1640 pixels (~258 ppi density)
  • Protection Corning Gorilla Glass
  • MEMORY Card slot microSDXC (dedicated slot)
  • Internal 64GB 4GB RAM, 128GB 4GB RAM, 128GB 6GB RAM eMMC 5.1
  • MAIN CAMERA Quad 48 MP, f/1.8, (wide), 1/2.0", 0.8µm, PDAF
  • 2 MP, f/2.4, (macro)
  • 2 MP, f/2.4, (depth)
  • 2 MP, f/1.8, (dedicated video camera) - 128/6 model only
  • Features Quad-LED flash, panorama, HDR
  • Video 1080p@30fps
  • SELFIE CAMERA Single 16 MP, f/2.0, 26mm (wide), 1/3.06", 1.0µm
  • Video 1080p@30fps
  • SOUND Loudspeaker Yes, with dual speakers
  • 3.5mm jack Yes
  • COMMS WLAN Wi-Fi 802.11 a/b/g/n/ac, dual-band, hotspot
  • Bluetooth 5.0, A2DP, LE
  • GPS Yes, with A-GPS
  • NFC No
  • Radio FM radio
  • USB microUSB 2.0, USB On-The-Go
  • FEATURES Sensors Fingerprint (side-mounted), accelerometer, proximity, compass
  • BATTERY Type Li-Po 5000 mAh, non-removable
  • Charging Fast charging 18W


فلاشة انفنكس X690


روم INFINIX X690


تفاصيلها 


INFINIX X690 FILE FLASH


للتحميل يجب التسجيل بالموقع والرابط مجاني


DA FILE FOR INFINIX X690-X690C-X690B


Infinix_Note_7_X690B_x690_x690c_DA_File


CLICK HERE


فلاشة Infinix Note 7 X690 مع ملف DA

روم HTC Desire 728 بعدة روابط


روم HTC Desire 728 بعدة روابط


IF  ANY MEGA LINKS NEEDS KEY 

DOWNLOAD FROM HERE


HTC DRIVERS


HTC Desire 728 Stock Roms


A50CML_DTUL


A50CML_TUHL


A50CMG_DWG


روم HTC Desire 728 بعدة روابط

frimware Stock China Mobile N5 M761

كيفية تحميل نظام هاتف وان فايف

China Mobile N5 M761 M762G

How to install Frimware Stock N5 M761
Flash Stock China Mobile N5 M762G
Rom Stock China Mobile N5 M761- M762G


كيفية تفليش هاتف تشاينا موبايل 
N5 M761
الفلاشة الوكالة لهاتف تشاينا موبايل
 N5 M762G
الروم الوكالة لهاتف تشاينا موبايل
  N5 M761-M762G

معلومات على النظام ومقدم من المبرمج ابراهيم الصيري  

اسم الجهاز 
 N5
اسم الطراز
M762G 
الحجم 
2.42GB
المعالج
 Qualcomm Incorporated , SDM450
اصدار النظام
Android 8
رقم الاصدار
 M762G_01.18.00RPD_HK.00

تحميل النظام الوكالة  

لتحميل رابط  النظام ( النظام)
لتحميل تعاريف الهاتف تحميل

كيفية توصيل وتفليش النظام الوكالة 

قم بااطفاء الهاتف
بعدها قم بادخال الهاتف وضع
 EDL Mode
 بضغط على ازرار الصوت وتركيب 
USB على الهاتف
الان قم بتشغيل اسكربت تفليش النظام 
عند انتهاء الخطوه الاوله بيشتغل الهاتف وسوف يعلق الجهاز على
 Bootloader
افصل الهاتف ونتظر حتى يطفي الهاتف تلقائي بعدها قم بادخال الهاتف وضع الكوالكوم
 EDL Mode
او قم بضغط على ازرار الصوت مع زر التشغيل حتى يدخول الهاتف وضع الكوالكوم 
بعدها تلقائي سيقوم الاسكربت باستكمال التفليش 
بعدها اصبح الهاتف جاهز

كما يمكنك تحميل اصلاح البوت اسكربت مستقل
في حالة تجاوز الاسكربت الخطوه الاخير تحميل
او اعادة تفليش النظام مره اخرى وتركيز على الخطوه الاخيره
تابع الفيديو اسفل لمعرفة كيفية التفليش بدون اي مشكلة

قناة ALABSI DEV 

شرح تفليش النظام بوضوح

النظام الوكالة لهاتف تشاينا موبايل N5 M761 - M762G وحل جميع المشاكل

Fix Bootloader for China Mobile N5 M761


كيفية اصلاح مشكلة البوت وتعليق الجهاز لهاتف

China Mobile N5 M761 M762G

How to fix Bootloader N5 M761
Fix Bootloader N5 M762G
Fix Bootloader China Mobile N5 M761-M762G

كيفية اصلاح مشكلة البوت لودار
 N5 M761
اصلاح مشكلة البوت لودار
 N5 M762G
اصلاح مشكلة البوت لودار تشاينا موبايل
 N5 M761-M762G

احتاجات اصلاح مشكلة 

 تحميل اسكربت الاصلح تحميل
لتحميل تعاريف الهاتف تحميل

كيفية التوصيل واصلاح المشكلة 

قم بااطفاء الهاتف
بعدها قم بضغط على ازرار الصوت وتركيب 
USB 
على الهاتف
الان قم بتشغيل اسكربت اصلاح البوت باسم
 fix-bootlaoder-N5-M761-M762G.bat
ونتظر حتى يشتغل الهاتف بعدها انتهاء اصلاح البوت

قناة ALABSI DEV

صوره توضيحية على المشكلة
fix bootloader for n5 m761

How to Fix Bootloader for China Mobile N5 M761 M762G

روم انفنكس INFINIX X5515-X557-X554-X606D-X609 بروابط سريعة


روم انفنكس INFINIX X5515-X557-X554-X606D-X609 بروابط سريعة

السلام عليكم ورحمة الله وبركاته 
أرحب بك أخي زائر مدونة احمد الحداد
واتمنى أن تكون في أتم الصحة والسلامة
وبعد موضوعنا في هذه التدوينة حول

روم انفنكس INFINIX X5515-X557-X554-X606D-X609 بروابط سريعة


فلاشة  INFINIX X5515


فلاشة INFINIX X554


فلاشة INFINIX X557


 BY DAALITECH


فلاشة  INFINIX X559


فلاشة  INFINIX X606D


فلاشة  INFINIX X609


روم انفنكس INFINIX X5515-X557-X554-X606D-X609 بروابط سريعة

فلاشات INFINIX X5515-X557-X554-X606D-X609

روم Infinix-X559C مجربه بنجاح


Infinix-X559C FIRMWARE


الروم مسحوبه بــ CM2 ومجربه بنجاح
تفاصيل الروم

Device Brand : Infinix
Device Model : Infinix-X559C
Device CPU : MT6580
Device IntName : H8015E
Device Version : 7.0
Device Compile : 15/11/2017 03:04:53 
Device Project : X559-H8015E-N-171115V3
Device ExtInfo : Infinix X559C

باسورد فك الضغط : Dev-Arab


رابط آخر لنفس الروم مجربة بنجاح


تفاصيلها

MT6580__INFINIX__Infinix_X559C__H8015E__Infinix-

X559C__X559-H8015E-N-171115V3__Android_7.0


Infinix X559-H8015AB-N-180326V147


CLICK HERE


روم Infinix-X559C مجربه بنجاح

What is the root and what are the benefits and harms

Root is a program that gives the user full powers to control the operating system where it can modify the operating system files or delete in the sense of the most complete control of the phone.
How To Root Samsung Galaxy M40 SM-M405F

Root features:
1-Modify or delete files or applications of the operating system.
2-Run programs that require root permissions.
3-Change the basic fonts within the Android system.
4-Move applications from device memory to external memory.
5-Installation of Custom rom.
6-Fix errors DRK and DM-Verity.

Cons of the root:
1-Loss of phone warranty.
2-Some applications do not work due to root (bluestacks root / dr fone root).
3-Stand on the company logo as a result of misuse.
4-The operating system crashed due to deletion or modification of important system files.


important warning:
  • Installation and use of the root android is entirely at your own risk and we do not take any responsibility for device failure.
  • In older versions of the Android system such as Jelly Bean and KitKat was using apps (kingroot / kingo root / framaroot / iroot root king / towelroot) To get root permissions either in new versions such as Lollipop, Marshmallow, Nougat, Pie and future versions of the Android system, these applications do not work.


What is the difference between SuperSU and Magisk

 VS 

The main difference between Magisk and SuperSU is how the root works on Android. Based on what the user wants to do.
We will first talk about supersu root how to get the root where it installs itself within the system files It changes the system files and adds new files to the system partition on the phone, but with the enhancement of Google to protect Android it has become difficult to do so that the amendment to the partition of the Android system to send an alert to applications that are trying to detect the presence of root.
Google SafetyNet monitors the operating system from any manipulation, and when it detects any manipulation in the Android operating system, most applications will not work and will not send you OTA updates.
What about Magisk is one of the most important features that does not touch system files, but modifies the boot partition instead so that it can trick safetyNet service and show that everything is normal and allows Magisk Manager to fully control the root settings.


Notes before root process

  • Charge the battery well before use.
  • Use the original USB cable that came with the device.
  • Use the laptop at work to avoid electricity problems.
  • You should focus well to protect the binary of your device.
  • The following protections must be disabled (FRP - OEM - RMM/KG) Follow the following article to learn How to Disbled FRP and OEM for device Samsung Galaxy.


Device information

-Brand Name: Samsung Galaxy
-Device Name: Galaxy M40
-Model: SM-M405F root
-Operating system: Android Pie or Q


Files required for root work

How To Root Galaxy M405F android Pie 9.0 / How To Root Galaxy M405F android Q 10

1-Download Drivers and flash Tool.
2-Install the drivers on your device.
3-Download Root File, The baseband version must match the version of the root file.
4-Open the EFTSU Flash Tool.
5-From the top, click on Select File and then choose the root file.
6-Boot your device into download mode prees Volume Down + Volume Up and connect the USB cable.
7-Press Flash to start.
8-After booting the device install EFTSU Manager app.
9-Then, from the EFTSU Flash tool, we click on Reboot ADB Device to Root Mode (Recovery mode).
10-When the boot is complete, Open the EFTSU Manager app to get the root.
11-You can check for root access through the root checker app.
12-In case you encounter any problems please feel free to contact us
13-If you want to unroot or revert to the offical firmware, you can flash new firmware.

How To Root Samsung Galaxy M40 SM-M405F