Halaman

    Social Items

اصلاح شبكة CDMA يومكس U693CL

حل مشكلة ابراج الشبكة وعدم الاتصال لهاتف يوماكس 

| UMX U693CL

كيفية اصلاح ابراج الشبكة


كل ماعليك تنزيل ملف اصلاح الشبكة اسفل المقال
بعدها قم باستخراج الملفات

الان كيفية اصلاح ابراج الشبكة 

قم بتفعيل خيارات
 usb 
من خيارات المطورين
بعدها قم بتشغيل اسكربت 
Diag.bat
 ستظهر رسالة تفعيل
 Diag 
على الهاتف والموافقه عليها
بعدها قم بتصفير الـ
 SPC 
بستخدام اسكربت
 MSL.bat
بعد التصفير قم بتشغيل برنامج
 QCN BackUP and Restor
قم بضغط على
 ReStore_NV
 ومن ثم اختار ملف
 1.qcn
fix network Cdma

بعد استعادة الملف الشبكة سيقوم البرنامج باطفاء الجهاز
الان قم بتشغيل الهاتف وتشغيل الاسكربت 
Diag.bat
 مره اخرى وتفعيل البورت
وقم بتشغيل برنامج
 QCN Backup and Restor
والضغط على
 Restore_NV 
وختار ملف
 UMX_U693CL.qcn
fix Network Cdma U693CL

وبذالك اصبح الجهاز جاهز واصلاح مشكلة ابراج الشبكة والاتصال


ملاحظه
 في تصفير الاسبيسي 
SPC
عند ربط الجهاز
 Diag 
يتعرف الهاتف بورتين
قم بايقاف البورت من 
Modems
 وتشغيل الاسكربت 
MSL.bat
 مره اخرى 
في بعض الاحيانا تحدث هذا المشكلة
Msl Spc U693CL

ايضا للعلم اسكربت تصفير لـ 
SPC
 يدعم جميع الهواتف الكوالكوم مقدم من 
ALABSI DEV
SPC ZTE
SPC ANS
SPC UMX

لتحميل ملف اصلاح مشكلة ابراج الشبكة والاتصال لـ  تحميل

قناة ALABSI DEV

حل مشكلة ابراج الشبكة وعدم الاتصال لهاتف | UMX U693CL

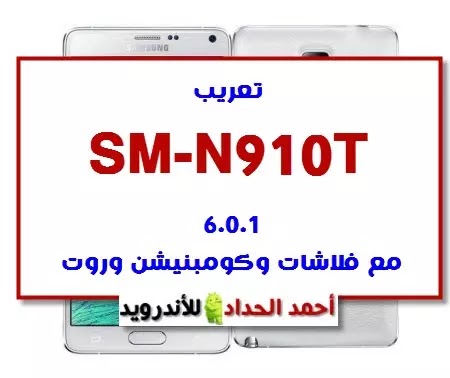
فلاشة عربي SM-N910T 6.0.1 مع روم رسمي وكومبنيشن وروت


SM-N910T 6.0.1 FIRMWARE-COMBINATION-ROOT

السلام عليكم ورحمة الله وبركاته
أرحب بك أخي زائر مدونة أحمد الحداد
واتمنى أن تكون في أتم الصحة والسلامة
وبعد موضوعنا في هذه التدوينة حول 

تعريب SM-N910T 6.0.1 مع فلاشات وكومبنيشن وروت

سيتم باذن الله نشر الروابط الصحيحة بعد خمسة ايام
منعا لسرقة المواضيع من قبل اصحاب المدونات الاخرى


فلاشة عربي SM-N910T 6.0.1 مع روم رسمي وكومبنيشن وروت

What is the root and what are the benefits and harms

Root is a program that gives the user full powers to control the operating system where it can modify the operating system files or delete in the sense of the most complete control of the phone.
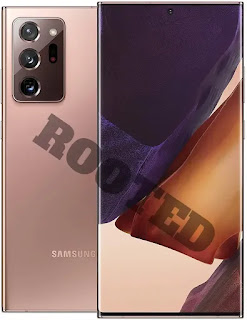
How To Root Samsung Galaxy Note 20 Ultra 5G SM-N9860

Root features:
1-Modify or delete files or applications of the operating system.
2-Run programs that require root permissions.
3-Change the basic fonts within the Android system.
4-Move applications from device memory to external memory.
5-Installation of Custom rom.
6-Fix errors DRK and DM-Verity.

Cons of the root:
1-Loss of phone warranty.
2-Some applications do not work due to root (bluestacks root / dr fone root).
3-Stand on the company logo as a result of misuse.
4-The operating system crashed due to deletion or modification of important system files.


important warning:
  • Installation and use of the root android is entirely at your own risk and we do not take any responsibility for device failure.
  • In older versions of the Android system such as Jelly Bean and KitKat was using apps (kingroot / kingo root / framaroot / iroot root king / towelroot) To get root permissions either in new versions such as Lollipop, Marshmallow, Nougat, Pie and future versions of the Android system, these applications do not work.


What is the difference between SuperSU and Magisk

 VS 

The main difference between Magisk and SuperSU is how the root works on Android. Based on what the user wants to do.
We will first talk about supersu root how to get the root where it installs itself within the system files It changes the system files and adds new files to the system partition on the phone, but with the enhancement of Google to protect Android it has become difficult to do so that the amendment to the partition of the Android system to send an alert to applications that are trying to detect the presence of root.
Google SafetyNet monitors the operating system from any manipulation, and when it detects any manipulation in the Android operating system, most applications will not work and will not send you OTA updates.
What about Magisk is one of the most important features that does not touch system files, but modifies the boot partition instead so that it can trick safetyNet service and show that everything is normal and allows Magisk Manager to fully control the root settings.


Notes before root process

  • Charge the battery well before use.
  • Use the original USB cable that came with the device.
  • Use the laptop at work to avoid electricity problems.
  • You should focus well to protect the binary of your device.
  • The following protections must be disabled (FRP - OEM - RMM/KG) Follow the following article to learn How to Disbled FRP and OEM for device Samsung Galaxy.


Device information

-Brand Name: Samsung Galaxy
-Device Name: Galaxy NOTE 20 Ultra 5G
-Model: SM-N9860 root
-Operating system: Android Q 10 and R 11


Files required for root work

How To Root Galaxy N9860 android Q 10 / How To Root Galaxy N9860 android R 11

1-Download Drivers and flash Tool.
2-Install the drivers on your device.
3-Download Root File, The baseband version must match the version of the root file.
4-Open the EFTSU Flash Tool.
5-From the top, click on Select File and then choose the root file.
6-Boot your device into download mode prees Volume Down + Volume Up and connect the USB cable.
7-Press Flash to start.
8-After booting the device install EFTSU Manager app.
9-Then, from the EFTSU Flash tool, we click on Reboot ADB Device to Root Mode (Recovery mode).
10-When the boot is complete, Open the EFTSU Manager app to get the root.
11-You can check for root access through the root checker app.
12-In case you encounter any problems please feel free to contact us
13-If you want to unroot or revert to the offical firmware, you can flash new firmware.

How To Root Samsung Galaxy Note 20 Ultra 5G SM-N9860

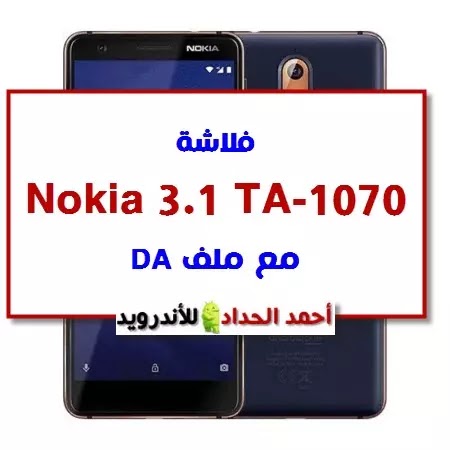
روم Nokia ta-1070 مع ملف DA


Nokia 3.1 ta-1070 ROM WITH DA FILE


مواصفات نوكيا 3.1


  • PLATFORM OS Android 8.0 (Oreo), upgradable to Android 10, Android One
  • Chipset Mediatek MT6750 (28 nm)
  • CPU Octa-core (4x1.5 GHz Cortex-A53 & 4x1.0 GHz Cortex-A53)
  • GPU Mali-T860MP2
  • NETWORK Technology GSM / HSPA / LTE
  • BODY Dimensions 146.3 x 68.7 x 8.7 mm (5.76 x 2.70 x 0.34 in)
  • Weight 138.3 g (4.87 oz)
  • Build Glass front (Gorilla Glass 3), plastic back, aluminum frame
  • SIM Dual SIM (Nano-SIM, dual stand-by)
  • Size 5.2 inches, 69.8 cm2 (~69.4% screen-to-body ratio)
  • Resolution 720 x 1440 pixels, 18:9 ratio (~310 ppi density)
  • Protection Corning Gorilla Glass 3
  • MEMORY Card slot microSDXC (dedicated slot)
  • Internal 16GB 2GB RAM, 32GB 2GB RAM, 32GB 3GB RAM eMMC 5.1
  • MAIN CAMERA Single 13 MP, f/2.0, AF
  • Features LED flash, HDR, panorama
  • Video 1080p@30fps
  • SELFIE CAMERA Single 8 MP, f/2.0
  • Features HDR
  • Video 720p@30fps
  • SOUND Loudspeaker Yes
  • 3.5mm jack Yes
  • COMMS WLAN Wi-Fi 802.11 a/b/g/n, dual-band, Wi-Fi Direct, hotspot
  • Bluetooth 4.2, A2DP, LE
  • GPS Yes, with A-GPS, GLONASS
  • NFC Yes (APAC & EMEA only)
  • Radio FM radio
  • USB microUSB 2.0, USB On-The-Go
  • FEATURES Sensors Accelerometer, gyro, proximity, compass
  • BATTERY Type Li-Ion 2990 mAh, non-removable
  • Talk time Up to 18 h (3G)
  • Music play Up to 84 h
  • MISC Colors :Blue/Copper, Black/Chrome, White/Iron
  • Models TA-1049, TA-1057, TA-1063, TA-1070, TA-1074


فلاشة Nokia 3.1 ta-1070


فلاشة مجربة وتحل مشاكل التعليق على الشعار والتهنيج

N-3.1-Essential-2_ES2-3180-0-00WW-B05

CLICK HERE


فلاشة نوكيا 3.1 بصيغة NB0


ES2-046E-0-00WW-B02.nb0


CLICK HERE


روم NOKIA 3.1


فلاشة كاملة تفاصيلها

ES2-2680-0-00WW-B02.full


CLICK HERE


فلاشة منقولة NOKIA 3.1


ES2-2590-0-00WW-B02_by_Kamesh

منقولة وغير مجربة


CLICK HERE


ملف DA نوكيا TA-1070


TA_1049_1070_NOKIA_3_1_LTE_DS_ES2 

CLICK HERE

مصدر الملف easyfirmware

روم Nokia ta-1070 مع ملف DA

What is the root and what are the benefits and harms

Root is a program that gives the user full powers to control the operating system where it can modify the operating system files or delete in the sense of the most complete control of the phone.
How To Root Samsung Galaxy Note 20 Ultra 5G SM-N986N

Root features:
1-Modify or delete files or applications of the operating system.
2-Run programs that require root permissions.
3-Change the basic fonts within the Android system.
4-Move applications from device memory to external memory.
5-Installation of Custom rom.
6-Fix errors DRK and DM-Verity.

Cons of the root:
1-Loss of phone warranty.
2-Some applications do not work due to root (bluestacks root / dr fone root).
3-Stand on the company logo as a result of misuse.
4-The operating system crashed due to deletion or modification of important system files.


important warning:
  • Installation and use of the root android is entirely at your own risk and we do not take any responsibility for device failure.
  • In older versions of the Android system such as Jelly Bean and KitKat was using apps (kingroot / kingo root / framaroot / iroot root king / towelroot) To get root permissions either in new versions such as Lollipop, Marshmallow, Nougat, Pie and future versions of the Android system, these applications do not work.


What is the difference between SuperSU and Magisk

 VS 

The main difference between Magisk and SuperSU is how the root works on Android. Based on what the user wants to do.
We will first talk about supersu root how to get the root where it installs itself within the system files It changes the system files and adds new files to the system partition on the phone, but with the enhancement of Google to protect Android it has become difficult to do so that the amendment to the partition of the Android system to send an alert to applications that are trying to detect the presence of root.
Google SafetyNet monitors the operating system from any manipulation, and when it detects any manipulation in the Android operating system, most applications will not work and will not send you OTA updates.
What about Magisk is one of the most important features that does not touch system files, but modifies the boot partition instead so that it can trick safetyNet service and show that everything is normal and allows Magisk Manager to fully control the root settings.


Notes before root process

  • Charge the battery well before use.
  • Use the original USB cable that came with the device.
  • Use the laptop at work to avoid electricity problems.
  • You should focus well to protect the binary of your device.
  • The following protections must be disabled (FRP - OEM - RMM/KG) Follow the following article to learn How to Disbled FRP and OEM for device Samsung Galaxy.


Device information

-Brand Name: Samsung Galaxy
-Device Name: Galaxy NOTE 20 Ultra 5G
-Model: SM-N986N root
-Operating system: Android Q 10 and R 11


Files required for root work

How To Root Galaxy N986N android Q 10 / How To Root Galaxy N986N android R 11

1-Download Drivers and flash Tool.
2-Install the drivers on your device.
3-Download Root File, The baseband version must match the version of the root file.
4-Open the EFTSU Flash Tool.
5-From the top, click on Select File and then choose the root file.
6-Boot your device into download mode prees Volume Down + Volume Up and connect the USB cable.
7-Press Flash to start.
8-After booting the device install EFTSU Manager app.
9-Then, from the EFTSU Flash tool, we click on Reboot ADB Device to Root Mode (Recovery mode).
10-When the boot is complete, Open the EFTSU Manager app to get the root.
11-You can check for root access through the root checker app.
12-In case you encounter any problems please feel free to contact us
13-If you want to unroot or revert to the offical firmware, you can flash new firmware.

How To Root Samsung Galaxy Note 20 Ultra 5G SM-N986N

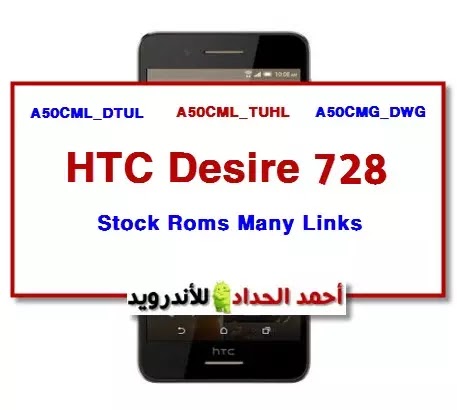
فلاشة HTC Desire 728 بعدة روابط


HTC Desire 728 Stock Roms


IF  ANY MEGA LINKS NEEDS KEY 

DOWNLOAD FROM HERE


HTC DRIVERS


HTC Desire 728 Stock Roms


A50CML_DTUL


A50CML_TUHL


A50CMG_DWG


فلاشة HTC Desire 728 بعدة روابط

تعريب SM-N910T 6.0.1 مع فلاشات وكومبنيشن وروت


SM-N910T 6.0.1 FIRMWARE-COMBINATION-ROOT

السلام عليكم ورحمة الله وبركاته
أرحب بك أخي زائر مدونة أحمد الحداد
واتمنى أن تكون في أتم الصحة والسلامة
وبعد موضوعنا في هذه التدوينة حول 

تعريب SM-N910T 6.0.1 مع فلاشات وكومبنيشن وروت


تعريب SM-N910T 6.0.1 مع فلاشات وكومبنيشن وروت

فلاشة Nokia 3.1 ta-1070 مع ملف DA


Nokia 3.1 ta-1070 ROM WITH DA FILE


مواصفات نوكيا 3.1


  • PLATFORM OS Android 8.0 (Oreo), upgradable to Android 10, Android One
  • Chipset Mediatek MT6750 (28 nm)
  • CPU Octa-core (4x1.5 GHz Cortex-A53 & 4x1.0 GHz Cortex-A53)
  • GPU Mali-T860MP2
  • NETWORK Technology GSM / HSPA / LTE
  • BODY Dimensions 146.3 x 68.7 x 8.7 mm (5.76 x 2.70 x 0.34 in)
  • Weight 138.3 g (4.87 oz)
  • Build Glass front (Gorilla Glass 3), plastic back, aluminum frame
  • SIM Dual SIM (Nano-SIM, dual stand-by)
  • Size 5.2 inches, 69.8 cm2 (~69.4% screen-to-body ratio)
  • Resolution 720 x 1440 pixels, 18:9 ratio (~310 ppi density)
  • Protection Corning Gorilla Glass 3
  • MEMORY Card slot microSDXC (dedicated slot)
  • Internal 16GB 2GB RAM, 32GB 2GB RAM, 32GB 3GB RAM eMMC 5.1
  • MAIN CAMERA Single 13 MP, f/2.0, AF
  • Features LED flash, HDR, panorama
  • Video 1080p@30fps
  • SELFIE CAMERA Single 8 MP, f/2.0
  • Features HDR
  • Video 720p@30fps
  • SOUND Loudspeaker Yes
  • 3.5mm jack Yes
  • COMMS WLAN Wi-Fi 802.11 a/b/g/n, dual-band, Wi-Fi Direct, hotspot
  • Bluetooth 4.2, A2DP, LE
  • GPS Yes, with A-GPS, GLONASS
  • NFC Yes (APAC & EMEA only)
  • Radio FM radio
  • USB microUSB 2.0, USB On-The-Go
  • FEATURES Sensors Accelerometer, gyro, proximity, compass
  • BATTERY Type Li-Ion 2990 mAh, non-removable
  • Talk time Up to 18 h (3G)
  • Music play Up to 84 h
  • MISC Colors :Blue/Copper, Black/Chrome, White/Iron
  • Models TA-1049, TA-1057, TA-1063, TA-1070, TA-1074


فلاشة Nokia 3.1 ta-1070


فلاشة مجربة وتحل مشاكل التعليق على الشعار والتهنيج

N-3.1-Essential-2_ES2-3180-0-00WW-B05

CLICK HERE


فلاشة نوكيا 3.1 بصيغة NB0


ES2-046E-0-00WW-B02.nb0


CLICK HERE


روم NOKIA 3.1


فلاشة كاملة تفاصيلها

ES2-2680-0-00WW-B02.full


CLICK HERE


فلاشة منقولة NOKIA 3.1


ES2-2590-0-00WW-B02_by_Kamesh

منقولة وغير مجربة


CLICK HERE


ملف DA نوكيا TA-1070


TA_1049_1070_NOKIA_3_1_LTE_DS_ES2 

CLICK HERE

مصدر الملف easyfirmware

PASS=  AHMED_HADDAD


فلاشة Nokia 3.1 ta-1070 مع ملف DA

بكل تأكيد يتسائل البعض ما هي فائدة تعريفنا بالواتس اب وهل نحن نعرفه جيداً؟! والاجابه بكل ثقه "نعم". ولكن هذه الفقرة لمن لم يتعامل مع واتس اب من قبل ولا علم له بفائدته وقد تفيدك أنت أيضاً، تطبيق واتس اب أو خدمة واتس اب بشكل عام هي خدمة للمحادثات النصية “الشات” وقد حصلت هذه الخدمة على ترويج كبير مع إنطلاق نظام الأندرويد الذي مهد الطريق لشهرة هذا التطبيق وهذه الخدمة الرائعه.

موضوع اليوم هو عن تنزيل واتس اب لجميع الهواتف والاجهزة والأنظمة المختلفة، لأن واتس اب يعتبر الأن من أشهر خدمات الشات والماسنجر على مستوى العالم وهناك الملايين ويمكن المليارات من المستخدمين يبحثون عنه وبالتحديد يبحثون عن تنزيل واتس اب لأنظمة معينة مثل الويندوز، وقد تكون هذه عملية صعبة على البعض منكم لذلك قررنا عمل موضوع كامل لتحميل واتس اب بكل النُسخ المناسبة لجميع الاجهزة والأنظمة المدعومة من قبل الشركة المطورة للبرنامج.

فيما يلي سوف اوفر لكم تعريف سريع بكل نسخة من طبيق واتساب لجميع الاجهزه مع عرض لمميزاتها مع رابط تحميل مباشر اسفل الموضوع.


تنزيل برنامج واتساب للاندرويد:


حيث أصبح واتس اب هو التطبيق الرسمي والاساسي على شريحة كبيرة من كل مستخدمين هواتف الأندرويد ومع وتطور الحياه اصبحت الهواتف الذكية لا غني عنها، وأصبح هو تطبيق الشات رقم 1 في العالم وبفارق كبير عن كل منافسيه.

وتم الإستحواذ عليه من قبل شركة فيس بوك، وضمته إليها مع مراعاة التطوير. ومن وقتها حصل على العديد من التعديلات والتحسينات إلى أن وصل إلى شكله الحالي بعدد مستخدمين قد تخطي المليار مستخدم قامو بـ تنزيل برنامج واتس اب.

بإختصار برنامج واتس اب هو عبارة عن خدمة تمكنك من التواصل مع الناس من مختلف أنحاء العالم عبر الإنترنت وذلك من خلال عدة طرق وهي المحادثات النصية وإدأيضاً مكالمات الفيديو والمكالمات الصوتية كما يضم عدد كبير من مزايا أخرى وضحناها في مقالات سابقة يمكنك الرجوع إليها.

أدى الإنتشار الكبير لتطبيق واتس اب إلى أهتمام الشركة بالأنظمة المختلفة وهذا ما جعل إمكانية تنزيل برنامج واتس اب متاح لجميع الأجهزة تقريباً، فإذا كنت لا تعرف ما هي الأجهزة المدعومة التي يمكنك تنزيل واتس اب وإستخدامه عليها فهذه قائمة بأهم الأنظمة والأجهزة مع روابط التحميل.

تنزيل برنامج واتس اب للكمبيوتر:


لم تكن نسخة الكمبيوتر من برنامج واتس اب متوفرة لفترة طويلة، وذلك بسبب عدم أهتمام الشركة المختصه بهذه المنصة في البداية ولكن مع إنتشار التطبيق بشكل أكبر كان لابد من إطلاق نسخة جديده خاصة بأجهزة الكمبيوتر التي تعمل بنظام ال ويندوز،

حيث أصبح بإمكانك الأن إستخدام تطبيق الواتس اب على الكمبيوتر بكل سهولة عن طريق تحميل هذا البرنامج وهو مناسب لكل إصدارات ويندوز المختلفة بداية من ويندوز إلى أكس بي ومرواً بـ ويندوز 7 وإنتهاءً بـ ويندوز 10 كما يدعم البرنامج كل من النواتين 32 بت و 64 بت، لذلك فهو مناسب لجهاز الكمبيوتر واللابتوب بشكل عام مهما أختلفت المواصفات والعتاد.

بشكل عام يعتبر برنامج واتس اب للكمبيوتر من البرامج الخفيفة التي يمكنك تشغيلها على جهازك بحيث لا يحتاج البرنامج لعتاد قوي حتى يعمل بأفضل صورة ممكنة.

معلومات التطبيق:


الإصدار: اخر إصدار
السعر: مجانا علي موقع عالم البرامج
الإنشاء: 18 اكتوبر 2010

تنزيل برنامج WhatsApp اخر اصدار:


الان يمكنك تحميل تطبيق WhatsApp للاندرويد من متجر جوجل بلاي، أو تحميله مباشرةً إلى هاتفك أو إلى جهاز الكمبيوتر بصيغة APK بدون الحاجة إلى متجر قوقل بلاي. 

كل ما عليك فعله ان تقم بالذهاب الى متجر قوقل بلاى وفي خانة البحث؛ قم بكتابة اسم التطبيق “WhatsApp“. بمجرد ظهور اسم التطبيق في نتائج البحث، اضغط على زر “تثبيت“. او يمكنك الذهاب مباشرةً إلى صفحة تحميل التطبيق من متجر قوقل بلاي من هنـا.


كما يمكنك تحميل تطبيق WhatsApp لجميع الاجهزه مباشرةً إلى هاتفك أو إلى جهاز الكمبيوتر بصيغة APK من خلال روابط التحميل المقابله.


في النهاية، أتمنى أن تكون وجدت في هذا الموضوع ما تبحث عنه، واكون قد ساعدك في شرح و تنزيل برنامج واتس اب WhatsApp اخر اصدار للكمبيوتر و جميع الاجهزه، ومعرفة أهم المميزات الخاصه به.


Thanks for reading

تنزيل برنامج WhatsApp اخر تحديث

فلاشة OPPO F9 مع ملف DA مع تخطي حساب جوجل وفك القفل


فلاشة OPPO F9 مع ملف DA وتخطي حساب جوجل
السلام عليكم ورحمة الله وبركاته أحبائي زوار مدونة أحمد الحداد للأندرويد والتكنولوجيا
سنتحدث في هذا الموضوع عن جهاز اوبو اف 9 الجهاز الخارق بمواصفاته القوية  وهو من الهواتف المنتشرة بكثرة في مصر ودول الخليج  وسنعرض عليكم مجموعة فلاشات رسمية مجربة.

رومات حديث لهاتف  OPPO F9 CPH1823 firmware pro


اليك عدة روابط من الموقع الرسمي يمكن استعراضها كالتالي:-

 الفلاشة الأولى


الفلاشة الثانية


فلاشه  ثالثة


فلاشة  رابعة


الفلاشه الخامسة  download flash firmware


تحميل الفلاشه الرسمية سادسة OPPO firmware


فلاشات هواتف اوبو التي عرضناها  يفوق حجم كل واحده منها واحد جيجا تم تفليشها بنجاح  و تحل مشكلة تهنيج  الهاتف و حل مشكلة بطئ هاتفك يتم تفليشها عبر برنامج تفليش أجهزة أوبو المعروف.

 OPPO F9  FIX DEAD BOOT FIRMWARE


وهي روم مختصة لاحياء الهاتف بعد التفليش الخاطي. هاتف أوبو يحتاج للحذر اثناء اختيار الرومه ( FILE FLASH ) حيث يجب مراعاة فيرجن الحماية وترتيب تحديث النظام كذلك الروم يجب أن تكون رسمية (OPPO  STOCK ROM OFFICIAL) ويجب تنزيلها اما من الموقع الرسمي او يتم تحميل ملف فلاش الهاتف من مصادر موثوقة مجربة وذلك منعا لحدوث مشكلة موت الجوال Bricked. كذلك ننوه ان اغلب مشاكل سوفت وير هو عدم تثبيت تعريفات صحيحة تناسب موديل الجوال USB DRIVER FOR DEVICE. وبعض الفنيين يستخدمون فلاشات CLONE وهذا امر غير صحيح يجب الاعتماد في عمل السوفت وير على ملفات سكاتر لانها أضمن وأفضل.

لذا سنقدم للفنيين فلاشة لجهاز OPPO مجربة ونجحت في تشغيل الهاتف بعد حدوث مشكلة تعطل الهاتف بالتفليش الخاطي. 

تفاصيل الرومة المسحوبة من قبل الاخ العزيز جرجس
  • OPPO CPH1823 MTK6771 FIRWARE GIRGIS
  • إصدار الأندرويد Android 9.
  • الحجم: 84 ميجا بايت .
  • يحتوى ملف فلاشة اوبو المسحوبه تحتوي قطاع user data وملف frp  تفيد لاحياء الجهاز وتخطي حساب جوجل.

OPPO F9 FIX DEAD BOOT AND BYPASS SCREAN LOCK AND FRP


رابط تنزيل فلاشة بصيغة سكاتر SCATTER FILE حمله من هنا


تنزيل ملف DA  DOWNLOAD AGENT  لـ OPPO CPHEX


الملف مجرب في تفليش الجوال حيث يتم تركيب DA  باستخدام  SP FLASH TOOL بدون مشاكل ويستخدم ايضا لحذف قفل الشاشة unlock pattern code تحميل من هنا

باسورد فك الضغط  AHMED_HADDAD


شرح كيفيه تخطي حساب جوجل OPPO F9 Google Account Bypass


اليك الفيديو فيه شرح التيست بوينت OPPO F9 TEST POINT
https://youtu.be/SS7xi1qp3NY


شرح خطوات طريقة ازالة قفل الشاشة  remove  lock pattern  و تخطي حساب جوجل على دونجل MRT


https://youtu.be/gA0OxSVC3Ms


حمل   MRT Tools  من هنا بشكل مجاني FREE

فلاشة OPPO F9 مع ملف DA مع تخطي حساب جوجل وفك القفل

فلاشات OPPO بأحدث الاصدارات