Halaman

    Social Items

What is the root and what are the benefits and harms

Root is a program that gives the user full powers to control the operating system where it can modify the operating system files or delete in the sense of the most complete control of the phone.
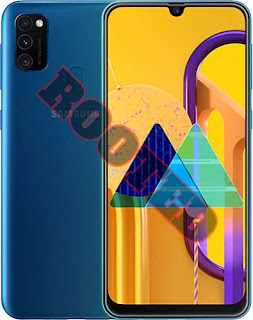
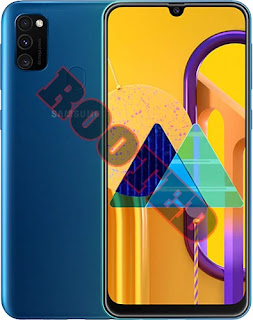
How To Root Samsung Galaxy M30s SM-M3070

Root features:
1-Modify or delete files or applications of the operating system.
2-Run programs that require root permissions.
3-Change the basic fonts within the Android system.
4-Move applications from device memory to external memory.
5-Installation of Custom rom.
6-Fix errors DRK and DM-Verity.

Cons of the root:
1-Loss of phone warranty.
2-Some applications do not work due to root (bluestacks root / dr fone root).
3-Stand on the company logo as a result of misuse.
4-The operating system crashed due to deletion or modification of important system files.


important warning:
  • Installation and use of the root android is entirely at your own risk and we do not take any responsibility for device failure.
  • In older versions of the Android system such as Jelly Bean and KitKat was using apps (kingroot / kingo root / framaroot / iroot root king / towelroot) To get root permissions either in new versions such as Lollipop, Marshmallow, Nougat, Pie and future versions of the Android system, these applications do not work.


What is the difference between SuperSU and Magisk

 VS 

The main difference between Magisk and SuperSU is how the root works on Android. Based on what the user wants to do.
We will first talk about supersu root how to get the root where it installs itself within the system files It changes the system files and adds new files to the system partition on the phone, but with the enhancement of Google to protect Android it has become difficult to do so that the amendment to the partition of the Android system to send an alert to applications that are trying to detect the presence of root.
Google SafetyNet monitors the operating system from any manipulation, and when it detects any manipulation in the Android operating system, most applications will not work and will not send you OTA updates.
What about Magisk is one of the most important features that does not touch system files, but modifies the boot partition instead so that it can trick safetyNet service and show that everything is normal and allows Magisk Manager to fully control the root settings.


Notes before root process

  • Charge the battery well before use.
  • Use the original USB cable that came with the device.
  • Use the laptop at work to avoid electricity problems.
  • You should focus well to protect the binary of your device.
  • The following protections must be disabled (FRP - OEM - RMM/KG) Follow the following article to learn How to Disbled FRP and OEM for device Samsung Galaxy.


Device information

-Brand Name: Samsung Galaxy
-Device Name: Galaxy M30s
-Model: SM-M3070 root
-Operating system: Android Pie and Q


Files required for root work

How To Root Galaxy M3070 android Pie 9.0 / How To Root Galaxy M3070 android Q 10

1-Download Drivers and flash Tool.
2-Install the drivers on your device.
3-Download Root File, The baseband version must match the version of the root file.
4-Open the EFTSU Flash Tool.
5-From the top, click on Select File and then choose the root file.
6-Boot your device into download mode prees Volume Down + Volume Up and connect the USB cable.
7-Press Flash to start.
8-After booting the device install EFTSU Manager app.
9-Then, from the EFTSU Flash tool, we click on Reboot ADB Device to Root Mode (Recovery mode).
10-When the boot is complete, Open the EFTSU Manager app to get the root.
11-You can check for root access through the root checker app.
12-In case you encounter any problems please feel free to contact us
13-If you want to unroot or revert to the offical firmware, you can flash new firmware.
How To Root Samsung Galaxy M30s SM-M3070

What is the root and what are the benefits and harms

Root is a program that gives the user full powers to control the operating system where it can modify the operating system files or delete in the sense of the most complete control of the phone.
How To Root Samsung Galaxy M30s SM-M307FN

Root features:
1-Modify or delete files or applications of the operating system.
2-Run programs that require root permissions.
3-Change the basic fonts within the Android system.
4-Move applications from device memory to external memory.
5-Installation of Custom rom.
6-Fix errors DRK and DM-Verity.

Cons of the root:
1-Loss of phone warranty.
2-Some applications do not work due to root (bluestacks root / dr fone root).
3-Stand on the company logo as a result of misuse.
4-The operating system crashed due to deletion or modification of important system files.


important warning:
  • Installation and use of the root android is entirely at your own risk and we do not take any responsibility for device failure.
  • In older versions of the Android system such as Jelly Bean and KitKat was using apps (kingroot / kingo root / framaroot / iroot root king / towelroot) To get root permissions either in new versions such as Lollipop, Marshmallow, Nougat, Pie and future versions of the Android system, these applications do not work.


What is the difference between SuperSU and Magisk

 VS 

The main difference between Magisk and SuperSU is how the root works on Android. Based on what the user wants to do.
We will first talk about supersu root how to get the root where it installs itself within the system files It changes the system files and adds new files to the system partition on the phone, but with the enhancement of Google to protect Android it has become difficult to do so that the amendment to the partition of the Android system to send an alert to applications that are trying to detect the presence of root.
Google SafetyNet monitors the operating system from any manipulation, and when it detects any manipulation in the Android operating system, most applications will not work and will not send you OTA updates.
What about Magisk is one of the most important features that does not touch system files, but modifies the boot partition instead so that it can trick safetyNet service and show that everything is normal and allows Magisk Manager to fully control the root settings.


Notes before root process

  • Charge the battery well before use.
  • Use the original USB cable that came with the device.
  • Use the laptop at work to avoid electricity problems.
  • You should focus well to protect the binary of your device.
  • The following protections must be disabled (FRP - OEM - RMM/KG) Follow the following article to learn How to Disbled FRP and OEM for device Samsung Galaxy.


Device information

-Brand Name: Samsung Galaxy
-Device Name: Galaxy M30s
-Model: SM-M307FN root
-Operating system: Android Pie and Q


Files required for root work

How To Root Galaxy M307FN android Pie 9.0 / How To Root Galaxy M307FN android Q 10

1-Download Drivers and flash Tool.
2-Install the drivers on your device.
3-Download Root File, The baseband version must match the version of the root file.
4-Open the EFTSU Flash Tool.
5-From the top, click on Select File and then choose the root file.
6-Boot your device into download mode prees Volume Down + Volume Up and connect the USB cable.
7-Press Flash to start.
8-After booting the device install EFTSU Manager app.
9-Then, from the EFTSU Flash tool, we click on Reboot ADB Device to Root Mode (Recovery mode).
10-When the boot is complete, Open the EFTSU Manager app to get the root.
11-You can check for root access through the root checker app.
12-In case you encounter any problems please feel free to contact us
13-If you want to unroot or revert to the offical firmware, you can flash new firmware.

How To Root Samsung Galaxy M30s SM-M307FN

What is the root and what are the benefits and harms

Root is a program that gives the user full powers to control the operating system where it can modify the operating system files or delete in the sense of the most complete control of the phone.
How To Root Samsung Galaxy M30s SM-M307F

Root features:
1-Modify or delete files or applications of the operating system.
2-Run programs that require root permissions.
3-Change the basic fonts within the Android system.
4-Move applications from device memory to external memory.
5-Installation of Custom rom.
6-Fix errors DRK and DM-Verity.

Cons of the root:
1-Loss of phone warranty.
2-Some applications do not work due to root (bluestacks root / dr fone root).
3-Stand on the company logo as a result of misuse.
4-The operating system crashed due to deletion or modification of important system files.


important warning:
  • Installation and use of the root android is entirely at your own risk and we do not take any responsibility for device failure.
  • In older versions of the Android system such as Jelly Bean and KitKat was using apps (kingroot / kingo root / framaroot / iroot root king / towelroot) To get root permissions either in new versions such as Lollipop, Marshmallow, Nougat, Pie and future versions of the Android system, these applications do not work.


What is the difference between SuperSU and Magisk

 VS 

The main difference between Magisk and SuperSU is how the root works on Android. Based on what the user wants to do.
We will first talk about supersu root how to get the root where it installs itself within the system files It changes the system files and adds new files to the system partition on the phone, but with the enhancement of Google to protect Android it has become difficult to do so that the amendment to the partition of the Android system to send an alert to applications that are trying to detect the presence of root.
Google SafetyNet monitors the operating system from any manipulation, and when it detects any manipulation in the Android operating system, most applications will not work and will not send you OTA updates.
What about Magisk is one of the most important features that does not touch system files, but modifies the boot partition instead so that it can trick safetyNet service and show that everything is normal and allows Magisk Manager to fully control the root settings.


Notes before root process

  • Charge the battery well before use.
  • Use the original USB cable that came with the device.
  • Use the laptop at work to avoid electricity problems.
  • You should focus well to protect the binary of your device.
  • The following protections must be disabled (FRP - OEM - RMM/KG) Follow the following article to learn How to Disbled FRP and OEM for device Samsung Galaxy.


Device information

-Brand Name: Samsung Galaxy
-Device Name: Galaxy M30s
-Model: SM-M307F root
-Operating system: Android Pie and Q


Files required for root work

How To Root Galaxy M307F android Pie 9.0 / How To Root Galaxy M307F android Q 10

1-Download Drivers and flash Tool.
2-Install the drivers on your device.
3-Download Root File, The baseband version must match the version of the root file.
4-Open the EFTSU Flash Tool.
5-From the top, click on Select File and then choose the root file.
6-Boot your device into download mode prees Volume Down + Volume Up and connect the USB cable.
7-Press Flash to start.
8-After booting the device install EFTSU Manager app.
9-Then, from the EFTSU Flash tool, we click on Reboot ADB Device to Root Mode (Recovery mode).
10-When the boot is complete, Open the EFTSU Manager app to get the root.
11-You can check for root access through the root checker app.
12-In case you encounter any problems please feel free to contact us
13-If you want to unroot or revert to the offical firmware, you can flash new firmware.

How To Root Samsung Galaxy M30s SM-M307F

What is the root and what are the benefits and harms

Root is a program that gives the user full powers to control the operating system where it can modify the operating system files or delete in the sense of the most complete control of the phone.
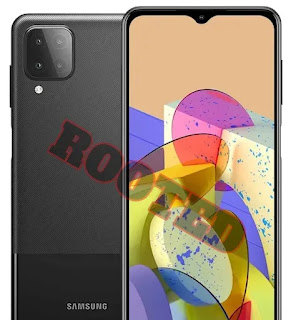
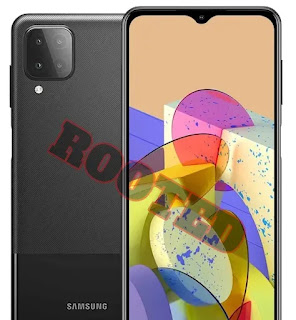
How To Root Samsung Galaxy M12 SM-M127G

Root features:
1-Modify or delete files or applications of the operating system.
2-Run programs that require root permissions.
3-Change the basic fonts within the Android system.
4-Move applications from device memory to external memory.
5-Installation of Custom rom.
6-Fix errors DRK and DM-Verity.

Cons of the root:
1-Loss of phone warranty.
2-Some applications do not work due to root (bluestacks root / dr fone root).
3-Stand on the company logo as a result of misuse.
4-The operating system crashed due to deletion or modification of important system files.


important warning:
  • Installation and use of the root android is entirely at your own risk and we do not take any responsibility for device failure.
  • In older versions of the Android system such as Jelly Bean and KitKat was using apps (kingroot / kingo root / framaroot / iroot root king / towelroot) To get root permissions either in new versions such as Lollipop, Marshmallow, Nougat, Pie and future versions of the Android system, these applications do not work.


What is the difference between SuperSU and Magisk

 VS 

The main difference between Magisk and SuperSU is how the root works on Android. Based on what the user wants to do.
We will first talk about supersu root how to get the root where it installs itself within the system files It changes the system files and adds new files to the system partition on the phone, but with the enhancement of Google to protect Android it has become difficult to do so that the amendment to the partition of the Android system to send an alert to applications that are trying to detect the presence of root.
Google SafetyNet monitors the operating system from any manipulation, and when it detects any manipulation in the Android operating system, most applications will not work and will not send you OTA updates.
What about Magisk is one of the most important features that does not touch system files, but modifies the boot partition instead so that it can trick safetyNet service and show that everything is normal and allows Magisk Manager to fully control the root settings.


Notes before root process

  • Charge the battery well before use.
  • Use the original USB cable that came with the device.
  • Use the laptop at work to avoid electricity problems.
  • You should focus well to protect the binary of your device.
  • The following protections must be disabled (FRP - OEM - RMM/KG) Follow the following article to learn How to Disbled FRP and OEM for device Samsung Galaxy.


Device information

-Brand Name: Samsung Galaxy
-Device Name: Galaxy M12
-Model: SM-M127G root
-Operating system: Android R


Files required for root work

How To Root Galaxy M127G android R 11

1-Download Drivers and flash Tool.
2-Install the drivers on your device.
3-Download Root File, The baseband version must match the version of the root file.
4-Open the EFTSU Flash Tool.
5-From the top, click on Select File and then choose the root file.
6-Boot your device into download mode prees Volume Down + Volume Up and connect the USB cable.
7-Press Flash to start.
8-After booting the device install EFTSU Manager app.
9-Then, from the EFTSU Flash tool, we click on Reboot ADB Device to Root Mode (Recovery mode).
10-When the boot is complete, Open the EFTSU Manager app to get the root.
11-You can check for root access through the root checker app.
12-In case you encounter any problems please feel free to contact us
13-If you want to unroot or revert to the offical firmware, you can flash new firmware.

How To Root Samsung Galaxy M12 SM-M127G

What is the root and what are the benefits and harms

Root is a program that gives the user full powers to control the operating system where it can modify the operating system files or delete in the sense of the most complete control of the phone.
How To Root Samsung Galaxy M12 SM-M127F

Root features:
1-Modify or delete files or applications of the operating system.
2-Run programs that require root permissions.
3-Change the basic fonts within the Android system.
4-Move applications from device memory to external memory.
5-Installation of Custom rom.
6-Fix errors DRK and DM-Verity.

Cons of the root:
1-Loss of phone warranty.
2-Some applications do not work due to root (bluestacks root / dr fone root).
3-Stand on the company logo as a result of misuse.
4-The operating system crashed due to deletion or modification of important system files.


important warning:
  • Installation and use of the root android is entirely at your own risk and we do not take any responsibility for device failure.
  • In older versions of the Android system such as Jelly Bean and KitKat was using apps (kingroot / kingo root / framaroot / iroot root king / towelroot) To get root permissions either in new versions such as Lollipop, Marshmallow, Nougat, Pie and future versions of the Android system, these applications do not work.


What is the difference between SuperSU and Magisk

 VS 

The main difference between Magisk and SuperSU is how the root works on Android. Based on what the user wants to do.
We will first talk about supersu root how to get the root where it installs itself within the system files It changes the system files and adds new files to the system partition on the phone, but with the enhancement of Google to protect Android it has become difficult to do so that the amendment to the partition of the Android system to send an alert to applications that are trying to detect the presence of root.
Google SafetyNet monitors the operating system from any manipulation, and when it detects any manipulation in the Android operating system, most applications will not work and will not send you OTA updates.
What about Magisk is one of the most important features that does not touch system files, but modifies the boot partition instead so that it can trick safetyNet service and show that everything is normal and allows Magisk Manager to fully control the root settings.


Notes before root process

  • Charge the battery well before use.
  • Use the original USB cable that came with the device.
  • Use the laptop at work to avoid electricity problems.
  • You should focus well to protect the binary of your device.
  • The following protections must be disabled (FRP - OEM - RMM/KG) Follow the following article to learn How to Disbled FRP and OEM for device Samsung Galaxy.


Device information

-Brand Name: Samsung Galaxy
-Device Name: Galaxy M12
-Model: SM-M127F root
-Operating system: Android R


Files required for root work

How To Root Galaxy M127F android R 11

1-Download Drivers and flash Tool.
2-Install the drivers on your device.
3-Download Root File, The baseband version must match the version of the root file.
4-Open the EFTSU Flash Tool.
5-From the top, click on Select File and then choose the root file.
6-Boot your device into download mode prees Volume Down + Volume Up and connect the USB cable.
7-Press Flash to start.
8-After booting the device install EFTSU Manager app.
9-Then, from the EFTSU Flash tool, we click on Reboot ADB Device to Root Mode (Recovery mode).
10-When the boot is complete, Open the EFTSU Manager app to get the root.
11-You can check for root access through the root checker app.
12-In case you encounter any problems please feel free to contact us
13-If you want to unroot or revert to the offical firmware, you can flash new firmware.
How To Root Samsung Galaxy M12 SM-M127F

من المؤكد انك من أحد مستخدمي الهواتف الذكيه الذين يبحثون عن أفضل تطبيقات الأندرويد المدفوعه او التطبيقات المجانيه، وفي هذا المقال سنتحدث عن افضل تطبيق عرض شاشة الهاتف علي التلفاز النسخه المدفوعه للأندرويد،

حيث أن العديد من مستخدمي هواتف الأندرويد يبحثون عن تطبيقات تدعم خاصية مشاركة شاشة الهاتف مع التلفاز والمعروفة بـ Screen Stream Mirroring Pro والتي تتيح لك عرض ما يدور على شاشة هاتفك ومشاركته على شاشة التلفاز. 

واليوم أشارك معك أحد أشهر وأفضل هذه التطبيقات على الإطلاق والذي وصل عدد مستخدميه لأكثر من 15 مليون مستخدم حول العالم، وحصل على العديد من التعليقات والتقييمات الإيجابية؛ الأمر الذي جعله التطبيق الافضل.


بكل ثقه هذا البرنامج لم يتم اختياره اختيار عشوائي، ولكن تم اختياره بناءً على عدد الجوائز والتقييمات والتعليقات الإيجابية التي حصل عليها، لانه حقا افضل تطبيق عرض شاشة الهاتف علي التلفاز، وكذلك مدى شعبيته وعدد مرات تثبيته، ولذلك فإن العديد من مستخدمي الأندرويد يعتبرون هذا التطبيق أحد أفضل تطبيقات الأندرويد Screen Stream Mirroring Pro.


برنامج Screen Stream Mirroring Pro النسخه المدفوعه اخر اصدار للأندرويد سوف تجد العديد من المستخدمين يقومون عنه، وذلك لأن هذه النوعية من البرامج توفر العديد من المزايا التي يحتاجها اشخاص كثيره من مستخدمي نظام الأندرويد، وذلك مثل عرض شاشة هاتفك على التلفاز، وتشغيل ملفات الموسيقى والافلام والالعاب على التلفاز من هاتفك.


تطبيق Screen Mirror Pro هو أحد أفضل التطبيقات المجانية لخاصية Screen Mirroring على نظام الأندرويد، حيث أنه يساعد المستخدمين في عرض شاشة الهاتف على التلفاز في الوقت الفعلي باستخدام شبكات الواي فاي.


تطبيق  Screen Mirror Pro يعتبر أفضل تطبيق لمشاركة شاشة الهاتف على التلفاز للأندرويد، ولقد أصبح هذا التطبيق أحد المنافسين الأكثر شعبيه للعديد من التطبيقات الأخرى في هذا التخصص.


هناك عدة أمور يمكنك الإستفادة منها عندما تقوم بتحميل تطبيق Screen Mirror Pro، وسوف تري بعضها في الفقره التالية:

  • يمكنك من خلال التطبيق عرض ما يدور على شاشة هاتفك على التلفاز.
  • يمكنك عرض مقاطع الفيديو الموجودة على هاتفك على شاشة التلفاز.
  • يمكنك تشغيل مقاطع صوتية من هاتفك وسامعها على التلفاز.
  • التطبيق يدعم العديد من الأجهزة التي تحتوي على ميزة اتصال الواي فاي مثل أجهزة التلفاز واللابتوب.
  • يمكنك التحكم في دقة عرض الفيديو على الشاشة من خلال التطبيق.
  • يمكنك عرض جميع ما يدور على هاتفك على التلفاز والتحكم به بشكل كامل.
  • التطبيق يساعدك في الحفاظ على بطارية هاتفك أثناء مشاركةا لشاشة.


يحتوي هذا التطبيق على العديد من المزايا التي جعلته يحظى بشهرة وشعبية كبيره بين مستخدمي نظام الأندرويد، وهذه المميزات ساعدته لكي يكون أحد أهم وأفضل تطبيقات الأندرويد على متجر قوقل بلاي، والتي تساعد المستخدمين في مشاركة شاشة الهاتف على شاشة الأجهزة الأخرى، وفيما يلي سأشرح لك كيفية تحميل تطبيق Screen Mirror Pro النسخه المدفوعه للاندرويد، واهم المميزات الخاصه به، ويمكنك تحميل تطبيق Screen Mirror Pro اخر اصدار للاندرويد بصيغة apk رابط مباشر من لينك التحميل في اخر التدوينه.


أهم مميزات تطبيق Screen Stream Mirroring Pro النسخه المدفوعه:


  • افضل تطبيق عرض شاشة الهاتف علي التلفاز النسخه المدفوعه للأندرويد
  • تستطيع من خلال تطبيق Screen Mirror Pro النسخه المدفوعه، مشاركة ما يدور على شاشة هاتفك مع الأجهزة الأخرى عبر الواي فاي.
  • تطبيق Screen Mirror Pro يدعم المشاركة مع العديد من الأجهزة الأخرى.
  • يمكنك من خلال التطبيق تشغيل الصور والفيديوهات والمقاطع الصوتية من هاتفك على الأجهزة الأخرى.
  • يمكنك من خلال تطبيق Screen Mirror Pro التحكم في اتجاه عرض الشاشة سواءً أفقي أو رأسي.
  • حجم تطبيق Screen Mirror Pro صغير ولا يحتاج إلى مساحة تخزينية كبيرة على ذاكرة الهاتف لكي تقوم بتثبيته واستخدامه.
  • يتميز تطبيق Screen Mirror Pro بواجهة مستخدم بسيطة وسهلة الإستخدام، ولذلك لن تواجه صعوبات في استخدامه.
  • تطبيق Screen Mirroring Pro يمكنك تحميله من متجر قوقل بلاي، أو أحد المتاجر البديلة لتحميل تطبيقات وألعاب الأندرويد.
  • لن تحتاج إلى البحث عن شرح لكي تعرف طريقة استخدام تطبيق Screen Mirroring Pro، فالتطبيق يمكنك معرفة كل شئ عنه في ثواني.


تحميل تطبيق Screen Stream Mirroring Pro النسخه المدفوعه للأندرويد:


الان يمكنك تحميل تطبيق Screen Stream Mirroring Pro النسخه المدفوعه للأندرويد من متجر جوجل بلاي، أو تحميله مباشرةً إلى هاتفك أو إلى جهاز الكمبيوتر بصيغة APK بدون الحاجة إلى متجر قوقل بلاي. 

كل ما عليك فعله ان تقم بالذهاب الى متجر قوقل بلاى وفي خانة البحث؛ قم بكتابة اسم التطبيق “Screen Stream Mirroring Pro“. بمجرد ظهور اسم التطبيق في نتائج البحث، اضغط على زر “تثبيت“. او يمكنك الذهاب مباشرةً إلى صفحة تحميل التطبيق من متجر قوقل بلاي من هنـا.


كما يمكنك تحميل تطبيق Screen Stream Mirroring Pro النسخه المدفوعه للأندرويد مباشرةً إلى هاتفك أو إلى جهاز الكمبيوتر بصيغة APK من خلال رابط تحميل مباشر من هنـا.


فى النهاية، أتمنى أن تكون وجدت في هذا الموضوع ما تبحث عنه، واكون قد ساعدك في شرح وتحميل تطبيق افضل تطبيق عرض شاشة الهاتف علي التلفاز النسخه المدفوعه للأندرويد، ومعرفة أهم المميزات الخاصه به.


Thanks for reading
-------------------------------------------

افضل تطبيق عرض شاشة الهاتف علي التلفاز للأندرويد

يعمل برنامج Driver Booster Pro على تحديث تعريفات الجهاز من خلال الاتصال بشبكة الانترنت والبحث عن التعريفات الغير موجود بالجهاز وتثبيتها تلقائيا ، كما يمكنك عمل فحص شامل لجهازك ومعرفة التعريفات المثبتة على الكمبيوتر بشكل كلي، ويقدم لك البرنامج إختار بالتعريفات القديمة مع امكانية اختيار عمل تحديث لهذة التعريفات.

لقد حاز برنامج Driver Booster Pro على إعجاب جميع المستخدمين نظرا لسرعتة العاليه جلب التحديثات المهمه و اللازمة لاجهزة الكمبيوتر و اللابتوب. من اهمها تعريفات كارت الشاشة والصوت.

من خلال برنامج درايفر بوستر برو تسطيع بعمل فحص كامل وإصلاح لكل مشاكل الصوت او مشاكل الشبكة بسهولة تامة. ويمكنك Driver Booster Pro من عرض تفاصيل الجهاز بالكامل من مكونات الكورة المتصلة به.

فيما يلي سأشرح لك كيفية تحميل برنامج Driver Booster Pro، واهم المميزات الخاصه به، ويمكنك تحميل برنامج درايفر بوستر برو برابط مباشر من لينك التحميل في اخر المقال.


يعد برنامج درايفر بوستر برو واحد من أفضل البرامج فى مجال البحث عن تعريفات الاجهزة المختلفة للكمبيوتر واللاب توب منها. وهو برنامج من إنتاج وتطوير الشركة العملاقه IObit. وهو الرائد في تحديث تعريفات الجهاز من خلال الاتصال بشبكة الانترنت والبحث عن التعريفات الغير موجود بالجهاز وتثبيتها تلقائيا

مميزات برنامج driver booster كامل للكمبيوتر:


  • مجموعة من الأدوات المفيدة والمحسنة لإصلاح المزيد من مشاكل الكمبيوتر.
  • انشاء نقطة استعادة للنظام قبل تثبيت برامج التشغيل أو تحديث أي تعريفات.
  • واجهة إستخدام سهلة بخلاف معظم برامج التعريفات الآخرى
  • التحديث التلقائي، حيث يعمل بشكل أوتوماتيكي في الخلفية
  • عمل جدولة تلقائية للعثورعلى تعريفات قطع الكمبيوتر.
  • يجعل جهاز الكمبيوتر الخاص بك مستقر وبأداء جيد.
  • فحص جميع الاجهزة المركبة بجهاز الكمبيوتر وكل برامج تشغيلها ويعرض عليك تحديثها ان كانت قديمة.

تحميل برنامج Driver Booster Pro كامل مفعل للكمبيوتر:


الان يمكنك تحميل برنامج Driver Booster Pro مباشرةً إلى جهاز الكمبيوتر بصيغة exe او rar من خلال رابط تحميل مباشر من هنـا.


فى النهاية، أتمنى أن تكون وجدت في هذا الموضوع ما تبحث عنه، واكون قد ساعدك في شرح وتحميل برنامج Driver Booster Pro كامل للكمبيوتر، ومعرفة أهم المميزات الخاصه به.


Thanks for reading

برنامج Driver Booster Pro كامل مفعل للكمبيوتر

تنزيل برنامج Dr.Fone النسخه المدفوعه مهكر اخر اصدار ويعد هذا التطبيق هو افضل تطبيق تستطيع من خلاله استعادة الصور، والفيديو، الرسائل القصيرة وجهات الاتصال المحذوفة أو المفقودة عن طريق الخطأ من هاتفك.

يحتوي تطبيق Dr.Fone Pro على العديد من المزايا التي جعلته يحظى بشهرة وشعبية كبيره بين مستخدمي نظام الأندرويد، وهذه المميزات ساعدته لكي يكون أحد أهم وأفضل تطبيقات الأندرويد على متجر قوقل بلاي، والتي تساعد المستخدمين في تجربه افضل من التطبيقات الأخرى.

فيما يلي سأشرح لك كيفية تحميل تطبيق Dr.Fone النسخه المدفوعه للاندرويد، واهم المميزات الخاصه به. كما يمكنك تحميل تطبيق دوكتور فون مهكر اخر اصدار للاندرويد بصيغة apk رابط مباشر من لينك التحميل في اخر التدوينه.


ميزة استرجاع الملفات في هواتف اندرويد:

استرداد من ذاكرة التخزين المؤقت لا تحتاج لوجود الرووت
دعم استعادة الصور ومقاطع الفيديو يضمن استعادة مع تشغيل الملفات بدون التلف.
دعم الاستعادة من ذاكرة التخزين المؤقت والصور المصغرة.
القدرة على استعادة الصور من الذاكرة الداخلية لهواتف اندرويد وكذلك من بطاقة SD المثبتة في الجهاز.

مميزات تطبيق Dr Fone النسخه المدفوعه اخر اصدار للاندرويد :

1- استعادة الصور ومقاطع الفيديو للاندرويد:
صيغ الصور المدعومة:
JPG , PNG , BMP , GIF, TIF ,TIFF.
صيغ الفيديو المدعومة:
MP4 (و الملتقطة بواسطة الكاميرا)، 3GP, MOV, AVI, MPG, WMV, ASF, FLV, RM/RMVB, M4V, 3G2, SWF.

2- القدرة على استعادة الصور من الذاكرة الداخلية وكذلك بطاقة SD المثبتة في الجهاز.
استرداد الرسائل المرسلة والمستقبلة SMS:
استعادة الرسائل المحذوفة عن طريق الخطأ من قاعدة بيانات الهاتف الداخلية

إخلاء المسؤولية:
بسبب وجود الآلاف من أنواع أجهزة أندرويد، التي تعمل على إصدارات أندرويد مختلفة، وقد تتأثر العملية أيضا بوقت الحذف، إن هذا التطبيق لا يضمن استرداد رسائلك %100.

استرداد جهات الاتصال:
استرداد جهات الاتصال المحذوفة عن طريق الخطأ من ذاكرة الهاتف الداخلية
دعم حفظ جهات الاتصال المستردة كملف .csv.

استرجاع عميق:
الاسترجاع العميق يدعم المزيد من خيارات فقدان البيانات مثل البيانات المحذوفة عن طريق الخطأ/ أخطاء الترويت/ تحديث نظام التشغيل / تحطم النظام، الخ…

أعلى معدل استرجاع في هذه الصناعة:
دعم استعادة الصور والفيديو وجهات الاتصال والرسائل وسجلات المكالمات والأغاني والمستندات ورسائل واتس آب وملحقاته.

ملاحظة:
هذه الميزة تحتاج إلى العمل مع إصدار سطح المكتب من Dr Fone النسخه المدفوعه

هام؟! 
dr.fone يدعم استعادة البيانات على كل من أجهزة أندرويد المروتة والغير مروتة.

ملاحظة مهمة قد يتم استبدال البيانات المحذوفة بالبيانات الجديدة. سيؤثر ذلك على نتائج استعادة البيانات. كلما تصرفت بأسرع، سوف تحصل على نتائج أفضل النتائج

إنها تماما مثل سلة المهملات على ويندوز الخاص بك أو الكمبيوتر المكتبي ماك. نقل الصور ومقاطع الفيديو إلى سلة المحذوفات عند حذفها، يمكنك استعادتها في أي وقت تريد.

تحميل تطبيق Dr.Fone النسخه المدفوعه للأندرويد:


الان يمكنك تحميل تطبيق Dr Fone النسخه المدفوعه للأندرويد من متجر جوجل بلاي، أو تحميله مباشرةً إلى هاتفك أو إلى جهاز الكمبيوتر بصيغة APK بدون الحاجة إلى متجر قوقل بلاي. 

كل ما عليك فعله ان تقم بالذهاب الى متجر قوقل بلاى وفي خانة البحث؛ قم بكتابة اسم التطبيق “Dr Fone“. بمجرد ظهور اسم التطبيق في نتائج البحث، اضغط على زر “تثبيت“. او يمكنك الذهاب مباشرةً إلى صفحة تحميل التطبيق من متجر قوقل بلاي من هنـا.


كما يمكنك تحميل تطبيق Dr Fone النسخه المدفوعه للأندرويد مباشرةً إلى هاتفك أو إلى جهاز الكمبيوتر بصيغة APK من خلال رابط تحميل مباشر من هنـا.


في النهاية، أتمنى أن تكون وجدت في هذا الموضوع ما تبحث عنه، واكون قد ساعدك في شرح و تحميل تطبيق Dr Fone النسخه المدفوعه اخر اصدار للأندرويد، ومعرفة أهم المميزات الخاصه به.


Thanks for reading
-------------------------------------------

افضل تطبيق إسترجاع الصور والفيديوهات المحذوفه dr.fone للاندرويد

تطبيق SkyVPN Vip هي واحدة من أفضل الأدوات التي تسمح لك بالوصول إلى جميع المحتويات المفضلة عبر الإنترنت مجانًا. إنها خدمة بروكسي VPN رائعة لأمان نقطة الاتصال اللاسلكي وحماية الخصوصية على الإنترنت.

يمكن لتطبيق SkyVPN Vip مهكر أن يتخطى الحواجز الموضوعة على موطنك كما يضمن لمستخدميه حماية نقطة اتصال الواي فاي عن طريق درع للأي بي الخاص بك.

عند استخدام شبكة واي فاي عامة يعمل SkyVPN Vip على حماية معلومات جهازك وعنوان الأي بي الخاص بك وتشفير خصوصيتك كي تكون أكثر أمانًا من أي خادم وسيط لشبكة خاصة افتراضية خاصة آخر.

فيما يلي سأشرح لك متطلبات تشغيل برنامج SkyVPN Vip بشكل سليم للحصول علي انترنت مجاني وبدون أي مشكله وكيفية تحميل التطبيق:


  • نقطة الوصول هي الأساسيه بدون اي تعديل
  • التأكد من عدم وجود رصيد في خطك ليتم تشغيل الانترنت لديك بدون أي مشكلة
  • بحال وجود رصيد في شريحتك لن يتم تشتغل النت المجاني لديك
  • وجوب عليك تفريغ شريحتك من الرصيد العادي و الباقه ليعمل البرنامج بشكل سليم
  • بحال لم يعمل البرنامج معك اعمل تحويل من 4G إلى 3G وسوف يعمل اتصال بإذن الله تعالى
  • بحال لم يعمل البرنامج نهائي اعمل اعاده تشغيل للموبايل واعاده المحاوله
  • بحال لم يعمل البرنامج فعل جهازك الى علامه الطيران من ثم افتح الجهاز من جديد
  • احفظ رابط هذه الصفحه لديك في متصفح جهازك لان سوف يتم تنزيل جميع التحديثات في هذه الصفحة فقط

مميزات تطبيق SkyVPN Vip النسخه المدفوعه:


  1. الوصول إلى جميع المحتوى والتطبيقات مع خدمة VPN غير محدودة
  2. حماية خصوصيتك على الإنترنت
  3. درع IP الخاص بك والعنوان المادي
  4. استمتع بخدمة VPN مع اتصال سريع ومستقر.
  5. تأمين نشاط الإنترنت الخاص بك واتصال واي فاي
  6. يعمل عبر أجهزة متعددة على Android و iPhone و iPad و PC و Macأفضل VPN للمدرسة والعمل والسفر و WiFi العام.
  7. أفضل VPN على الأمان والخصوصية التي تحمي حركة مرور الشبكة تحت نقطة اتصال WiFi
  8. تصفح مجهول والخاص دون أن يتم تعقبها.

الآن يمكنك الاستمتاع بسرعة و HighVPN مستقرة !

يعمل SkyVPN Vip على العمل كخدمة شبكة خاصة افتراضية للتصفح بدون الكشف عن هويتك وبدون تخزين أي بياناتٍ لك لأننا نؤمن أن لكل شخص الحق في المحافظة على خصوصيته وأن يتصفح الإنترنت بخصوصية تامة. يحمي SkyVPN Vip خصوصية بياناتك ويؤمن معلوماتك الشخصية ويحمي تصفحك للإنترنت.

تحذير:
بعض خدمات VPN الأخرى المتاحة قد:
(1) تجمع بياناتك وتبيعها. لذلك من المهم أن تقرأ شروط الاستخدام قبل البدء.
(2) تطلب منك أن تدفع مبلغًا شهريًا مقابل خدمة عرض نطاق ترددي متميزة.
خدمة شبكة خاصة افتراضية متميزة ومجانية وغير محدودة
يمكنك باستخدام SkyVPN Vip مهكر التمتع بخدمة شبكة خاصة افتراضية متميزة ومجانية وغير محدودة

تمتع بالخصوصية وإخفاء هويتك:

يعمل تطبيق SkyVPN Vip كذلك على إضافة درع لنقطة الاتصال بشبكة الواي فاي ويسمح لك بتصفح الإنترنت بخصوصية مع إخفاء هويتك عن طريق خادم وسيط، كما يحافظ على سرية وخصوصية جميع نشاطاتك في تصفح الإنترنت.

تحميل تطبيق SkyVpn Vip النسخه المدفوعه للأندرويد:


الان يمكنك تحميل تطبيق SkyVpn Vip النسخه المدفوعه للأندرويد من متجر جوجل بلاي، أو تحميله مباشرةً إلى هاتفك أو إلى جهاز الكمبيوتر بصيغة APK بدون الحاجة إلى متجر قوقل بلاي. 

كل ما عليك فعله ان تقم بالذهاب الى متجر قوقل بلاى وفي خانة البحث؛ قم بكتابة اسم التطبيق “SkyVpn Vip“. بمجرد ظهور اسم التطبيق في نتائج البحث، اضغط على زر “تثبيت“. او يمكنك الذهاب مباشرةً إلى صفحة تحميل التطبيق من متجر قوقل بلاي من هنـا.


كما يمكنك تحميل تطبيق SkyVpn Vip النسخه المدفوعه للأندرويد مباشرةً إلى هاتفك أو إلى جهاز الكمبيوتر بصيغة APK من خلال رابط تحميل مباشر من هنـا.


في النهاية، أتمنى أن تكون وجدت في هذا الموضوع ما تبحث عنه، واكون قد ساعدك في شرح و تحميل تطبيق SkyVpn Vip Premium مهكر اخر اصدار للأندرويد، ومعرفة أهم المميزات الخاصه به.


Thanks for reading
-------------------------------------------

تطبيق SkyVpn Vip Pro وكيفية الاتصال بي إنترنت مجاني

فلاشة S3 SGH-I747 مع فلاشة اربع ملفات وروت

تعريب S3 SGH-I747 مع فلاشة رسمية وروت واربع ملفات


فلاشات رسمية SGH-I747


فلاشة اربع ملفات I747


CF AUTO ROOT I747


اقرا ايضا

فلاشة S3 SGH-I747 مع فلاشة اربع ملفات وروت