Halaman

    Social Items

النظام الوكالة لهاتف N5 pro M860

النظام الوكالة لهاتف 

Frimware Stock China Mobile N5 Pro M860


CMCC-M860_01.24.00RPD_CN.00
How to Flash Stock N5 Pro
Rom Stock N5 Pro
Fix Wi-Fi for N5 Pro M860


مميزات تنزيل النظام الوكالة

اصلاح اذا كان الجهاز طافي على وضع الكوالكوم
اصلاح الرقم التسلسلي للجهاز
يقوم بازالة جميع البرامج الضاره
اصلاح مشكلة البوت لودار واعادة تشغيل الجهاز
اصلاح للاسف توقف التطبيقات عن العمل
اصلاح مشكلة الشبكة الجوال او الوايفاي
اعادة تعيين الحساب
استعادة الجهاز الى ضبط المصنع

معلومات على النظام

اسم الجهاز
N5 Pro M860
اسم الطراز
CMCC M860
الحجم 
2.31 GB
المعالج 
qualcomm technologies, inc SDM636
اصدار النظام
 Android 8
رقم الاصدار
CMCC-M860_01.24.00RPD_CN.00

متطلبات تفليش النظام

نظام
 N5 pro M860
اداة التحميل موجود داخل ملف النظام باسم
MR2 Engineering Software Download Tool 
التعاريف 
qualcomm usb Qdloader 9008
نسخة
32-bit
نسخة
64-bit

كيفية تفليش النظام الوكالة

تحميل تعاريف الجهاز على الكمبيوتر
قم بفك الضغط وستخراج ملف النظام
تشيغل برنامج الفليش
 MR2 Engineering Software Download Tool
ادخال الهاتف وضع الدونلود
 Download
 ضغط على ازرار الصوت معاً ومن ثم توصيل 
Usb 
بعدها ستظهر نافذة ادخال الهاتف وضع الداونلود بضغط على زر رفع الصوت
الضغط على كلمة
 Download
 في البرنامج والانتظر حتى يتم الانتهاء من التفليش


شاهد الفيديو لمعرفة التفاصيل


Frimware Stock China Mobile N5 Pro | CMCC-M860_01.24.00RPD_CN.00

روت htc desire 10 pro منقول


htc desire 10 pro ROOT


شرح روت htc desire 10 pro


 الروت صالح للإصدار اندرويد 6


اولا يتم فك البوتلودر عبر الموقع التالي


ثانيا يتم تفليش الريكفيري المعدل التالي


PASS=AHMED_HADDAD


ثالثا يتم تثبيت ملف الروت عبر الريكفيري المعدل

  Magisk-v17.1.zip 
PASS=AHMED_HADDAD


HTC Desire 10 PRO ROOT TWRP

NOT TESTED

1. First install device drivers and download ADB fastboot from this thread
2. Dowload TWRP 3.1 for your phone variant from here and move it to the ADB fastboot folder and rename the img file to "twrp"


3. Press shift + right click and select open command window here.
4. Go to developer options on your phone and select Allow USB debugging and Allow bootloader to be unlocked.
(Very important step)
5. Connect the phone to your PC and check the connection by typing the following in the command prompt.
adb devices
If it shows only one device, you're good to go!!
Otherwise remove any other connected phones/devices and disable any Android emulators if you have them. (Like Bluestacks)
6. Go to HTCDev website and unlock your bootloader, (HTCDev will give those instructions), the phone model isn't shown but select "other supported models".
(Warning - This will erase all your data so make a backup)
7. Type the following into the command window to boot your device into bootloader/fastboot mode:
adb reboot bootloader
8. Once your device boots into bootloader mode, type this into the command line.
fastboot flash recovery twrp
9. Once TWRP is successfully flashed on your device, type this final command to reboot your device.
fastboot reboot
10. Download SuperSu latest version   SuperSu v2.82
11. Copy the SuperSu zip file to your phone internal storage
12. Then type this command to go to TWRP,

fastboot reboot recovery

13. Wait for TWRP to load and tap Install
14. Select the SuperSu zip file and flash it
15. After flashing finishes, tap on Reboot System
16. Congradzz !!! Your HTC Desire 10 Pro is rooted now.
Now you can further customize if you like by installing Xposed.


روت htc desire 10 pro منقول

Full Firmware For Device Samsung Galaxy SM-W2019

You can use these Repair Firmwares W2020 to Fix your Samsung Android Smartphone or Tablet, These files contain the full set of Samsung firmware files, Inside these packages you will get PDA, AP, Modem, Phone, CP, BL, Bootloader, and CSC file. In case you did not find the PIT file inside any full firmware package, Then you can Download it from (PIT and OPS Files for Samsung android 1 Mobile Phones).
Full Firmware For Device Samsung Galaxy W20 SM-W2020

Information about Firmware W2020:

  • Samsung SM-W2020 Repair (100% Tested) Factory Flash File Free Download
  • Samsung SM-W2020 android os Official Firmware Phone Data Recovery
  • Samsung SM-W2020 100% Tested Repair Flash File Factory File 4File Stock Rom
  • Samsung SM-W2020 Official Factory File 100% Tested. Samsung Update
  • Samsung SM-W2020 Official Repair Firmware 100% Tested
  • Samsung SM-W2020 Stock Rom Firmware Download Samsung Mobile Firmware
  • Samsung SM-W2020 Dead Boot Recovery Firmware Flash File
  • Samsung SM-W2020 4Files Firmware Network Problem Flash After Done
  • Samsung SM-W2020 4Files Firmware Flash After IMEI Problem Solve
  • Samsung SM-W2020 4Files Firmware efs data recovery
  • Samsung SM-W2020 4Files Firmware format data recovery


Problem Solve This Firmware W2020:

  • Update android version.
  • Fix Camera.
  • Fix Invalid IMEI And Baseband.
  • Fix Wifi and Bluetooth.
  • Fix custom binary blocked by frp lock.
  • Fix standing on the logo.
  • Fix storage space.
  • Fix slow device.
  • Fix sensors.
  • Solve the problem of high temperature.
  • Fix applications stop working.
  • Fix restarting the device.
  • delete pattern or password.
  • Fix hide Imei.
  • Fix baseband unknown.
  • Remove root.
  • wipe data.
  • wipe cache.
  • hard reset.
  • Fix sound problems.
Of course, if the problem is software


Specifications of a device Galaxy SM-W2020:

DISPLAY:
  • Type: Foldable Dynamic AMOLED, HDR10+.
  • Size: 7.3 inches.
  • Resolution: 1536 x 2152 pixels.
PLATFORM:
  • Android OS Versions: Android Pie 9.0, Upgradable to android Q 10.
  • Chipset: Qualcomm SM8150 Snapdragon 855.
  • CPU: Octa-core (1x2.84 GHz Kryo 485 & 3x2.42 GHz Kryo 485 & 4x1.78 GHz Kryo 485).
  • GPU: Adreno 640.
MEMORY:
  • Internal: 512 GB, 12 GB RAM.
MAIN CAMERA:
  • Triple: 12 MP (wide)/ 12 MP (telephoto)/ 16 MP (ultrawide).
  • Features: LED flash, panorama, HDR.
  • Video: 4K-60fps, 1080p-60/240fps, 720p-960fps, HDR10.
SELFIE CAMERA:
  • Single: 10 MP (wide) / 8 MP (wide).
  • Features: HDR.
  • Video: 4K-30fps, 1080p-30fps.


Firmware Galaxy SM-W2020:

Important Notice: Please Inform us in case of any dead link, Or any flashing error you get when using these files, So we can check and repalce, Send an Facebook with details to: Contact us

Warning: This firmware W2020 use to repair software smartphone problem and it will clean everything on your smartphone so you have to backup your data, don’t try to flash your device with this firmware if it work prefect. if you use pit file please make sure 16GB or 8GB or 32GB, Because the 8GB Pit file don’t work with 16GB or 32GB and the same for 16GB or 32GB Pit File make sure you use the Correct ROM for your device.

To flash your Samsung galaxy smartphone, you need Odin software made available to the Samsung Galaxy users for flashing a range of things including firmware, custom recovery, CF-Auto-Root and more. Odin software performs a clean install that means; it removes the old firmware and flashes a new one,Backup your data before start flashing you smartphone.


Link firmware W2020 download:

Here you find all the latest android os for the Galaxy W20 SM-W2020, if you want to flash your device with the newest Samsung software. Before downloading, make sure your device has the exact model code SM-W2020. You can download the most recent Galaxy W20 firmwares for free, or check out our cheap but fast download options.


Important tools to work flash android update:


Notes on android os Firmware W2020:

  • Pit File W2020
  • Should be used odin 3.13 if you need flash android versions Oreo 8.1.0 or Pie 9.0 or Q 10.
  • If there are problems with the download links please contact us.


How To Flash latest android os Galaxy SM-W2020:

  • Extract the Firmware W2020 By 7z or winrar You should get 5 files (BL-AP-CP-CSC-Home CSC). 
  • Download Odin. 
  • Add each file to it's respective field in Odin v3.13.3. Use CSC_** if you want to do a clean flash (lost data) or HOME_CSC_** if you want to keep your apps and data (unformat). 
  • Reboot Phone in Download Mode (press Volume Down + Volume Up and connect the Type-C USB cable to device). 
  • Connect phone and wait until you get a blue sign in Odin. 
  • Add the files to BL - AP - CP - CSC 
  • Do NOT tick any extra boxes. The only options to be ticked are F.Reset Time and Auto-Reboot. 
  • Click the start button, wait for Odin to say 'PASS' in a GREEN box. Once the flash is complete, your phone will reboot, and you can disconnect your phone from the PC. 
  • Now you have the latest android version.

Full Firmware For Device Samsung Galaxy W20 SM-W2020

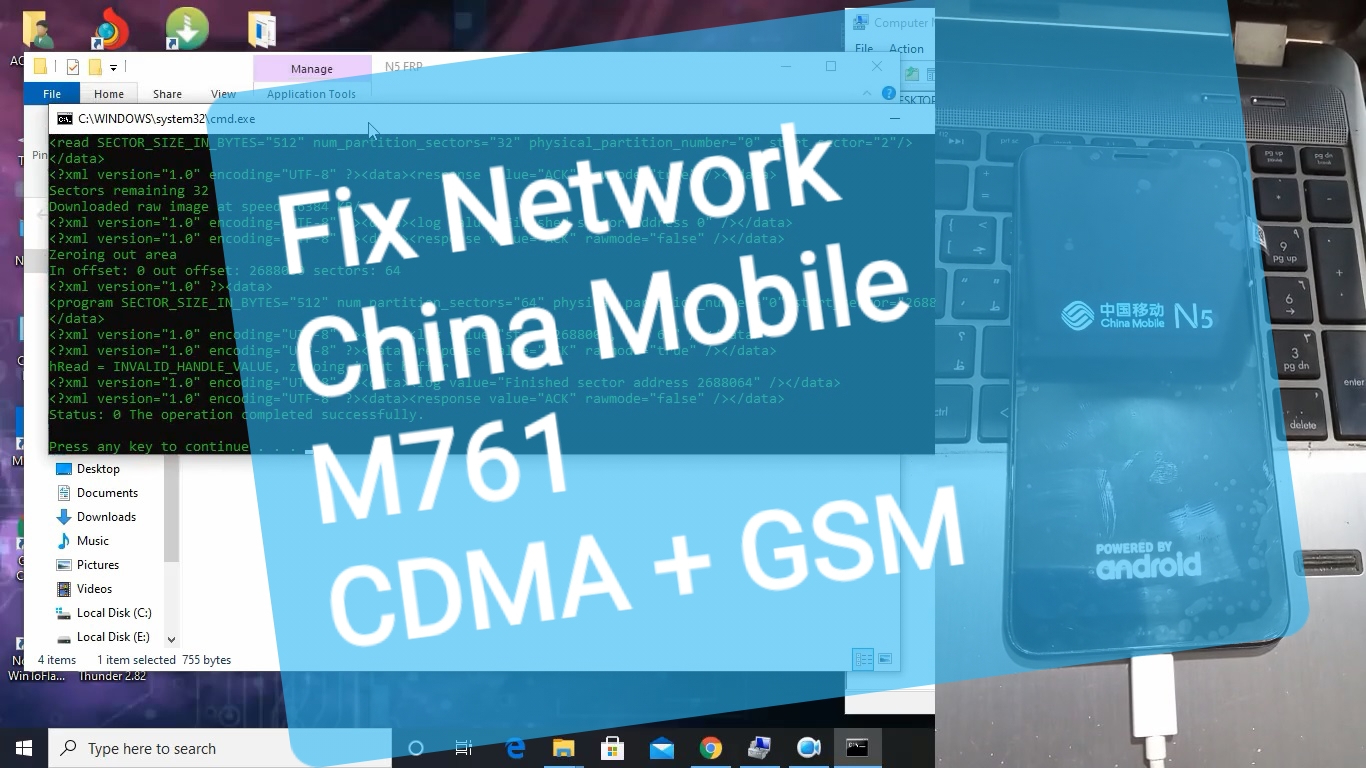
اصلاح مشكلة اختفاء الشبكة وعدم الاتصال china mobile n5 m761

كيفية اصلح مشكلة اختفاء ابراج الشبكة وعدم الاتصال لهاتف

China Mobile N5 M761 - M762G

اصلح مشكلة الشبكة
 N5 CMCC M761 - M762G
فك شفرة هاتف
 N5 M761 - M762G
اصلح مشكلة الشبكة
 China Mobile N5
حل مشكلة ابراج الشبكة 
China Mobile N5 M761-M672G
حل مشكلة اختفاء شريحة يمن موبايل
 CDMA
حل مشكلة الثريجي 
3G

احتياجات اصلاح شبكة

تحميل ملف اصلح مشكلة الشبكة
 China Mobile M761 - M762G
تحميل تعاريف
qualcomm usb Qdloader 9008

نسخة
 32-bit
نسخة
 64-bit

طريقة اصلاح شبكة 

قم بتثبت تعريف الكوالكوم على الكمبيوتر
فك الضغط على ملف اصلح مشكلة الشبكة بستخدام برنامج 
الان قم باطفي الهاتف 
بعدها قم بادخال الهاتف وضع الدونلود بضغط على
 زر خفض الصوت + زر رفع الصوت وتشغيل الهاتف او توصيل
 usb 
بدل زر التشغيل
الان قم بتشغيل اسكربت الاصلاح باسم
 Fix-Network-N5-CMCC-M761.bat
 ونتظر حتى يشتغل الهاتف وبذالك تم اصلاح مشكلة الشبكة وعدم الاتصال والثريجي

Fix Network CDMA GSM for China Mobile N5 M761

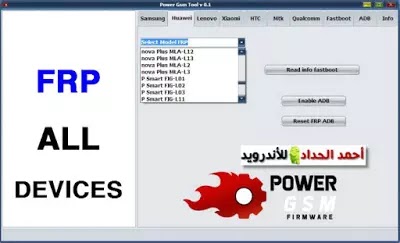
اداة Power Gsm Tool المميزة لتخطي حساب جوجل للعديد من الاجهزة


اداة Power Gsm Tool لتخطي حساب جوجل لاجهزة هواوي


السلام عليكم ورحمة الله وبركاته
أرحب بك أخي زائر مدونة أحمد الحداد للاندرويد
واتمنى أن تكون في أتم الصحة والسلامة
وبعد موضوعنا في هذه التدوينة حول


اداة Power Gsm Tool المميزة لتخطي حساب جوجل للعديد من الاجهزة


الاداة من تصميم فريق power gsm  الاداة مختصة في تجاوز حساب جوجل للعديد من الاجهزة هي:-

  • SAMSUNG
  • HUAWEI
  • LENOVO
  • XIAOMI
  • HTC
  • MTK
  • QUALCOMM
  • FASTBOOT


ما هي المميزات الفريدة لاداة Power Gsm Tool


الميزة الجديدة في اداة Power Gsm Tool هي انها تدعم تخطي حساب جوجل لاجهزة هواوي ولينوفو بشكل مميز خاصة التابلات والمعروف عنها صعوبة تخطي حساب جوجل للتابات تلك.
فهمي تدعم طيف واسع من اجهزة HUAWEI , LENOVO باغلب انواعها . طبعا نتحدث عن الموديلات المتوسطة وليس الموديلات الحديثة جدا.


الموديلات المدعومة  هواوي لتخطي حساب جوجل على POWER GSM TOOL


نذكر بعضا منها

  • Honor 5A CAM-AL00
  • Honor 5X KIW-TL00
  • Honor 7i ATH-CL00
  • Honor 8 FRD-TL00
  • Enjoy 7 Plus TRT-L01
  • GT3 NMO-L21
  • Enjoy 7 Plus TRT-L01
  • MediaPad M2 7.0 PLE-703LT
  • MediaPad M5 WiFi SHT-W09
  • MediaPad M2 7.0 PLE-703LT
  • MediaPad T3 AGS-L03
  • nova CAN-AL00
  • Mate 10 Pro BLA-L29


تقريبا ذكرت فقط 5 في المائة من الاجهزة المدعومة


الموديلات المدعومة  لينوفو لتخطي حساب جوجل على POWER GSM TOOL


  • Vibe K5 A6020a40
  • K6 Note  k53a48
  • Vibe K6  k33a48/k33a42/k33b36/k33b37


رابط تحميل اداة بور جي اس ام POWER GSM TOOL

اداة Power Gsm Tool المميزة لتخطي حساب جوجل للعديد من الاجهزة

What is the root and what are the benefits and harms

Root is a program that gives the user full powers to control the operating system where it can modify the operating system files or delete in the sense of the most complete control of the phone.
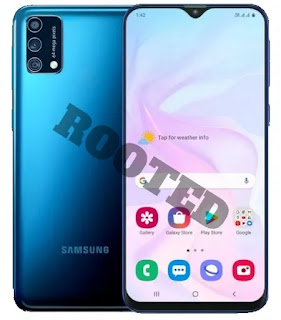
How To Root Samsung Galaxy M20 SM-M205F


Root features:
1-Modify or delete files or applications of the operating system.
2-Run programs that require root permissions.
3-Change the basic fonts within the Android system.
4-Move applications from device memory to external memory.
5-Installation of Custom rom.
6-Fix errors DRK and DM-Verity.

Cons of the root:
1-Loss of phone warranty.
2-Some applications do not work due to root (bluestacks root / dr fone root).
3-Stand on the company logo as a result of misuse.
4-The operating system crashed due to deletion or modification of important system files.


important warning:
  • Installation and use of the root android is entirely at your own risk and we do not take any responsibility for device failure.
  • In older versions of the Android system such as Jelly Bean and KitKat was using apps (kingroot / kingo root / framaroot / iroot root king / towelroot) To get root permissions either in new versions such as Lollipop, Marshmallow, Nougat, Pie and future versions of the Android system, these applications do not work.


What is the difference between SuperSU and Magisk

 VS 

The main difference between Magisk and SuperSU is how the root works on Android. Based on what the user wants to do.
We will first talk about supersu root how to get the root where it installs itself within the system files It changes the system files and adds new files to the system partition on the phone, but with the enhancement of Google to protect Android it has become difficult to do so that the amendment to the partition of the Android system to send an alert to applications that are trying to detect the presence of root.
Google SafetyNet monitors the operating system from any manipulation, and when it detects any manipulation in the Android operating system, most applications will not work and will not send you OTA updates.
What about Magisk is one of the most important features that does not touch system files, but modifies the boot partition instead so that it can trick safetyNet service and show that everything is normal and allows Magisk Manager to fully control the root settings.


Notes before root process

  • Charge the battery well before use.
  • Use the original USB cable that came with the device.
  • Use the laptop at work to avoid electricity problems.
  • You should focus well to protect the binary of your device.
  • The following protections must be disabled (FRP - OEM - RMM/KG) Follow the following article to learn How to Disbled FRP and OEM for device Samsung Galaxy.


Device information

-Brand Name: Samsung Galaxy
-Device Name: Galaxy M20
-Model: SM-M205F root
-Operating system: Android Oreo or Pie or Q


Files required for root work

How To Root Galaxy M205F android Oreo 8.1.0 / How To Root Galaxy M205F android Pie 9.0 / How To Root Galaxy M205F android Q 10

1-Download Drivers and flash Tool.
2-Install the drivers on your device.
3-Download Root File, The baseband version must match the version of the root file.
4-Open the EFTSU Flash Tool.
5-From the top, click on Select File and then choose the root file.
6-Boot your device into download mode prees Volume Down + Volume Up and connect the USB cable.
7-Press Flash to start.
8-After booting the device install EFTSU Manager app.
9-Then, from the EFTSU Flash tool, we click on Reboot ADB Device to Root Mode (Recovery mode).
10-When the boot is complete, Open the EFTSU Manager app to get the root.
11-You can check for root access through the root checker app.
12-In case you encounter any problems please feel free to contact us
13-If you want to unroot or revert to the offical firmware, you can flash new firmware.

How To Root Samsung Galaxy M20 SM-M205F

What is the root and what are the benefits and harms

Root is a program that gives the user full powers to control the operating system where it can modify the operating system files or delete in the sense of the most complete control of the phone.
How To Root Samsung Galaxy M02 SM-M025F

Root features:
1-Modify or delete files or applications of the operating system.
2-Run programs that require root permissions.
3-Change the basic fonts within the Android system.
4-Move applications from device memory to external memory.
5-Installation of Custom rom.
6-Fix errors DRK and DM-Verity.

Cons of the root:
1-Loss of phone warranty.
2-Some applications do not work due to root (bluestacks root / dr fone root).
3-Stand on the company logo as a result of misuse.
4-The operating system crashed due to deletion or modification of important system files.


important warning:
  • Installation and use of the root android is entirely at your own risk and we do not take any responsibility for device failure.
  • In older versions of the Android system such as Jelly Bean and KitKat was using apps (kingroot / kingo root / framaroot / iroot root king / towelroot) To get root permissions either in new versions such as Lollipop, Marshmallow, Nougat, Pie and future versions of the Android system, these applications do not work.


What is the difference between SuperSU and Magisk

 VS 

The main difference between Magisk and SuperSU is how the root works on Android. Based on what the user wants to do.
We will first talk about supersu root how to get the root where it installs itself within the system files It changes the system files and adds new files to the system partition on the phone, but with the enhancement of Google to protect Android it has become difficult to do so that the amendment to the partition of the Android system to send an alert to applications that are trying to detect the presence of root.
Google SafetyNet monitors the operating system from any manipulation, and when it detects any manipulation in the Android operating system, most applications will not work and will not send you OTA updates.
What about Magisk is one of the most important features that does not touch system files, but modifies the boot partition instead so that it can trick safetyNet service and show that everything is normal and allows Magisk Manager to fully control the root settings.


Notes before root process

  • Charge the battery well before use.
  • Use the original USB cable that came with the device.
  • Use the laptop at work to avoid electricity problems.
  • You should focus well to protect the binary of your device.
  • The following protections must be disabled (FRP - OEM - RMM/KG) Follow the following article to learn How to Disbled FRP and OEM for device Samsung Galaxy.


Device information

-Brand Name: Samsung Galaxy
-Device Name: Galaxy M02
-Model: SM-M025F root
-Operating system: Android Q


Files required for root work

How To Root Galaxy M025F android Q 10

1-Download Drivers and flash Tool.
2-Install the drivers on your device.
3-Download Root File, The baseband version must match the version of the root file.
4-Open the EFTSU Flash Tool.
5-From the top, click on Select File and then choose the root file.
6-Boot your device into download mode prees Volume Down + Volume Up and connect the USB cable.
7-Press Flash to start.
8-After booting the device install EFTSU Manager app.
9-Then, from the EFTSU Flash tool, we click on Reboot ADB Device to Root Mode (Recovery mode).
10-When the boot is complete, Open the EFTSU Manager app to get the root.
11-You can check for root access through the root checker app.
12-In case you encounter any problems please feel free to contact us
13-If you want to unroot or revert to the offical firmware, you can flash new firmware Full Firmware For Device Samsung Galaxy M02 SM-M025F.

How To Root Samsung Galaxy M02 SM-M025F

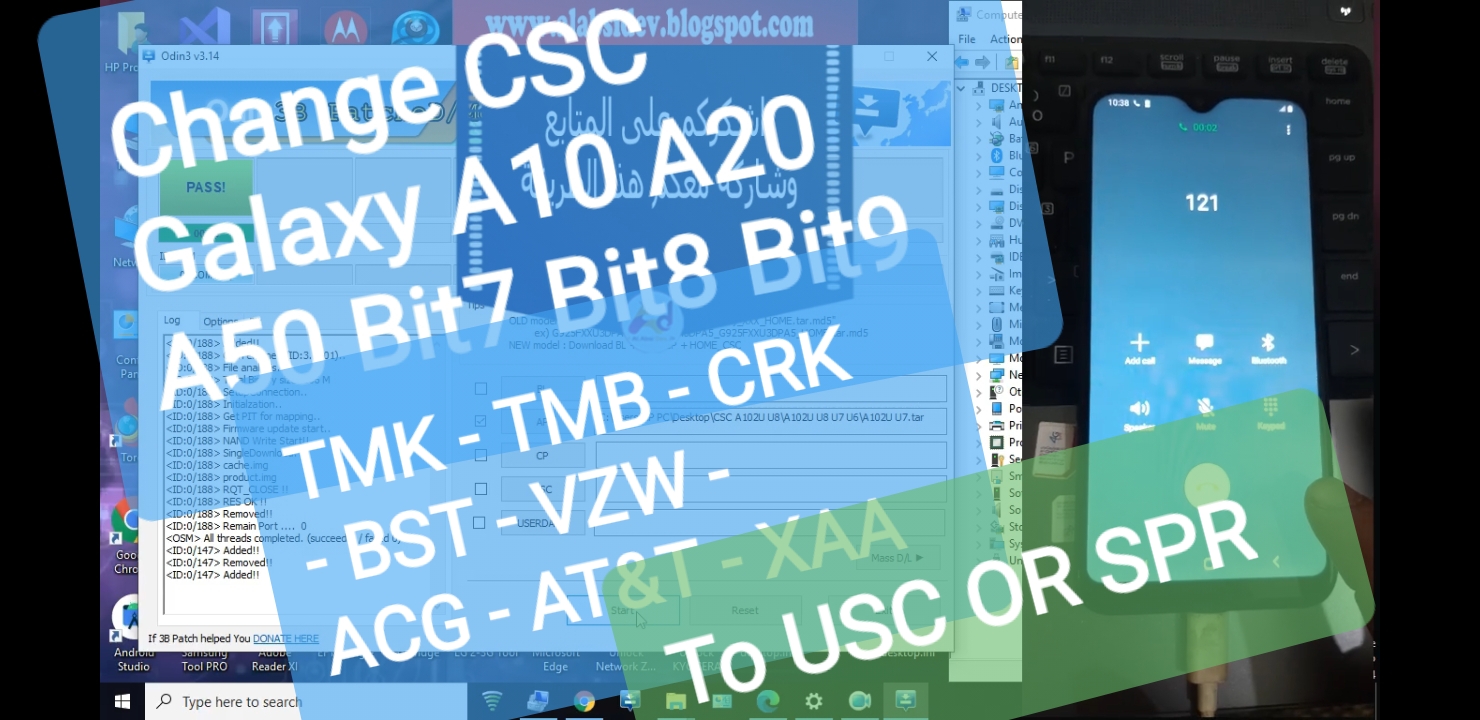
تحويل هواتف السامسونج جلاكسي A10 A20 A50 الحماية 6 و 7

شرح كيفية تغير الكارير لجميع اجهزة السامسونج جلاكسي لجميع الحمايات

 CSC لعمل ملف 
ولاي جهاز سامسونج جلاكسي واي حماية
وتحويل الجهاز الى اي شركة تريد الموضع اسفل المقال

Free Change CSC All Samsung Galaxy All Security All Android Versions


Change CSC All SAMSUNG GALAXY Android 11
Change CSC All SAMSUNG GALAXY Android 10
Change CSC All SAMSUNG GALAXY Android 9
Change CSC All SAMSUNG GALAXY Android 8
Change CSC Samsung Galaxy A102U Bit7 Bit8 Bit9 .. Etc
Change CSC Samsung Galaxy A205U Bit7 Bit8 Bit9 .. Etc
Change CSC Samsung Galaxy A505U Bit7 Bit8 Bit9 .. Etc
Change CSC Samsung Galaxy A102U U7 U8 U9 .. Etc
Change CSC Samsung Galaxy A205U U7 U8 U9 .. Etc
Change CSC Samsung Galaxy A505U U7 U8 U9 .. Etc
A21 A11 A51 A10 A20 A50
How to Change CSC to USC - USCellular or SPR - Sprint

TMB - Tmobile
TMK - MetroPCS
ACG - CSpire
BST - Boost
CRK - Cricket
LRA - VZW Regional
TFN - Tracfone
VMU - Virgin Mobile
VZW - Verizon
XAA - USA
XAS - Sprint/Generic

لتحميل ملف 
CSC 
لجهاز 
A102U U7
لتحميل ملف
 CSC
 لجهاز
 A205U U7
لتحميل
 Odin3_v3.14.1_3B_PatcheD

قناة ALABSI DEV


شرح كيفية تحويل الكارير شاهد الفيديو


Free Change CSC Samsung Galaxy | A10 | A20 | A50 | Bit7 Bit8 Bit9 ...Etc

HTC Desire 10 PRO FIRMWARE  A56DJ-PRO-UHL


HTC Desire 10 PRO فلاشة


HTC Desire 10 PRO Specifications


  • PLATFORM OS Android 6.0 (Marshmallow)
  • Chipset Mediatek MT6755 Helio P10 (28 nm)
  • CPU Octa-core (4x1.8 GHz Cortex-A53 & 4x1.0 GHz Cortex-A53)
  • GPU Mali-T860MP2
  • MEMORY Card slot microSDXC (uses shared SIM slot)
  • Internal 64GB 4GB RAM eMMC 5.1
  • NETWORK Technology  GSM / HSPA / LTE
  • BODY Dimensions 156.5 x 76 x 7.9 mm (6.16 x 2.99 x 0.31 in)
  • Build Glass front (Gorilla Glass), aluminum back, aluminum frame
  • SIM Hybrid Dual SIM (Nano-SIM, dual stand-by)
  • DISPLAY Type IPS LCD
  • Size 5.5 inches, 83.8 cm2 (~70.5% screen-to-body ratio)
  • Resolution 1080 x 1920 pixels, 16:9 ratio (~400 ppi density)
  • Protection Corning Gorilla Glass (unspecified version)
  • MAIN CAMERA Single 20 MP, f/2.2, 28mm (wide), Laser AF
  • Features Dual-LED dual-tone flash, panorama
  • Video 1080p@30fps
  • SELFIE CAMERA Single 13 MP, f/2.2, 28mm (wide)
  • Video 1080p@30fps
  • SOUND Loudspeaker Yes, dual mono speakers
  • 3.5mm jack Yes
  • COMMS WLAN Wi-Fi 802.11 a/b/g/n, dual-band, Wi-Fi Direct, hotspot
  • Bluetooth 4.2, A2DP, LE
  • GPS Yes, with A-GPS, GLONASS
  • NFC Yes
  • Radio FM radio
  • USB microUSB 2.0
  • FEATURES Sensors Fingerprint (rear-mounted), accelerometer, gyro, proximity, compass
  • BATTERY Type Li-Ion 3000 mAh, non-removable
  • Charging Charging 10W
  • Stand-by Up to 480 h (3G)
  • Talk time Up to 19 h (3G)


HTC Desire 10 PRO ROM DETAILES 


2PYAIMG_A56DJ_PRO_UHL_M60_SENSE80GP_HTC_Europe_1.16.401.21_Radio_0.A56DJPV1P22.6400.1208.A56U_release_492698_signed


A56DJ_PRO_UHL

DOWNLOAD

CLICK HERE


HTC Desire 10 PRO FIRMWARE A56DJ-PRO-UHL

فلاشة احياء NOKIA TA-1188 مع فورمات-تخطي حساب جوجل-ملف da


فلاشة احياء NOKIA TA-1188 مع فورمات-تخطي حساب جوجل-ملف da


السلام عليكم ورحمة الله وبركاته  أرحب بك أخي زائر مدونة أحمد الحداد واتمنى أن تكون في أتم الصحة والسلامة وبعد موضوعنا في هذه التدوينة حول


فلاشة احياء NOKIA TA-1188 مع فورمات-تخطي حساب جوجل-ملف da


تعريف بالجهاز


الجهاز معالج MTK وغير مدعوم على البوكسات


NOKIA 2.2 TA-1188 FIX DEAD BOOT ROM


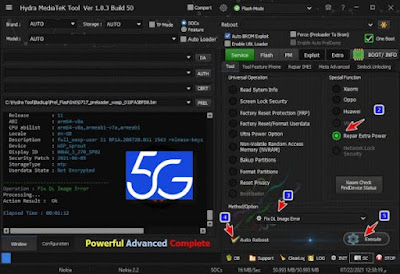
  • Nokia 2.2 dead boot  repair sp tool + hydra tool done 
  • DOWNLOAD THIS FIRMWARE


  • FLASH IT ON SP FLASH TOOL AND YOU MUST EXCLUDE
custom-a
elable-a


  • USE THIS DA FILE


  • AFTER FLASHING DONE IT WILL BE LIKE THIS 


  • NEXT STEP YOU MUST WORK WITH HYDRA BOX LIKE THIS
  • AND DONE


FIX DEAD BOOT NOKIA 2.2 TA-1188

REPAIR DEAD BOOT  NOKIA TA-1188


فيديو شرح فورمات نوكيا 2.2

https://www.youtube.com/watch?v=dSJuC6PQnwA


تخطي حساب جوجل نوكيا ta-1188


او يمكن تجاوز الحساب عبر ملف DA مع ملف PRELOADER


Nokia TA1183 Pattern Unlock Frp


 ملف da ta-1188 مجرب بنجاح


Click here

فلاشة احياء NOKIA TA-1188 مع فورمات-تخطي حساب جوجل-ملف da