Halaman

    Social Items

اسطوانة 2020 DriverPack Solution رابط مباشر بصيغة iso


تنزيل اسطوانة تعاريف الحاسب 2020 تحميل اسطوانة DriverPack الاحدث 2020 جميع تعريفات كل الحواسيب رابط مباشر - رابط درايف-صيغة ايزو تعريفات بصيغة ISO


  • تنزيل اسطوانة تعاريف الحاسب 2020
  • تحميل اسطوانة DriverPack
  • الاحدث 2020
  • جميع تعريفات كل الحواسيب
  • رابط مباشر - رابط درايف-صيغة ايزو
  • تعريفات بصيغة ISO


السلام عليكم ورحمة الله وبركاته
أرحب بك أخي زائر مدونة أحمد الحداد
واتمنى أن تكون في أتم الصحة والسلامة
وبعد موضوعنا في هذه التدوينة حول 


حمل اسطوانة التعاريف DriverPack 17.10.14 الاحدث 2020 برابط مباشر


لمحةعامة عن أسطوانة التعريفات DriverPack Solution 2020


الاسطوانة بها جميع التعريفات لجميع القطع والماركات العالمية. أهم ما يميز هذه الاسطوانة أنها تعمل offline من أجل اكتمال التعريفات وتنصيبها، حيث أن التعريفات تم تحميلها مسبقا، كما أن اسطوانة DriverPack Solution 2020 Offline ISO ستغنيك عن استخدام برامج التعريفات online التي تحتاج الى اتصال انترنت.


الشركة المطورة للاسطوانة تصدر تحديثات دورية لها باستمرار من أجل وضع آخر الاصدارات الخاصة بالتعريفات لجميع الماركات العالمية، الاصدار الاخير من اسطوانة 2020 DriverPack Solution اصبحت تدعم ويندوز 10 وأيضاً النسخة الأخيرة منه.


الاسطوانة تعمل على جميع الاصدارات القديمة من windows سواء كنت تستخدم windows 7 أو 8 أو windows 8.1 أو windows XP. نذكرك أيضا أن الاسطوانة داعمة للغة العربية بشكل كامل ويمكنك استخدامها باللغة الانجليزية لو أردت ذلك، كما أنها تعمل على نسخ الويندوز ذات النواة 32 بت و64 بت.


تنزيل اسطوانة تعاريف الحاسب 2020 تحميل اسطوانة DriverPack الاحدث 2020 جميع تعريفات كل الحواسيب رابط مباشر - رابط درايف-صيغة ايزو تعريفات بصيغة ISO


الموقع الرسمي للأسطوانة


تعمل اسطوانة التعريفات الشهيرة DriverPack Solution 2020 Offline ISO على تعريف جميع الأجزاء والقطع مثل تعريف الشبكة Network وكرت الصوت وكرت الشاشة. الاسطوانة قادرة على تعريف أجهزة laptop HP وLaptop TOSHIBA و Acer و Dell وLENOVO وجميع الماركات الأخرى 

يمكنك بعد تحميل الاسطوانة أن تقوم بحرقها على فلاشة يو اس بي USB، وفي حالة قمت بتنصيب نسخة ويندوز جديدة على جهازك، يمكنك وضع الفلاشة واستخدام الاسطوانة مباشرة في تعريف كل أجزاء الكمبيوتر بدون وجود انترنت.


معلومات التحميل


النسخة بصيغة iso ومرفوعة على جوجل درايف


تفاصيلها


DriverPack 17.10.14 Offline

بحجم 18.5 جيجا


التحميل


download


روابط تحميل الاصدارات الاخرى


الإصدار: 17.10.14-20035


رابط مباشر

download


الإصدار: 17.10.14-20035

رابط تورنت


download


اسطوانة 2020 DriverPack Solution رابط مباشر بصيغة iso

حمل اسطوانة التعريفات  DriverPack 17.10.14  2020 


تنزيل اسطوانة تعاريف الحاسب 2020 تحميل اسطوانة DriverPack الاحدث 2020 جميع تعريفات كل الحواسيب رابط مباشر - رابط درايف-صيغة ايزو تعريفات بصيغة ISO


  • تنزيل اسطوانة تعاريف الحاسب 2020
  • تحميل اسطوانة DriverPack
  • الاحدث 2020
  • جميع تعريفات كل الحواسيب
  • رابط مباشر - رابط درايف-صيغة ايزو
  • تعريفات بصيغة ISO


السلام عليكم ورحمة الله وبركاته
أرحب بك أخي زائر مدونة أحمد الحداد
واتمنى أن تكون في أتم الصحة والسلامة
وبعد موضوعنا في هذه التدوينة حول 


حمل اسطوانة التعاريف DriverPack 17.10.14 الاحدث 2020 برابط مباشر


لمحةعامة عن أسطوانة التعريفات DriverPack Solution 2020


الاسطوانة بها جميع التعريفات لجميع القطع والماركات العالمية. أهم ما يميز هذه الاسطوانة أنها تعمل offline من أجل اكتمال التعريفات وتنصيبها، حيث أن التعريفات تم تحميلها مسبقا، كما أن اسطوانة DriverPack Solution 2020 Offline ISO ستغنيك عن استخدام برامج التعريفات online التي تحتاج الى اتصال انترنت.


الشركة المطورة للاسطوانة تصدر تحديثات دورية لها باستمرار من أجل وضع آخر الاصدارات الخاصة بالتعريفات لجميع الماركات العالمية، الاصدار الاخير من اسطوانة 2020 DriverPack Solution اصبحت تدعم ويندوز 10 وأيضاً النسخة الأخيرة منه.


الاسطوانة تعمل على جميع الاصدارات القديمة من windows سواء كنت تستخدم windows 7 أو 8 أو windows 8.1 أو windows XP. نذكرك أيضا أن الاسطوانة داعمة للغة العربية بشكل كامل ويمكنك استخدامها باللغة الانجليزية لو أردت ذلك، كما أنها تعمل على نسخ الويندوز ذات النواة 32 بت و64 بت.


تنزيل اسطوانة تعاريف الحاسب 2020 تحميل اسطوانة DriverPack الاحدث 2020 جميع تعريفات كل الحواسيب رابط مباشر - رابط درايف-صيغة ايزو تعريفات بصيغة ISO


الموقع الرسمي للأسطوانة


تعمل اسطوانة التعريفات الشهيرة DriverPack Solution 2020 Offline ISO على تعريف جميع الأجزاء والقطع مثل تعريف الشبكة Network وكرت الصوت وكرت الشاشة. الاسطوانة قادرة على تعريف أجهزة laptop HP وLaptop TOSHIBA و Acer و Dell وLENOVO وجميع الماركات الأخرى 

يمكنك بعد تحميل الاسطوانة أن تقوم بحرقها على فلاشة يو اس بي USB، وفي حالة قمت بتنصيب نسخة ويندوز جديدة على جهازك، يمكنك وضع الفلاشة واستخدام الاسطوانة مباشرة في تعريف كل أجزاء الكمبيوتر بدون وجود انترنت.


اقرا ايضا : اداة تثبيت التعريفات للحاسب اونلاين IObit Drivers Booster

معلومات التحميل Driver Pack 17.10.14 2020 


النسخة بصيغة iso ومرفوعة على جوجل درايف


تفاصيلها


DriverPack 17.10.14 Offline


بحجم 18.5 جيجا


التحميل


download


روابط تحميل الاصدارات الاخرى


الإصدار: 17.10.14-20035


رابط مباشر

download


الإصدار: 17.10.14-20035

رابط تورنت


download


حمل اسطوانة التعريفات Driver Pack 17.10.14 2020

التعريب الوكالة لهاتف 2.3.6 samsung sch-i699 تشاينا تيليكوم


ROM I699  FIRMWARE-STOCK ROM  فلاشة-تعريب - روم معربة


ROM I699
FIRMWARE-STOCK ROM
فلاشة-تعريب - روم معربة

يتم التعريب بالتفليش عبر أودين

تفاصيل التعريب الأول


SCH-I699 ARABIC BY BASEM ALMANSORY
MEGA


التعريب الثاني


من تطوير شركة اللوزي


الروم الوكالة


ROM I699 FIRMWARE-STOCK ROM فلاشة-تعريب - روم معربة


تفاصيلها

I699HK17_I699HK17_2.3.6


تفليش ريكفيري معدل


يمكن تفليش ريكفيري معدل عبر

أداة بروتتش لتفليش ريكفيري معدل
رابط التحمــــيل 


الشرح


بعد تثبيت الاداة قم بفتحها بتطلب منك الباسورد 


الباسوورد
pro-touch


وهاذا ريكفري مطور


recovery-cwm-5.0.2.8-I699.tar


PASS= AHMED_HADDAD

يتم التركيب عبر الـOdin


تعريب جديد + التعريب الوكالة لهاتف 2.3.6 samsung sch-i699 تشاينا تيليكوم

التعريب الوكالة لهاتف 2.3.6 samsung sch-i699 تشاينا تيليكوم


ROM I699  FIRMWARE-STOCK ROM  فلاشة-تعريب - روم معربة


  • ROM I699
  • FIRMWARE-STOCK ROM
  • فلاشة-تعريب - روم معربة


يتم التعريب بالتفليش عبر أودين

تفاصيل التعريب الأول


SCH-I699 ARABIC BY BASEM ALMANSORY
MEGA


التعريب الثاني


من تطوير شركة اللوزي


الروم الوكالة


ROM I699 FIRMWARE-STOCK ROM فلاشة-تعريب - روم معربة


تفاصيلها

I699HK17_I699HK17_2.3.6


تفليش ريكفيري معدل


يمكن تفليش ريكفيري معدل عبر

أداة بروتتش لتفليش ريكفيري معدل
رابط التحمــــيل 


الشرح


بعد تثبيت الاداة قم بفتحها بتطلب منك الباسورد 


الباسوورد
pro-touch


وهاذا ريكفري مطور


recovery-cwm-5.0.2.8-I699.tar


PASS= AHMED_HADDAD

يتم التركيب عبر الـOdin

فلاشة عربية i699 بعدة روابط مع الروم الرسمية

What is the root and what are the benefits and harms

Root is a program that gives the user full powers to control the operating system where it can modify the operating system files or delete in the sense of the most complete control of the phone.
root j111m,how to root j111m,root j111m 5.1.1

Root features:
1-Modify or delete files or applications of the operating system.
2-Run programs that require root permissions.
3-Change the basic fonts within the Android system.
4-Move applications from device memory to external memory.
5-Installation of Custom rom.
6-Fix errors DRK and DM-Verity.

Cons of the root:
1-Loss of phone warranty.
2-Some applications do not work due to root (bluestacks root / dr fone root).
3-Stand on the company logo as a result of misuse.
4-The operating system crashed due to deletion or modification of important system files.


important warning:
  • Installation and use of the root android is entirely at your own risk and we do not take any responsibility for device failure.
  • In older versions of the Android system such as Jelly Bean and KitKat was using apps (kingroot / kingo root / framaroot / iroot root king / towelroot) To get root permissions either in new versions such as Lollipop, Marshmallow, Nougat, Pie and future versions of the Android system, these applications do not work.


What is the difference between SuperSU and Magisk

 VS 

The main difference between Magisk and SuperSU is how the root works on Android. Based on what the user wants to do.
We will first talk about supersu root how to get the root where it installs itself within the system files It changes the system files and adds new files to the system partition on the phone, but with the enhancement of Google to protect Android it has become difficult to do so that the amendment to the partition of the Android system to send an alert to applications that are trying to detect the presence of root.
Google SafetyNet monitors the operating system from any manipulation, and when it detects any manipulation in the Android operating system, most applications will not work and will not send you OTA updates.
What about Magisk is one of the most important features that does not touch system files, but modifies the boot partition instead so that it can trick safetyNet service and show that everything is normal and allows Magisk Manager to fully control the root settings.


Notes before root process

  • Charge the battery well before use.
  • Use the original USB cable that came with the device.
  • Use the laptop at work to avoid electricity problems.
  • You should focus well to protect the binary of your device.
  • The following protections must be disabled (FRP - OEM - RMM/KG) Follow the following article to learn How to Disbled FRP and OEM for device Samsung Galaxy.


Device information

-Brand Name: Samsung Galaxy
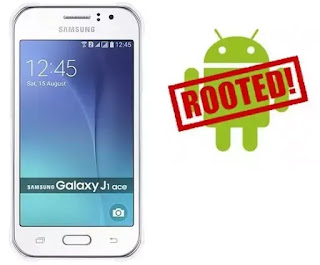
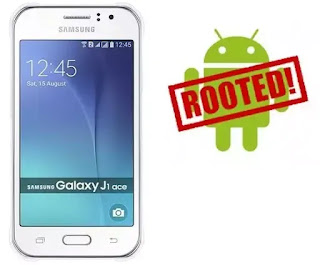
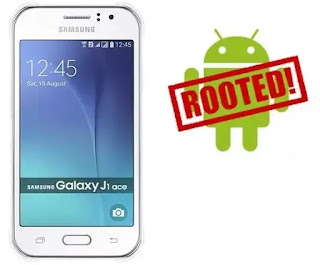
-Device Name: Galaxy J1 ACE
-Model: SM-J111M root
-Operating system: Android Lollipop 5.1.1


Files required for root work

How To Root Galaxy J111M android Lollipop 5.1.1

1-Download Drivers, Flash Tool and J111M Root files for Lollipop 5.1.1 Depending on your device version.
2-Install the drivers on your device.
3-Install the EFTSU Manager app on your Phone.
4-Download Root File.
5-Open the EFTSU Flash Tool.
6-From the top, click on Select File and then choose the root file.
7-Boot your device into download mode press and hold Home + Power + Volume Down buttons.
8-Press Flash to start.
9-After booting the device open EFTSU Manager app you need to reboot your device to get root permissions.
10-You can check for root access through the root checker app.
11-In case you encounter any problems please feel free to contact us
12-If you want to unroot or revert to the offical firmware, you can flash new firmware.

How To Root Samsung Galaxy J1 ACE SM-J111M

What is the root and what are the benefits and harms

Root is a program that gives the user full powers to control the operating system where it can modify the operating system files or delete in the sense of the most complete control of the phone.
root j111f,how to root j111f,root j111f 5.1.1

Root features:
1-Modify or delete files or applications of the operating system.
2-Run programs that require root permissions.
3-Change the basic fonts within the Android system.
4-Move applications from device memory to external memory.
5-Installation of Custom rom.
6-Fix errors DRK and DM-Verity.

Cons of the root:
1-Loss of phone warranty.
2-Some applications do not work due to root (bluestacks root / dr fone root).
3-Stand on the company logo as a result of misuse.
4-The operating system crashed due to deletion or modification of important system files.


important warning:
  • Installation and use of the root android is entirely at your own risk and we do not take any responsibility for device failure.
  • In older versions of the Android system such as Jelly Bean and KitKat was using apps (kingroot / kingo root / framaroot / iroot root king / towelroot) To get root permissions either in new versions such as Lollipop, Marshmallow, Nougat, Pie and future versions of the Android system, these applications do not work.


What is the difference between SuperSU and Magisk

 VS 

The main difference between Magisk and SuperSU is how the root works on Android. Based on what the user wants to do.
We will first talk about supersu root how to get the root where it installs itself within the system files It changes the system files and adds new files to the system partition on the phone, but with the enhancement of Google to protect Android it has become difficult to do so that the amendment to the partition of the Android system to send an alert to applications that are trying to detect the presence of root.
Google SafetyNet monitors the operating system from any manipulation, and when it detects any manipulation in the Android operating system, most applications will not work and will not send you OTA updates.
What about Magisk is one of the most important features that does not touch system files, but modifies the boot partition instead so that it can trick safetyNet service and show that everything is normal and allows Magisk Manager to fully control the root settings.


Notes before root process

  • Charge the battery well before use.
  • Use the original USB cable that came with the device.
  • Use the laptop at work to avoid electricity problems.
  • You should focus well to protect the binary of your device.
  • The following protections must be disabled (FRP - OEM - RMM/KG) Follow the following article to learn How to Disbled FRP and OEM for device Samsung Galaxy.


Device information

-Brand Name: Samsung Galaxy
-Device Name: Galaxy J1 ACE
-Model: SM-J111F root
-Operating system: Android Lollipop 5.1.1


Files required for root work

How To Root Galaxy J111F android Lollipop 5.1.1

1-Download Drivers, Flash Tool and J111F Root files for Lollipop 5.1.1 Depending on your device version.
2-Install the drivers on your device.
3-Install the EFTSU Manager app on your Phone.
4-Download Root File.
5-Open the EFTSU Flash Tool.
6-From the top, click on Select File and then choose the root file.
7-Boot your device into download mode press and hold Home + Power + Volume Down buttons.
8-Press Flash to start.
9-After booting the device open EFTSU Manager app you need to reboot your device to get root permissions.
10-You can check for root access through the root checker app.
11-In case you encounter any problems please feel free to contact us
12-If you want to unroot or revert to the offical firmware, you can flash new firmware.

How To Root Samsung Galaxy J1 ACE SM-J111F

What is the root and what are the benefits and harms

Root is a program that gives the user full powers to control the operating system where it can modify the operating system files or delete in the sense of the most complete control of the phone.
root j110m,how to root j110m,root j110m 4.4.4

Root features:
1-Modify or delete files or applications of the operating system.
2-Run programs that require root permissions.
3-Change the basic fonts within the Android system.
4-Move applications from device memory to external memory.
5-Installation of Custom rom.
6-Fix errors DRK and DM-Verity.

Cons of the root:
1-Loss of phone warranty.
2-Some applications do not work due to root (bluestacks root / dr fone root).
3-Stand on the company logo as a result of misuse.
4-The operating system crashed due to deletion or modification of important system files.


important warning:
  • Installation and use of the root android is entirely at your own risk and we do not take any responsibility for device failure.
  • In older versions of the Android system such as Jelly Bean and KitKat was using apps (kingroot / kingo root / framaroot / iroot root king / towelroot) To get root permissions either in new versions such as Lollipop, Marshmallow, Nougat, Pie and future versions of the Android system, these applications do not work.


What is the difference between SuperSU and Magisk

 VS 

The main difference between Magisk and SuperSU is how the root works on Android. Based on what the user wants to do.
We will first talk about supersu root how to get the root where it installs itself within the system files It changes the system files and adds new files to the system partition on the phone, but with the enhancement of Google to protect Android it has become difficult to do so that the amendment to the partition of the Android system to send an alert to applications that are trying to detect the presence of root.
Google SafetyNet monitors the operating system from any manipulation, and when it detects any manipulation in the Android operating system, most applications will not work and will not send you OTA updates.
What about Magisk is one of the most important features that does not touch system files, but modifies the boot partition instead so that it can trick safetyNet service and show that everything is normal and allows Magisk Manager to fully control the root settings.


Notes before root process

  • Charge the battery well before use.
  • Use the original USB cable that came with the device.
  • Use the laptop at work to avoid electricity problems.
  • You should focus well to protect the binary of your device.
  • The following protections must be disabled (FRP - OEM - RMM/KG) Follow the following article to learn How to Disbled FRP and OEM for device Samsung Galaxy.


Device information

-Brand Name: Samsung Galaxy
-Device Name: Galaxy J1 ACE
-Model: SM-J110M root
-Operating system: Android Kitkat 4.4.4


Files required for root work

How To Root Galaxy J110M android Kitkat 4.4.4

1-Download Drivers, Flash Tool and J110M Root files for Kitkat 4.4.4 Depending on your device version.
2-Install the drivers on your device.
3-Install the EFTSU Manager app on your Phone.
4-Download Root File.
5-Open the EFTSU Flash Tool.
6-From the top, click on Select File and then choose the root file.
7-Boot your device into download mode press and hold Home + Power + Volume Down buttons.
8-Press Flash to start.
9-After booting the device open EFTSU Manager app you need to reboot your device to get root permissions.
10-You can check for root access through the root checker app.
11-In case you encounter any problems please feel free to contact us
12-If you want to unroot or revert to the offical firmware, you can flash new firmware.

How To Root Samsung Galaxy J1 ACE SM-J110M

What is the root and what are the benefits and harms

Root is a program that gives the user full powers to control the operating system where it can modify the operating system files or delete in the sense of the most complete control of the phone.
root j110l,how to root j110l,root j110l 4.4.4

Root features:
1-Modify or delete files or applications of the operating system.
2-Run programs that require root permissions.
3-Change the basic fonts within the Android system.
4-Move applications from device memory to external memory.
5-Installation of Custom rom.
6-Fix errors DRK and DM-Verity.

Cons of the root:
1-Loss of phone warranty.
2-Some applications do not work due to root (bluestacks root / dr fone root).
3-Stand on the company logo as a result of misuse.
4-The operating system crashed due to deletion or modification of important system files.


important warning:
  • Installation and use of the root android is entirely at your own risk and we do not take any responsibility for device failure.
  • In older versions of the Android system such as Jelly Bean and KitKat was using apps (kingroot / kingo root / framaroot / iroot root king / towelroot) To get root permissions either in new versions such as Lollipop, Marshmallow, Nougat, Pie and future versions of the Android system, these applications do not work.


What is the difference between SuperSU and Magisk

 VS 

The main difference between Magisk and SuperSU is how the root works on Android. Based on what the user wants to do.
We will first talk about supersu root how to get the root where it installs itself within the system files It changes the system files and adds new files to the system partition on the phone, but with the enhancement of Google to protect Android it has become difficult to do so that the amendment to the partition of the Android system to send an alert to applications that are trying to detect the presence of root.
Google SafetyNet monitors the operating system from any manipulation, and when it detects any manipulation in the Android operating system, most applications will not work and will not send you OTA updates.
What about Magisk is one of the most important features that does not touch system files, but modifies the boot partition instead so that it can trick safetyNet service and show that everything is normal and allows Magisk Manager to fully control the root settings.


Notes before root process

  • Charge the battery well before use.
  • Use the original USB cable that came with the device.
  • Use the laptop at work to avoid electricity problems.
  • You should focus well to protect the binary of your device.
  • The following protections must be disabled (FRP - OEM - RMM/KG) Follow the following article to learn How to Disbled FRP and OEM for device Samsung Galaxy.


Device information

-Brand Name: Samsung Galaxy
-Device Name: Galaxy J1 ACE
-Model: SM-J110L root
-Operating system: Android Kitkat 4.4.4


Files required for root work

How To Root Galaxy J110L android Kitkat 4.4.4

1-Download Drivers, Flash Tool and J110L Root files for Kitkat 4.4.4 Depending on your device version.
2-Install the drivers on your device.
3-Install the EFTSU Manager app on your Phone.
4-Download Root File.
5-Open the EFTSU Flash Tool.
6-From the top, click on Select File and then choose the root file.
7-Boot your device into download mode press and hold Home + Power + Volume Down buttons.
8-Press Flash to start.
9-After booting the device open EFTSU Manager app you need to reboot your device to get root permissions.
10-You can check for root access through the root checker app.
11-In case you encounter any problems please feel free to contact us
12-If you want to unroot or revert to the offical firmware, you can flash new firmware.

How To Root Samsung Galaxy J1 ACE SM-J110L