Halaman

    Social Items

What is the root and what are the benefits and harms

Root is a program that gives the user full powers to control the operating system where it can modify the operating system files or delete in the sense of the most complete control of the phone.
root j250f,how to root j250f,root j250f 7.1.1

Root features:
1-Modify or delete files or applications of the operating system.
2-Run programs that require root permissions.
3-Change the basic fonts within the Android system.
4-Move applications from device memory to external memory.
5-Installation of Custom rom.
6-Fix errors DRK and DM-Verity.

Cons of the root:
1-Loss of phone warranty.
2-Some applications do not work due to root (bluestacks root / dr fone root).
3-Stand on the company logo as a result of misuse.
4-The operating system crashed due to deletion or modification of important system files.


important warning:
  • Installation and use of the root android is entirely at your own risk and we do not take any responsibility for device failure.
  • In older versions of the Android system such as Jelly Bean and KitKat was using apps (kingroot / kingo root / framaroot / iroot root king / towelroot) To get root permissions either in new versions such as Lollipop, Marshmallow, Nougat, Pie and future versions of the Android system, these applications do not work.


What is the difference between SuperSU and Magisk

 VS 

The main difference between Magisk and SuperSU is how the root works on Android. Based on what the user wants to do.
We will first talk about supersu root how to get the root where it installs itself within the system files It changes the system files and adds new files to the system partition on the phone, but with the enhancement of Google to protect Android it has become difficult to do so that the amendment to the partition of the Android system to send an alert to applications that are trying to detect the presence of root.
Google SafetyNet monitors the operating system from any manipulation, and when it detects any manipulation in the Android operating system, most applications will not work and will not send you OTA updates.
What about Magisk is one of the most important features that does not touch system files, but modifies the boot partition instead so that it can trick safetyNet service and show that everything is normal and allows Magisk Manager to fully control the root settings.


Notes before root process

  • Charge the battery well before use.
  • Use the original USB cable that came with the device.
  • Use the laptop at work to avoid electricity problems.
  • You should focus well to protect the binary of your device.
  • The following protections must be disabled (FRP - OEM - RMM/KG) Follow the following article to learn How to Disbled FRP and OEM for device Samsung Galaxy.


Device information

-Brand Name: Samsung Galaxy
-Device Name: Galaxy J2 Pro
-Model: SM-J250F root
-Operating system: Android Nougat 7.1.1


Files required for root work

How To Root Galaxy J250F android Nougat 7.1.1

1-Download Drivers and flash Tool.
2-Install the drivers on your device.
3-Download Root File, The baseband version must match the version of the root file.
4-Open the EFTSU Flash Tool.
5-From the top, click on Select File and then choose the root file.
6-Boot your device into download mode prees Volume Down + Volume Up and connect the USB cable.
7-Press Flash to start.
8-After booting the device install EFTSU Manager app.
9-Then, from the EFTSU Flash tool, we click on Reboot ADB Device to Root Mode (Recovery mode).
10-When the boot is complete, Open the EFTSU Manager app to get the root.
11-You can check for root access through the root checker app.
12-In case you encounter any problems please feel free to contact us
13-If you want to unroot or revert to the offical firmware, you can flash new firmware.
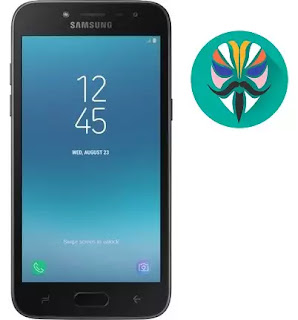
How To Root Samsung Galaxy J2 Pro SM-J250F

What is the root and what are the benefits and harms

Root is a program that gives the user full powers to control the operating system where it can modify the operating system files or delete in the sense of the most complete control of the phone.
root j260y,how to root j260y,root j260y 8.1.0

Root features:
1-Modify or delete files or applications of the operating system.
2-Run programs that require root permissions.
3-Change the basic fonts within the Android system.
4-Move applications from device memory to external memory.
5-Installation of Custom rom.
6-Fix errors DRK and DM-Verity.

Cons of the root:
1-Loss of phone warranty.
2-Some applications do not work due to root (bluestacks root / dr fone root).
3-Stand on the company logo as a result of misuse.
4-The operating system crashed due to deletion or modification of important system files.


important warning:
  • Installation and use of the root android is entirely at your own risk and we do not take any responsibility for device failure.
  • In older versions of the Android system such as Jelly Bean and KitKat was using apps (kingroot / kingo root / framaroot / iroot root king / towelroot) To get root permissions either in new versions such as Lollipop, Marshmallow, Nougat, Pie and future versions of the Android system, these applications do not work.


What is the difference between SuperSU and Magisk

 VS 

The main difference between Magisk and SuperSU is how the root works on Android. Based on what the user wants to do.
We will first talk about supersu root how to get the root where it installs itself within the system files It changes the system files and adds new files to the system partition on the phone, but with the enhancement of Google to protect Android it has become difficult to do so that the amendment to the partition of the Android system to send an alert to applications that are trying to detect the presence of root.
Google SafetyNet monitors the operating system from any manipulation, and when it detects any manipulation in the Android operating system, most applications will not work and will not send you OTA updates.
What about Magisk is one of the most important features that does not touch system files, but modifies the boot partition instead so that it can trick safetyNet service and show that everything is normal and allows Magisk Manager to fully control the root settings.


Notes before root process

  • Charge the battery well before use.
  • Use the original USB cable that came with the device.
  • Use the laptop at work to avoid electricity problems.
  • You should focus well to protect the binary of your device.
  • The following protections must be disabled (FRP - OEM - RMM/KG) Follow the following article to learn How to Disbled FRP and OEM for device Samsung Galaxy.


Device information

-Brand Name: Samsung Galaxy
-Device Name: Galaxy J2 Core
-Model: SM-J260Y root
-Operating system: Android Oreo 8.1.0


Files required for root work

How To Root Galaxy J260Y android Oreo 8.1.0

1-Download Drivers and flash Tool.
2-Install the drivers on your device.
3-Download Root File, The baseband version must match the version of the root file.
4-Open the EFTSU Flash Tool.
5-From the top, click on Select File and then choose the root file.
6-Boot your device into download mode prees Volume Down + Volume Up and connect the USB cable.
7-Press Flash to start.
8-After booting the device install EFTSU Manager app.
9-Then, from the EFTSU Flash tool, we click on Reboot ADB Device to Root Mode (Recovery mode).
10-When the boot is complete, Open the EFTSU Manager app to get the root.
11-You can check for root access through the root checker app.
12-In case you encounter any problems please feel free to contact us
13-If you want to unroot or revert to the offical firmware, you can flash new firmware.

How To Root Samsung Galaxy J2 Core SM-J260Y

What is the root and what are the benefits and harms

Root is a program that gives the user full powers to control the operating system where it can modify the operating system files or delete in the sense of the most complete control of the phone.
root j260m,how to root j260m,root j260m 8.1.0

Root features:
1-Modify or delete files or applications of the operating system.
2-Run programs that require root permissions.
3-Change the basic fonts within the Android system.
4-Move applications from device memory to external memory.
5-Installation of Custom rom.
6-Fix errors DRK and DM-Verity.

Cons of the root:
1-Loss of phone warranty.
2-Some applications do not work due to root (bluestacks root / dr fone root).
3-Stand on the company logo as a result of misuse.
4-The operating system crashed due to deletion or modification of important system files.


important warning:
  • Installation and use of the root android is entirely at your own risk and we do not take any responsibility for device failure.
  • In older versions of the Android system such as Jelly Bean and KitKat was using apps (kingroot / kingo root / framaroot / iroot root king / towelroot) To get root permissions either in new versions such as Lollipop, Marshmallow, Nougat, Pie and future versions of the Android system, these applications do not work.


What is the difference between SuperSU and Magisk

 VS 

The main difference between Magisk and SuperSU is how the root works on Android. Based on what the user wants to do.
We will first talk about supersu root how to get the root where it installs itself within the system files It changes the system files and adds new files to the system partition on the phone, but with the enhancement of Google to protect Android it has become difficult to do so that the amendment to the partition of the Android system to send an alert to applications that are trying to detect the presence of root.
Google SafetyNet monitors the operating system from any manipulation, and when it detects any manipulation in the Android operating system, most applications will not work and will not send you OTA updates.
What about Magisk is one of the most important features that does not touch system files, but modifies the boot partition instead so that it can trick safetyNet service and show that everything is normal and allows Magisk Manager to fully control the root settings.


Notes before root process

  • Charge the battery well before use.
  • Use the original USB cable that came with the device.
  • Use the laptop at work to avoid electricity problems.
  • You should focus well to protect the binary of your device.
  • The following protections must be disabled (FRP - OEM - RMM/KG) Follow the following article to learn How to Disbled FRP and OEM for device Samsung Galaxy.


Device information

-Brand Name: Samsung Galaxy
-Device Name: Galaxy J2 Core
-Model: SM-J260M root
-Operating system: Android Oreo 8.1.0


Files required for root work


How To Root Galaxy J260M android Oreo 8.1.0

1-Download Drivers and flash Tool.
2-Install the drivers on your device.
3-Download Root File, The baseband version must match the version of the root file.
4-Open the EFTSU Flash Tool.
5-From the top, click on Select File and then choose the root file.
6-Boot your device into download mode prees Volume Down + Volume Up and connect the USB cable.
7-Press Flash to start.
8-After booting the device install EFTSU Manager app.
9-Then, from the EFTSU Flash tool, we click on Reboot ADB Device to Root Mode (Recovery mode).
10-When the boot is complete, Open the EFTSU Manager app to get the root.
11-You can check for root access through the root checker app.
12-In case you encounter any problems please feel free to contact us
13-If you want to unroot or revert to the offical firmware, you can flash new firmware.

How To Root Samsung Galaxy J2 Core SM-J260M

What is the root and what are the benefits and harms

Root is a program that gives the user full powers to control the operating system where it can modify the operating system files or delete in the sense of the most complete control of the phone.
root j260g,how to root j260g,root j260g 8.1.0

Root features:
1-Modify or delete files or applications of the operating system.
2-Run programs that require root permissions.
3-Change the basic fonts within the Android system.
4-Move applications from device memory to external memory.
5-Installation of Custom rom.
6-Fix errors DRK and DM-Verity.

Cons of the root:
1-Loss of phone warranty.
2-Some applications do not work due to root (bluestacks root / dr fone root).
3-Stand on the company logo as a result of misuse.
4-The operating system crashed due to deletion or modification of important system files.


important warning:
  • Installation and use of the root android is entirely at your own risk and we do not take any responsibility for device failure.
  • In older versions of the Android system such as Jelly Bean and KitKat was using apps (kingroot / kingo root / framaroot / iroot root king / towelroot) To get root permissions either in new versions such as Lollipop, Marshmallow, Nougat, Pie and future versions of the Android system, these applications do not work.


What is the difference between SuperSU and Magisk

 VS 

The main difference between Magisk and SuperSU is how the root works on Android. Based on what the user wants to do.
We will first talk about supersu root how to get the root where it installs itself within the system files It changes the system files and adds new files to the system partition on the phone, but with the enhancement of Google to protect Android it has become difficult to do so that the amendment to the partition of the Android system to send an alert to applications that are trying to detect the presence of root.
Google SafetyNet monitors the operating system from any manipulation, and when it detects any manipulation in the Android operating system, most applications will not work and will not send you OTA updates.
What about Magisk is one of the most important features that does not touch system files, but modifies the boot partition instead so that it can trick safetyNet service and show that everything is normal and allows Magisk Manager to fully control the root settings.


Notes before root process

  • Charge the battery well before use.
  • Use the original USB cable that came with the device.
  • Use the laptop at work to avoid electricity problems.
  • You should focus well to protect the binary of your device.
  • The following protections must be disabled (FRP - OEM - RMM/KG) Follow the following article to learn How to Disbled FRP and OEM for device Samsung Galaxy.


Device information

-Brand Name: Samsung Galaxy
-Device Name: Galaxy J2 Core
-Model: SM-J260G root
-Operating system: Android Oreo 8.1.0


Files required for root work

How To Root Galaxy J260G android Oreo 8.1.0

1-Download Drivers and flash Tool.
2-Install the drivers on your device.
3-Download Root File, The baseband version must match the version of the root file.
4-Open the EFTSU Flash Tool.
5-From the top, click on Select File and then choose the root file.
6-Boot your device into download mode prees Volume Down + Volume Up and connect the USB cable.
7-Press Flash to start.
8-After booting the device install EFTSU Manager app.
9-Then, from the EFTSU Flash tool, we click on Reboot ADB Device to Root Mode (Recovery mode).
10-When the boot is complete, Open the EFTSU Manager app to get the root.
11-You can check for root access through the root checker app.
12-In case you encounter any problems please feel free to contact us
13-If you want to unroot or revert to the offical firmware, you can flash new firmware.

How To Root Samsung Galaxy J2 Core SM-J260G

What is the root and what are the benefits and harms

Root is a program that gives the user full powers to control the operating system where it can modify the operating system files or delete in the sense of the most complete control of the phone.
root j260f,how to root j260f,root j260f 8.1.0

Root features:
1-Modify or delete files or applications of the operating system.
2-Run programs that require root permissions.
3-Change the basic fonts within the Android system.
4-Move applications from device memory to external memory.
5-Installation of Custom rom.
6-Fix errors DRK and DM-Verity.

Cons of the root:
1-Loss of phone warranty.
2-Some applications do not work due to root (bluestacks root / dr fone root).
3-Stand on the company logo as a result of misuse.
4-The operating system crashed due to deletion or modification of important system files.


important warning:
  • Installation and use of the root android is entirely at your own risk and we do not take any responsibility for device failure.
  • In older versions of the Android system such as Jelly Bean and KitKat was using apps (kingroot / kingo root / framaroot / iroot root king / towelroot) To get root permissions either in new versions such as Lollipop, Marshmallow, Nougat, Pie and future versions of the Android system, these applications do not work.


What is the difference between SuperSU and Magisk

 VS 

The main difference between Magisk and SuperSU is how the root works on Android. Based on what the user wants to do.
We will first talk about supersu root how to get the root where it installs itself within the system files It changes the system files and adds new files to the system partition on the phone, but with the enhancement of Google to protect Android it has become difficult to do so that the amendment to the partition of the Android system to send an alert to applications that are trying to detect the presence of root.
Google SafetyNet monitors the operating system from any manipulation, and when it detects any manipulation in the Android operating system, most applications will not work and will not send you OTA updates.
What about Magisk is one of the most important features that does not touch system files, but modifies the boot partition instead so that it can trick safetyNet service and show that everything is normal and allows Magisk Manager to fully control the root settings.


Notes before root process

  • Charge the battery well before use.
  • Use the original USB cable that came with the device.
  • Use the laptop at work to avoid electricity problems.
  • You should focus well to protect the binary of your device.
  • The following protections must be disabled (FRP - OEM - RMM/KG) Follow the following article to learn How to Disbled FRP and OEM for device Samsung Galaxy.


Device information

-Brand Name: Samsung Galaxy
-Device Name: Galaxy J2 Core
-Model: SM-J260F root
-Operating system: Android Oreo 8.1.0


Files required for root work

How To Root Galaxy J260F android Oreo 8.1.0

1-Download Drivers and flash Tool.
2-Install the drivers on your device.
3-Download Root File, The baseband version must match the version of the root file.
4-Open the EFTSU Flash Tool.
5-From the top, click on Select File and then choose the root file.
6-Boot your device into download mode prees Volume Down + Volume Up and connect the USB cable.
7-Press Flash to start.
8-After booting the device install EFTSU Manager app.
9-Then, from the EFTSU Flash tool, we click on Reboot ADB Device to Root Mode (Recovery mode).
10-When the boot is complete, Open the EFTSU Manager app to get the root.
11-You can check for root access through the root checker app.
12-In case you encounter any problems please feel free to contact us
13-If you want to unroot or revert to the offical firmware, you can flash new firmware.
How To Root Samsung Galaxy J2 Core SM-J260F

تحديث جديد لاداة فريق الغموض  Mysterious Dev Premium Tool V2.0

مع اضافات جديدة -تدعم  اجهزة  Oppo, Vivo ,Samsung, Huawei, HTC, LG,  Xiaomi  ,Qualcomm ,lenove
الاصدار الثاني مع الكيجن اداة فريق الغموض 2
Mysterious Dev Premium Tool V2.0
اداة  Mysterious Dev Premium Tool V2.0 

Mysterious Dev Premium Tool - V2.0

تحديث جديد لاداة  Mysterious Dev Premium Tool

بتحسينات واضافات جديدة    CDMA Dev         


التحسينات والاضافات الجديدة

1- تعمل الاداة على اصدار 32 bit 64 --bit

قائمة تعريب جميع اجهزة الاندرويد جميع الاصدارات بدون روت
تحسينات في تعريب سامسونج بدون روت جميع الاصدارات 

 -تعريب بدون روت اصدار5.x.x
-تعريب بدون روت اصدار 6.x.x
-تعريب بدون روت اصدار 7.x.x
-تعريب بدون روت اصدار 8.x.x
-تعريب بدون روت اصدار 9.x.x

اضافة خيار اصلاح التعريب 
من ضمن الاصلاح
اصلاح مشكلة توقف جهات الاتصال 
اصلاح مشكلة عدم تعريب الرسائل 
اصلاح مشكلة عدم تعريب التطبيقات التي يتم تثبيتها
اولأ يجب اختيار التعريب ومن ثم اصلاح 
 -------------------------------------------------------------------
 قائمة samsung

 Network
 1- Fix IMEI
2-FIX IMIP FAILD

3-UNLOCK CDMA
-فك شفرة جميع اجهزة سامسونج الحديثة 
واصلاح مشاكل الشبكة بعد الفرمته او التحديث  بدون روت
فقط قم بادراج شريحة فرايزون
S7 ,S8, S8 PLUS, S9, S9 PLUS, S10, S10PLUS, NOT8, NOT7, NOT9, NOT10
4- Unlock China Telecom
فك شفرة جميع اجهزة تشيناتيلكوم                CDMA Dev

Repairs

  1-Disable sim Card is not from Verizon (Root)
ازالة اشعار بطاقة sim ليست من فرازيون
2-Disable send security Reports (root) 
3-Remove security Notice (Without Root)
4-Fix Checking Device Status Notice
حذف اشعارات الامان لاجهزة سامسونج بدون روت
5-Enable Data Icon
تفعيل ايقونات البيانات بدون روت
6-Disable Factory Mode
تعطيل Factory Mode في جميع اجهزة سامسونج 
7- Remove please Call Me -
enable Unknown Source- 8
 تفعيل  مصادر غير معروفة 
 9-fixing S-Healith Knox Tripped 
10-fix Reboot (Boot Loob)

اصلاح مشاكل اعادة التشغيل 
Enable Diag

1-  Enable Diag without root -with root
تفعيل الدياق بدون روت 
- تفعيل الدياق روت
FRP / Samsung Account
تخطي حساب جوجل لجميع اجهزة سامسونج
 تخطي حساب سامسونج اكونت لجميع اجهزة سامسونج

 fix software bricked (smart switch mode )*

 Fix Hand Free

 اصلاح مشكلة تنشيط السماعة السلكية لجميع الاجهزة بدون روت
 Fix Hand Free Without Root For (Samsung, ZTE,LG, HTC

حذف تطبيقات الشركات بدون روت  Remove Apps 
Remove Sprint Apps Without Root
Remove Verizon Apps Without Root
Remove T-Mobile Apps Without Root   

Remove AT&T Apps Without Root

  قائمة fastboot
FRP Lenove
FRP Remove Xiaomi
FRP Remove Huawe
FRP Remove HTC
FRP Micro Max
FRP Universal
FRP Qualcomm
قائمة Lz4
Extract system,boot,recovery,sboot,aboot,userdata,modem -Lz4 -convert to img

استخراج وتحويل جميع الاقسام من Lz4 الي img

قائمة General

-Anit-Relock (Xiaomi)
- تفعيل الدياق جميع الاجهزة يحتاج روت
-الغاء تفعيل الدياق جميع الاجهزة يحتاج روت

-FRP ADB
-Fix Wifi lg اصلاح الوفاي اجهزة LG
- تثبيت كيبور السراب البعيد
- Remove scren Lock (No Root)
- Remove scren Lock ( Root)
ازالة قفل الشاشة بدون روت ازالة قفل الشاشة روت 


https://mega.nz/#!b1kDDSCT!kiHI7WOzFM3QrdklQX5iIC_YnGpM9KzYFOd4JvfdNvw

PASS= AHMED_HADDAD


حصريا الاصدار الثاني اداة Mysterious Dev Premium Tool V2.0

اقدم لكم لعبة القتال والحرب الشهيرة Call Of Duty متاحة الان للاندرويد لانه بكل بساطه اللعبة الآن مدعومه في جميع البلاد العربية واليوم سنشرح تنزيلها وطريقة التشغيل لكل الأجهزة الذكية في نسختها الاصليه المخصصة للهواتف والجوالات المحمولة!

لعبة كول اوف ديوتي Call Of Duty Mobile كاملة apk + data obb النسخة الاصلية أحدث اصدار للاندرويد.وتعتبر هذه اللعبة من أفضل العاب google ضمن العاب اون لاين حرب وقتال.

فيما يلي سأشرح لك كيفية تحميل لعبة كول اوف ديوتي Call Of Duty Mobile كامله للاندرويد، واهم المميزات الخاصه بها.


لعبة Call Of Duty Mobile الاصلية للاندرويد.

تعتبر لعبة كول اوف ديوتي واحدة من أفضل واشهر العاب الحرب والقتال الجماعي online وهي اقوى لعبة من فئة باتل رويال! وتعتبر هذه اللعبة منافس قوي للعبة pubg mobile ولعبة Free fire، ولعبة MC 5، وربما تتغلب عليها جميعا في فترة وجيزة من إصدار النسخة الاصلية بشكل رسمي، واتاحتها للتنزيل من متجر google play بشكل رسمي.

معلومات حول لعبة كول اوف ديوتي موبايل :


تحتوي Call of Duty Mobile على وضعين رئيسيين للعبة 'zombies' و'multiplayer'. كلاهما من الأوضاع المشهورة في الامتياز ويتحدونك لمواجهة اللاعبين الآخرين على الإنترنت، إلى جانب التعاون معهم من أجل تدمير الموتى الاحياء Nuketown، Hijacked أو Killhouse هي من الخرائط القليلة الاكثر شهرة التي يمكن أن نلعب فيها.

استخدم مهاراتك للارتقاء إلى القمة في وضع الترتيب التنافسي، أو الفوز بجوائز Clan في اللعبة في أثناء اللعب مع الأصدقاء.

أثناء تشغيل Call of Duty Mobile، ستربح وتفتح العديد من الشخصيات البارزة، الأسلحة، الملابس، scorestreaks، والعتاد من الكون Call of Duty الذي يمكن استخدامه لتخصيص عمليات التحميل الخاصة بك.

لعبة Call Of Duty كانت متاحة لمنصات الالعاب الكبيرة فقط مثل أجهزة البلايستيشن PS، واكس بوكس xbox، واجهزة الكمبيوتر pc، ولم تكن متاحة لجميع انواع الهواتف والاجهزة الذكية، سواء العاملة بنظام android، أو أجهزة ابل وهواتف الايفون التي تعمل بنظام Ios.

بعدها قامت شركة Infinity Ward المطورة والمنتجة للعبة كول اوف ديوتي بالتعاون مع شركة Tencent وقامتا بتعديل اللعبة وإنتاج نسخة جديدة منها تحمل اسم "Call Of Duty Mobile" وهي متوافقة مع جميع الأجهزة والهواتف الذكية، وتم إطلاقها رسميا للاندرويد وهواتف Iphone.


النسخة الاصليه من لعبة Call Of Duty Mobile للاندرويد


فقد قمنا بتوفير روابط مباشرة لتنزيل لعبة كول اوف ديوتي موبايل للاندرويد وتجربتها ولعبها الان في اي مكان بالعالم


معلومات اللعبة :

نوع اللعبة: الإثارة والاكشن
الإصدار: اخر اصدار
يتطلب أندرويد: 5.0 فما فوق
حجم اللعبه: 1.3 جيغابايت
التعديل: كاملة - متوفر مجانا!
تحتاج إلى الإنترنت: نعم
الشركة المنتجة: Activision Publishing، Inc. ‏


صور اللعبة :


طريقه تشغيل لعبة Call Of Duty Mobile الاصلية للاندرويد :


  1. اولا قم بتحميل ملف Call of Duty APK الرابط الموجود أسفل الموضوع.
  2. بعد تحميل الملف ثم قم بتثبيت التطبيق كأي تطبيق عادي، ولكن لا تقم بتشغيل اللعبة الآن، لأنها تحتاج إلى ملفات OBB.
  3. بعد ذلك قم بتحميل مجلد Obb، وبداخل هذا الملف المضغوط ستجد مجلد، باسم com. activision. callofduty. shooter
  4. باستخدام أي تطبيق لتصفح ملفات الذاكرة مثل تطبيق Zarchiver الذي يدعم امتدادات zip المضغوطة وستجده أيضا برابط مباشر اخر الموضوع،
  5. قم باستخراج محتويات ملف zip إلى مجلد /Android/obb/ في الذاكرة الداخلية بجهازك الاندرويد، يمكنك أيضا فك الضغط عن ملف zip بأي مكان آخر، المهم هو أن تقوم بنقلها أو نسخها إلى /Android/obb/،
  6. يجب أن تتأكد أن ملف main. 156. com. activision. callofduty. shooter. obb يتواجد حاليا في مجلد /Android/obb/com. activision. callofduty. shooter في ذاكرة الهاتف الداخلية، وذلك كي تعمل اللعبة.

تحميل لعبة كول اوف ديوتي Call Of Duty من متجر Google play سوق بلاي :


في النهاية، أتمنى أن تكون وجدت في هذا الموضوع ما تبحث عنه، واكون قد ساعدك في شرح وتحميل لعبة Call Of Duty Mobile للأندرويد، ومعرفة أهم المميزات الخاصه بها


Thanks for reading ❤
---------------------------------------------
كلمات مفتاحية:
black ops android, تحميل لعبة كولف ديوتي للاندرويد, call of duty تحميل للاندرويد.

تحميل لعبة كول أوف ديوتي موبايل Call of Duty Mobile آخر اصدار