Halaman

    Social Items

Samsung Galaxy A215W Modem bit2

Samsung Galaxy A21 A215U Unlocked Bit2 Metropcs T-Mobile 


Unlock SAMSUNG A21 Last Bit
Unlock SAMSUNG SM-A215U Bit2
Unlock SAMSUNG SM-A215U Latest Binary
Unlock Galaxy A21  
Unlock SAMSUNG SM-A215U 
Modem Samsung Galaxy A215W Last Bit
Modem Samsung Galaxy A215W Bit2
Modem Galaxy A215W Latest Binary

Now Download Frimware A215WVLS2AUC1
and Flashing Only CP Using Odin


The Unlocked of the Samsung Galaxy A21 Phone
, The Second Protection ( U2 | Bit2 | Modem A215W ) 
CDMA + GSM
will be Downloaded for Free 
only on the Alabsi Dev Blog

Samsung Galaxy A215W Modem Bit2

روم ANS UL40 مسحوبة منقولة مع شرح سحب النظام وتجاوز حساب جوجل


تعريب ANS UL40 مسحوب


 تعريب ANS UL40 مسحوب


الروم مسحوبة وغير مجربة للامانة
تم نقلها من دون تجربها
رابط الروم بدون user data


شرح تجاوز حساب جوجل UL40


عبارة عن سكريبت في وضع EDL
رابط الاسكريبت
او


حذف حساب جوجل  FRP ANS UL40 بطريقة اخرى

  • لحذف الحساب نذهب الى  قسم Extra في ميراكل.
  • نختار  Remove account lock other.
  • نضغط START ومبروك.


شرح طريقة سحب النظام ANS UL40 او فك الرمز  او تجاوز الحساب عبر كراك الميراكل

  1. اولا ادخال الهاتف لوضع EDL
  2. نضغط زر الصوت او رفعة ليدخل لوضع الريكفري نسوي Reboot bootloader
  3. الان الهاتف في وضع الفاست بوت نعطيه الامر التالي   Fastboot reboot edl
  4. الان الهاتف في وضع EDL
  5. نفتح الميراكل 2.82
  6. ندخل لتبويب كوالكوم  ونخلية AUTO  نعمل Read info
  7. نحدد الوضع وضع edl mode  راح يقرا المعلومات ويرسل اللودر بهذا الاسم  Pro.Msm8909 unknown
  8.  راح يتصل الان نكون قادرين لعمل اي شيء للجهاز
  9. لحفظ النظام تذهب ال خانة  Read format flash  نسوي Read partition
  10. بعدها رح يطلع لك النظام كامل تحدد الاقسام التي تريدها


قراءة الفلاشة ANS UL40


  • نسوي تحديد للكل وايضا ليكون لديك ملف  Rawprogram .xml
  • نحدد xml make  And Auto program
  • ونحفظ الفلاشة كاملة وانصح من دون userdate  لان حجمها 5جيجا 
  • انتظر حتى الانتهاء ومبروك عليك النظام واللودر 


روم ANS UL40 مسحوبة منقولة و تجاوز حساب جوجل

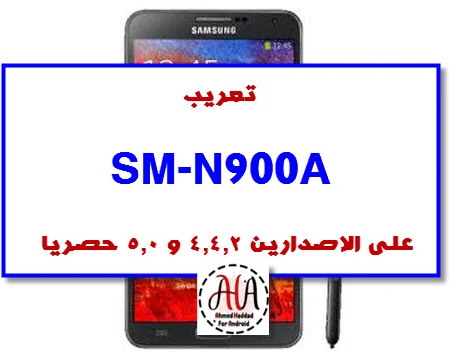
تعريب SM-N900A على الاصدار 4.4.2 و 5.0


روم عربي n900a للاصدارين لولي بوب وكيتكات


روم عربي n900a للاصدارين لولي بوب وكيتكات

شرح تعريب N900A على الاصدار 5.0 دون فتح البوت لودر

الفكرة هي بتفليش الجهاز بروم مروته ثم تعريبه عبر EFT

1- يجب تفليش الهاتف بهذه الفلاشة  N900AUCUCNC2 اصدار 4.4.2 من هنا


2- تحميل التطبيقات التاليه وتثبيتها علي الهاتف  من هنا

PASS= AHMED_HADDAD

3-  فتح تطبيق tr_v2  ثم الضغط علي make it rain  ثم فتح تطبيق Superuser  ثم  contune  ثم normal ثم thank.

4-افتح تطبيق BusyBox واعطيه صلاحيات الروت
ثم install وانتظر قليلا حتى يكتمل 
5-افتح تطبيق Safestrap_KK واعطيه صلاحيات الروت واضغط علي install twrp recovery وانتظر قليلا الى ان يكتمل تثبيت الريكفري

6- قم بتحميل الروم المروته من هنا


7- قم بوضعها فى sd card  وادخلها في الجهاز ثم اضغط على reboot لاعادة التشغيل الى twrp اذا لم يدخل للريكفيري المعدل
عليك اعادة الخطوات السابقه الروم التى تم تفليشها عبر الريكفري المعدل اصدار lollipop ومروته جاهز للتعريب يمكنك تعريب الجهاز على دنقل eft.

ثانيا شرح تعريب N900A  4.4.2

عبارة عن روم يتم تفليشها بالأودين للإصدار 4.4.2 وستجد بها اللغة العربية

تفاصيل التعريب


تعريب SM-N900A على الاصدارين 4.4.2 و 5.0 حصريا 2021

What is the root and what are the benefits and harms

Root is a program that gives the user full powers to control the operating system where it can modify the operating system files or delete in the sense of the most complete control of the phone.
How To Root Samsung Galaxy F41 SM-F415F

Root features:
1-Modify or delete files or applications of the operating system.
2-Run programs that require root permissions.
3-Change the basic fonts within the Android system.
4-Move applications from device memory to external memory.
5-Installation of Custom rom.
6-Fix errors DRK and DM-Verity.

Cons of the root:
1-Loss of phone warranty.
2-Some applications do not work due to root (bluestacks root / dr fone root).
3-Stand on the company logo as a result of misuse.
4-The operating system crashed due to deletion or modification of important system files.


important warning:
  • Installation and use of the root android is entirely at your own risk and we do not take any responsibility for device failure.
  • In older versions of the Android system such as Jelly Bean and KitKat was using apps (kingroot / kingo root / framaroot / iroot root king / towelroot) To get root permissions either in new versions such as Lollipop, Marshmallow, Nougat, Pie and future versions of the Android system, these applications do not work.


What is the difference between SuperSU and Magisk

 VS 

The main difference between Magisk and SuperSU is how the root works on Android. Based on what the user wants to do.
We will first talk about supersu root how to get the root where it installs itself within the system files It changes the system files and adds new files to the system partition on the phone, but with the enhancement of Google to protect Android it has become difficult to do so that the amendment to the partition of the Android system to send an alert to applications that are trying to detect the presence of root.
Google SafetyNet monitors the operating system from any manipulation, and when it detects any manipulation in the Android operating system, most applications will not work and will not send you OTA updates.
What about Magisk is one of the most important features that does not touch system files, but modifies the boot partition instead so that it can trick safetyNet service and show that everything is normal and allows Magisk Manager to fully control the root settings.


Notes before root process

  • Charge the battery well before use.
  • Use the original USB cable that came with the device.
  • Use the laptop at work to avoid electricity problems.
  • You should focus well to protect the binary of your device.
  • The following protections must be disabled (FRP - OEM - RMM/KG) Follow the following article to learn How to Disbled FRP and OEM for device Samsung Galaxy.


Device information

-Brand Name: Samsung Galaxy
-Device Name: Galaxy F41
-Model: SM-E625F root
-Operating system: Android Q or R


Files required for root work

How To Root Galaxy F415F android Q 10 / How To Root Galaxy F415F android R 11

1-Download Drivers and flash Tool.
2-Install the drivers on your device.
3-Download Root File, The baseband version must match the version of the root file.
4-Open the EFTSU Flash Tool.
5-From the top, click on Select File and then choose the root file.
6-Boot your device into download mode prees Volume Down + Volume Up and connect the USB cable.
7-Press Flash to start.
8-After booting the device install EFTSU Manager app.
9-Then, from the EFTSU Flash tool, we click on Reboot ADB Device to Root Mode (Recovery mode).
10-When the boot is complete, Open the EFTSU Manager app to get the root.
11-You can check for root access through the root checker app.
12-In case you encounter any problems please feel free to contact us
13-If you want to unroot or revert to the offical firmware, you can flash new firmware.

How To Root Samsung Galaxy F41 SM-F415F

What is the root and what are the benefits and harms

Root is a program that gives the user full powers to control the operating system where it can modify the operating system files or delete in the sense of the most complete control of the phone.
How To Root Samsung Galaxy F12 SM-F127G

Root features:
1-Modify or delete files or applications of the operating system.
2-Run programs that require root permissions.
3-Change the basic fonts within the Android system.
4-Move applications from device memory to external memory.
5-Installation of Custom rom.
6-Fix errors DRK and DM-Verity.

Cons of the root:
1-Loss of phone warranty.
2-Some applications do not work due to root (bluestacks root / dr fone root).
3-Stand on the company logo as a result of misuse.
4-The operating system crashed due to deletion or modification of important system files.


important warning:
  • Installation and use of the root android is entirely at your own risk and we do not take any responsibility for device failure.
  • In older versions of the Android system such as Jelly Bean and KitKat was using apps (kingroot / kingo root / framaroot / iroot root king / towelroot) To get root permissions either in new versions such as Lollipop, Marshmallow, Nougat, Pie and future versions of the Android system, these applications do not work.


What is the difference between SuperSU and Magisk

 VS 

The main difference between Magisk and SuperSU is how the root works on Android. Based on what the user wants to do.
We will first talk about supersu root how to get the root where it installs itself within the system files It changes the system files and adds new files to the system partition on the phone, but with the enhancement of Google to protect Android it has become difficult to do so that the amendment to the partition of the Android system to send an alert to applications that are trying to detect the presence of root.
Google SafetyNet monitors the operating system from any manipulation, and when it detects any manipulation in the Android operating system, most applications will not work and will not send you OTA updates.
What about Magisk is one of the most important features that does not touch system files, but modifies the boot partition instead so that it can trick safetyNet service and show that everything is normal and allows Magisk Manager to fully control the root settings.


Notes before root process

  • Charge the battery well before use.
  • Use the original USB cable that came with the device.
  • Use the laptop at work to avoid electricity problems.
  • You should focus well to protect the binary of your device.
  • The following protections must be disabled (FRP - OEM - RMM/KG) Follow the following article to learn How to Disbled FRP and OEM for device Samsung Galaxy.


Device information

-Brand Name: Samsung Galaxy
-Device Name: Galaxy F12
-Model: SM-F127G root
-Operating system: Android R


Files required for root work

How To Root Galaxy F127G android R 11

1-Download Drivers and flash Tool.
2-Install the drivers on your device.
3-Download Root File, The baseband version must match the version of the root file.
4-Open the EFTSU Flash Tool.
5-From the top, click on Select File and then choose the root file.
6-Boot your device into download mode prees Volume Down + Volume Up and connect the USB cable.
7-Press Flash to start.
8-After booting the device install EFTSU Manager app.
9-Then, from the EFTSU Flash tool, we click on Reboot ADB Device to Root Mode (Recovery mode).
10-When the boot is complete, Open the EFTSU Manager app to get the root.
11-You can check for root access through the root checker app.
12-In case you encounter any problems please feel free to contact us
13-If you want to unroot or revert to the offical firmware, you can flash new firmware.

How To Root Samsung Galaxy F12 SM-F127G

What is the root and what are the benefits and harms

Root is a program that gives the user full powers to control the operating system where it can modify the operating system files or delete in the sense of the most complete control of the phone.
How To Root Samsung Galaxy M62 SM-M625F

Root features:
1-Modify or delete files or applications of the operating system.
2-Run programs that require root permissions.
3-Change the basic fonts within the Android system.
4-Move applications from device memory to external memory.
5-Installation of Custom rom.
6-Fix errors DRK and DM-Verity.

Cons of the root:
1-Loss of phone warranty.
2-Some applications do not work due to root (bluestacks root / dr fone root).
3-Stand on the company logo as a result of misuse.
4-The operating system crashed due to deletion or modification of important system files.


important warning:
  • Installation and use of the root android is entirely at your own risk and we do not take any responsibility for device failure.
  • In older versions of the Android system such as Jelly Bean and KitKat was using apps (kingroot / kingo root / framaroot / iroot root king / towelroot) To get root permissions either in new versions such as Lollipop, Marshmallow, Nougat, Pie and future versions of the Android system, these applications do not work.


What is the difference between SuperSU and Magisk

 VS 

The main difference between Magisk and SuperSU is how the root works on Android. Based on what the user wants to do.
We will first talk about supersu root how to get the root where it installs itself within the system files It changes the system files and adds new files to the system partition on the phone, but with the enhancement of Google to protect Android it has become difficult to do so that the amendment to the partition of the Android system to send an alert to applications that are trying to detect the presence of root.
Google SafetyNet monitors the operating system from any manipulation, and when it detects any manipulation in the Android operating system, most applications will not work and will not send you OTA updates.
What about Magisk is one of the most important features that does not touch system files, but modifies the boot partition instead so that it can trick safetyNet service and show that everything is normal and allows Magisk Manager to fully control the root settings.


Notes before root process

  • Charge the battery well before use.
  • Use the original USB cable that came with the device.
  • Use the laptop at work to avoid electricity problems.
  • You should focus well to protect the binary of your device.
  • The following protections must be disabled (FRP - OEM - RMM/KG) Follow the following article to learn How to Disbled FRP and OEM for device Samsung Galaxy.


Device information

-Brand Name: Samsung Galaxy
-Device Name: Galaxy M62
-Model: SM-M625F root
-Operating system: Android R


Files required for root work

How To Root Galaxy M625F android R 11

1-Download Drivers and flash Tool.
2-Install the drivers on your device.
3-Download Root File, The baseband version must match the version of the root file.
4-Open the EFTSU Flash Tool.
5-From the top, click on Select File and then choose the root file.
6-Boot your device into download mode prees Volume Down + Volume Up and connect the USB cable.
7-Press Flash to start.
8-After booting the device install EFTSU Manager app.
9-Then, from the EFTSU Flash tool, we click on Reboot ADB Device to Root Mode (Recovery mode).
10-When the boot is complete, Open the EFTSU Manager app to get the root.
11-You can check for root access through the root checker app.
12-In case you encounter any problems please feel free to contact us
13-If you want to unroot or revert to the offical firmware, you can flash new firmware.

How To Root Samsung Galaxy M62 SM-M625F

What is the root and what are the benefits and harms

Root is a program that gives the user full powers to control the operating system where it can modify the operating system files or delete in the sense of the most complete control of the phone.
How To Root Samsung Galaxy F62 SM-E625F

Root features:
1-Modify or delete files or applications of the operating system.
2-Run programs that require root permissions.
3-Change the basic fonts within the Android system.
4-Move applications from device memory to external memory.
5-Installation of Custom rom.
6-Fix errors DRK and DM-Verity.

Cons of the root:
1-Loss of phone warranty.
2-Some applications do not work due to root (bluestacks root / dr fone root).
3-Stand on the company logo as a result of misuse.
4-The operating system crashed due to deletion or modification of important system files.


important warning:
  • Installation and use of the root android is entirely at your own risk and we do not take any responsibility for device failure.
  • In older versions of the Android system such as Jelly Bean and KitKat was using apps (kingroot / kingo root / framaroot / iroot root king / towelroot) To get root permissions either in new versions such as Lollipop, Marshmallow, Nougat, Pie and future versions of the Android system, these applications do not work.


What is the difference between SuperSU and Magisk

 VS 

The main difference between Magisk and SuperSU is how the root works on Android. Based on what the user wants to do.
We will first talk about supersu root how to get the root where it installs itself within the system files It changes the system files and adds new files to the system partition on the phone, but with the enhancement of Google to protect Android it has become difficult to do so that the amendment to the partition of the Android system to send an alert to applications that are trying to detect the presence of root.
Google SafetyNet monitors the operating system from any manipulation, and when it detects any manipulation in the Android operating system, most applications will not work and will not send you OTA updates.
What about Magisk is one of the most important features that does not touch system files, but modifies the boot partition instead so that it can trick safetyNet service and show that everything is normal and allows Magisk Manager to fully control the root settings.


Notes before root process

  • Charge the battery well before use.
  • Use the original USB cable that came with the device.
  • Use the laptop at work to avoid electricity problems.
  • You should focus well to protect the binary of your device.
  • The following protections must be disabled (FRP - OEM - RMM/KG) Follow the following article to learn How to Disbled FRP and OEM for device Samsung Galaxy.


Device information

-Brand Name: Samsung Galaxy
-Device Name: Galaxy F62
-Model: SM-E625F root
-Operating system: Android R


Files required for root work

How To Root Galaxy E625F android R 11

1-Download Drivers and flash Tool.
2-Install the drivers on your device.
3-Download Root File, The baseband version must match the version of the root file.
4-Open the EFTSU Flash Tool.
5-From the top, click on Select File and then choose the root file.
6-Boot your device into download mode prees Volume Down + Volume Up and connect the USB cable.
7-Press Flash to start.
8-After booting the device install EFTSU Manager app.
9-Then, from the EFTSU Flash tool, we click on Reboot ADB Device to Root Mode (Recovery mode).
10-When the boot is complete, Open the EFTSU Manager app to get the root.
11-You can check for root access through the root checker app.
12-In case you encounter any problems please feel free to contact us
13-If you want to unroot or revert to the offical firmware, you can flash new firmware.

How To Root Samsung Galaxy F62 SM-E625F

تحميل و تنزيل تحديث واتساب ميكس آخر إصدار ضد الحظر WhatsApp Mix برابط مباشر.


♧السلام عليكم ورحمة الله وبركاته♧
أصدقائي متابعي قناة و مدونة ألمبرمج ألمحترف
أتمنى أن تكونوا جميعا بخير ان شاء الله أقدم لكم اليوم. 

تحديث جديد واتساب ميكس - Mix WhatsApp
 آخر أصدار ضد الحظر. مع اضافات ومميزات جديدة.

تحميل واتساب ميكس Mix WhatsApp


ما هو واتس اب ميكس WHATSAPP MIX؟


هو نسخة واتساب معدلة من تطبيق الدردشات الشهير الواتساب الرسمي، مبني على آخر إصدار من الواتساب الأصلي الأخضر، وايضا واتس اب ضد الحظر. ويوجد به العديد من الميزات الرائعة.

ميزات واتس ميكس whatsapp mix:


  1. نسخة أمنة ومضادة للحظر.
  2. إمكانية إخفاء آخر ظهور.
  3. خيارات خصوصية جديدة.
  4. يدعم المكالمات
  5. يدعم تعدد الدردشات
  6. المزيد من الثيمات لتخصيص التطبيق واتس Mix.
  7. إمكانية إخفاء أحدث المشاهدات والحالة عبر الإنترنت واخفاء الدردشات والمزيد.
  8. إمكانية تنزيل حالات اصدقائك وقصص المستخدمين الآخرين.
  9. يحوي ميكس واتس متجر ثيمات، لتنزيل ثيمات جديدة.
  10. متوفر في التطبيق نمط ثلاثي الأبعاد 3D يجذب العديد من المستخدمين.
  11. إمكانية إيقاف الإنترنت عن الواتساب ميكس.
  12. إمكانية وضع قفل للواتس اب مكس.
  13. خيار لتعديل نمط شكل فقاعات الدردشة.
  14. امكانية تغير شكل الفيسات الايموجي والرموز التعبيرية.
  15. أرسل مقاطع فيديو أكبر من WhatsApp الأصلية.
  16. أرسل حتى 90 صورة في نفس الوقت بدلا من 10.
  17. اكتب حالات تصل إلى 250 حرفًا بدلاً من 139 حرفًا.
  18. إمكانية النقر على روابط حالة جهات الاتصال الخاصة بك.
  19. يمكنك أخذ نسخة احتياطية من البيانات واتس مكس واستعادتها من جهاز إلى جهاز آخر.
  20. إخفاء اسمك والوقت الذي تقوم فيه بنسخ وإعادة توجيه الرسائل التي يزيد طولها عن سطر واحد.
  21. إمكانية نسخ حالات أصدقائك.
  22. تغيير شكل التطبيق وأيقونات البرنامج والاشعارات.
  23. والعديد من الميزات الاخرى في واتساب MIX.


كيفية تنزيل واتساب ميكس Mix WhatsApp ؟


يمكنكم تنزيل Whatsapp MIX أحدث إصدار من الروابط التحميل المباشرة في اسفل الموضوع, سيتم تنزيله إلى هاتف الأندرويد على شكل ملف (APK). قم بتثبيت تطبيق واتساب ميكس الجديد على جهازك، اتصل هاتفك بالإنترنت، إدخال رقم هاتفك المحمول، الآن إستمتع بجميع المميزات الجديد في ميكس واتساب.

لتسهيل وتسريع تنزيل الواتساب ميكس اليكم أفضل تطبيقات تحميل للأندرويد على الاطلاق والتحميل برابط مباشر من هنا.

روابط التحميل:

تنزيل واتس اب ميكس اخر اصدار ضد الحظر WhatsApp Mix 11.0.0


تحميل واتساب ميكس اخر اصدار ضد الحظر WhatsApp Mix